
English
Types of Signature Fields
This article describes each available type of signature field.
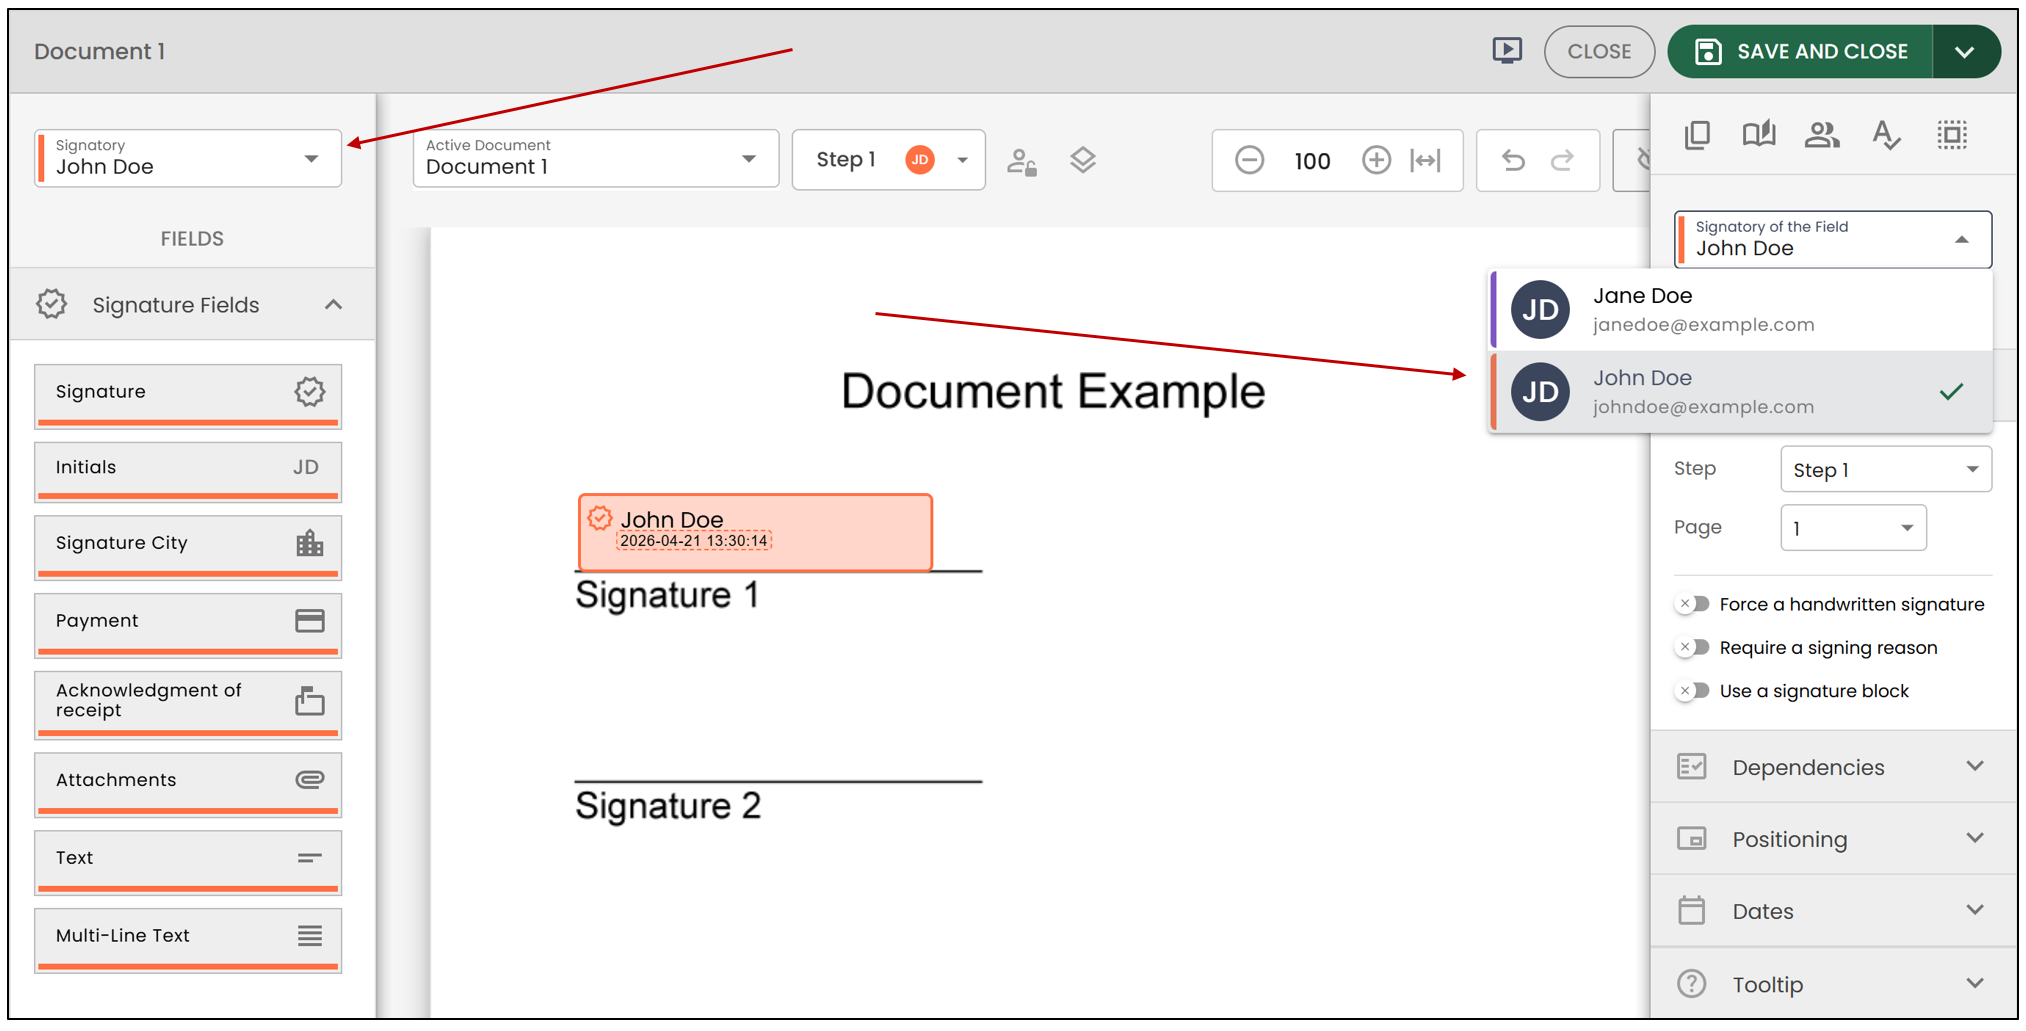
For each type of field, the parameter options will vary, but some parameters are fixed and have been grouped in the first section of this article. When you click on a field, the parameter options for that field appear on the right side of your window.
You will always need to assign the field to a signatory when adding it, but you can modify the signatory of a field at any time.
Tools
You have access to the following tools to speed up the addition of signature fields:
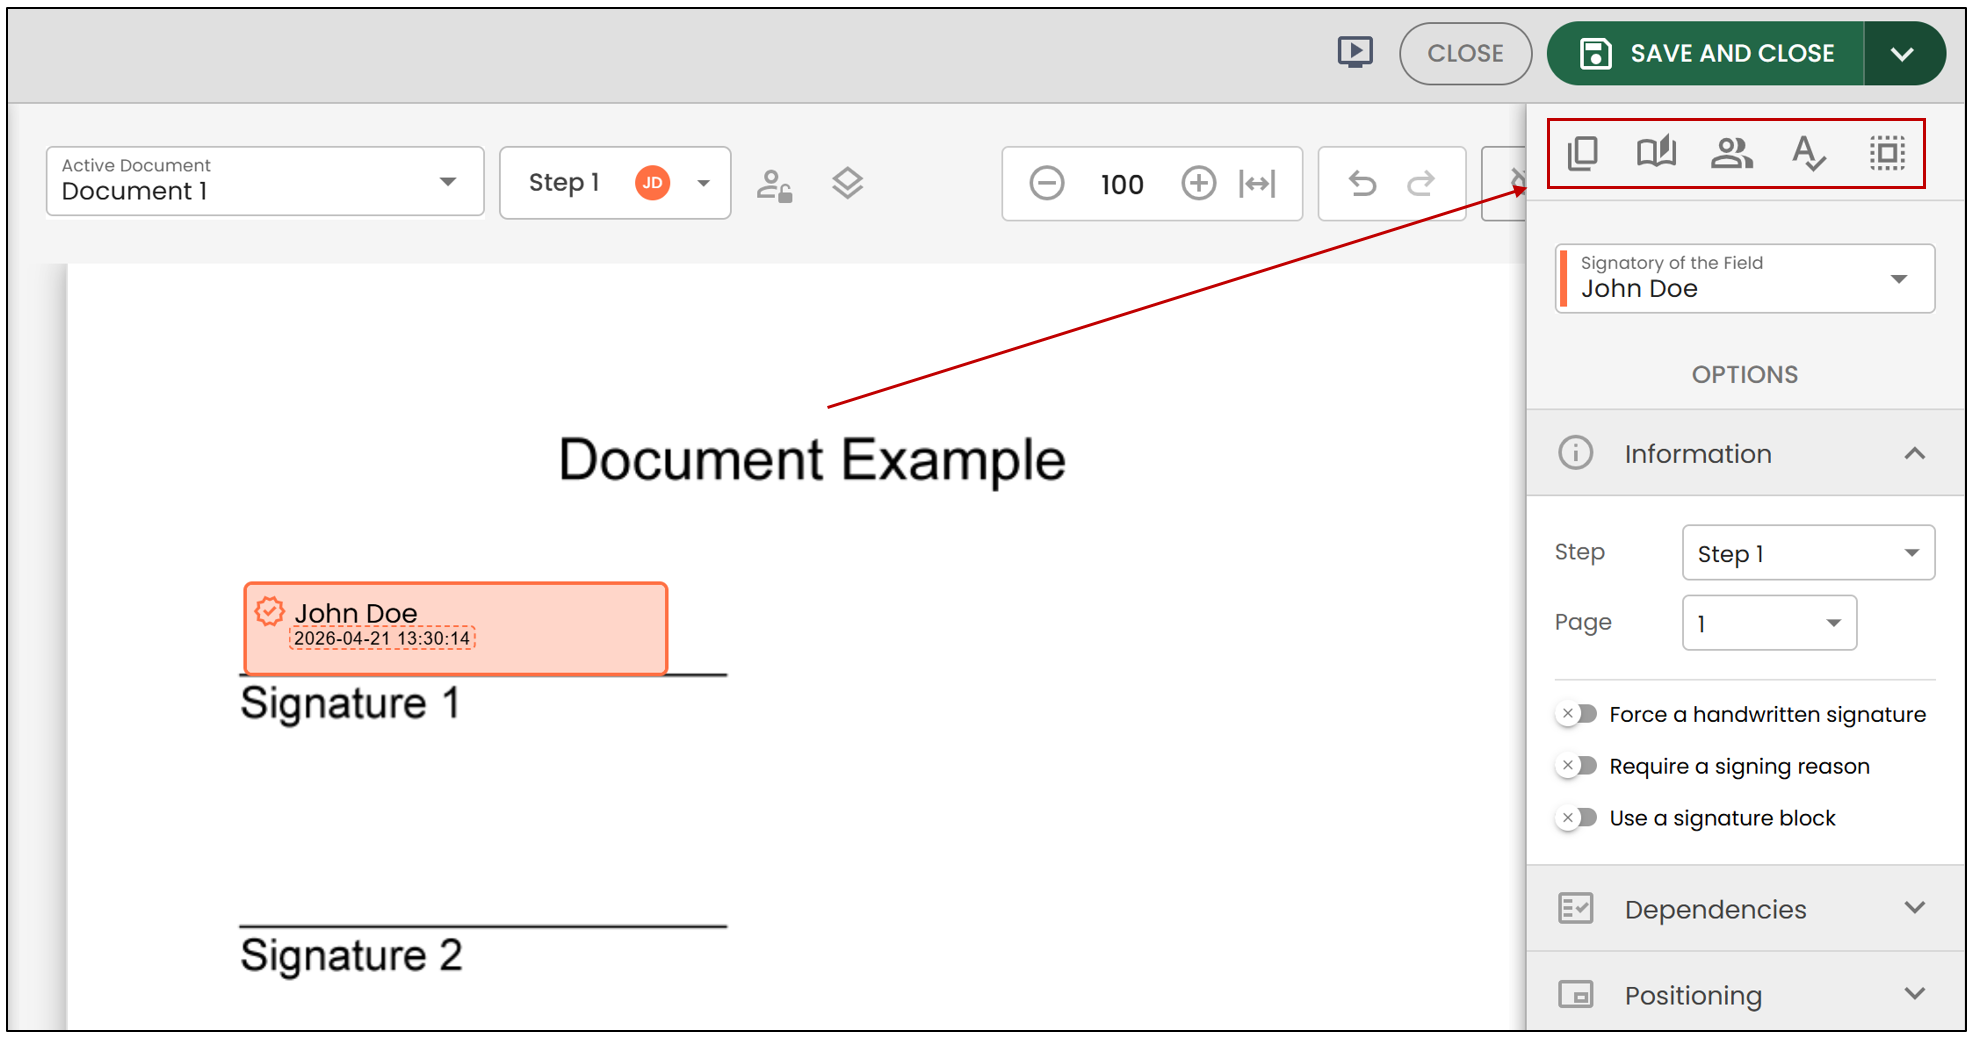
Make a Copy of the Field
- When you select a field in your form, you have the option to click on the

icon. This allows you to copy the selected field while retaining the previously entered options. This will create a copy of the field, but in a different field group, so these fields won’t be linked.
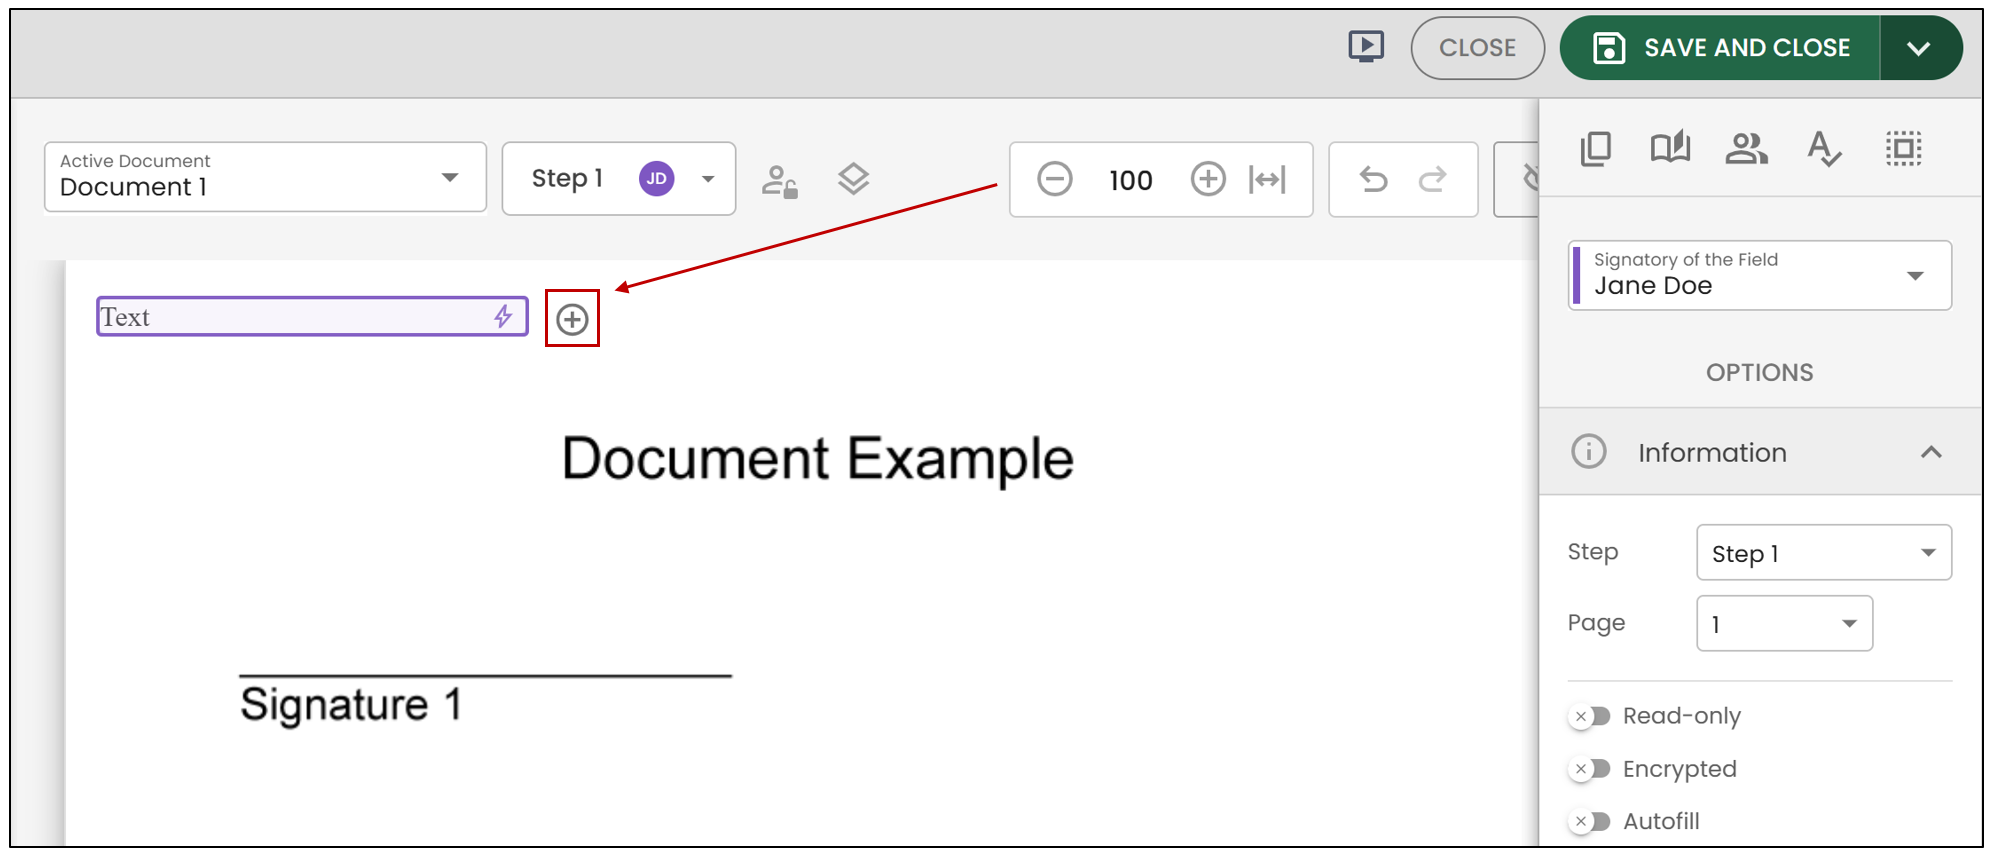
- If you click on the "+" icon located at the top right of the field, you’ll have the option to add a new element within the same field group. These will share the same identification visible under the Field Group Name, but each Field Name will be unique to the individual fields.
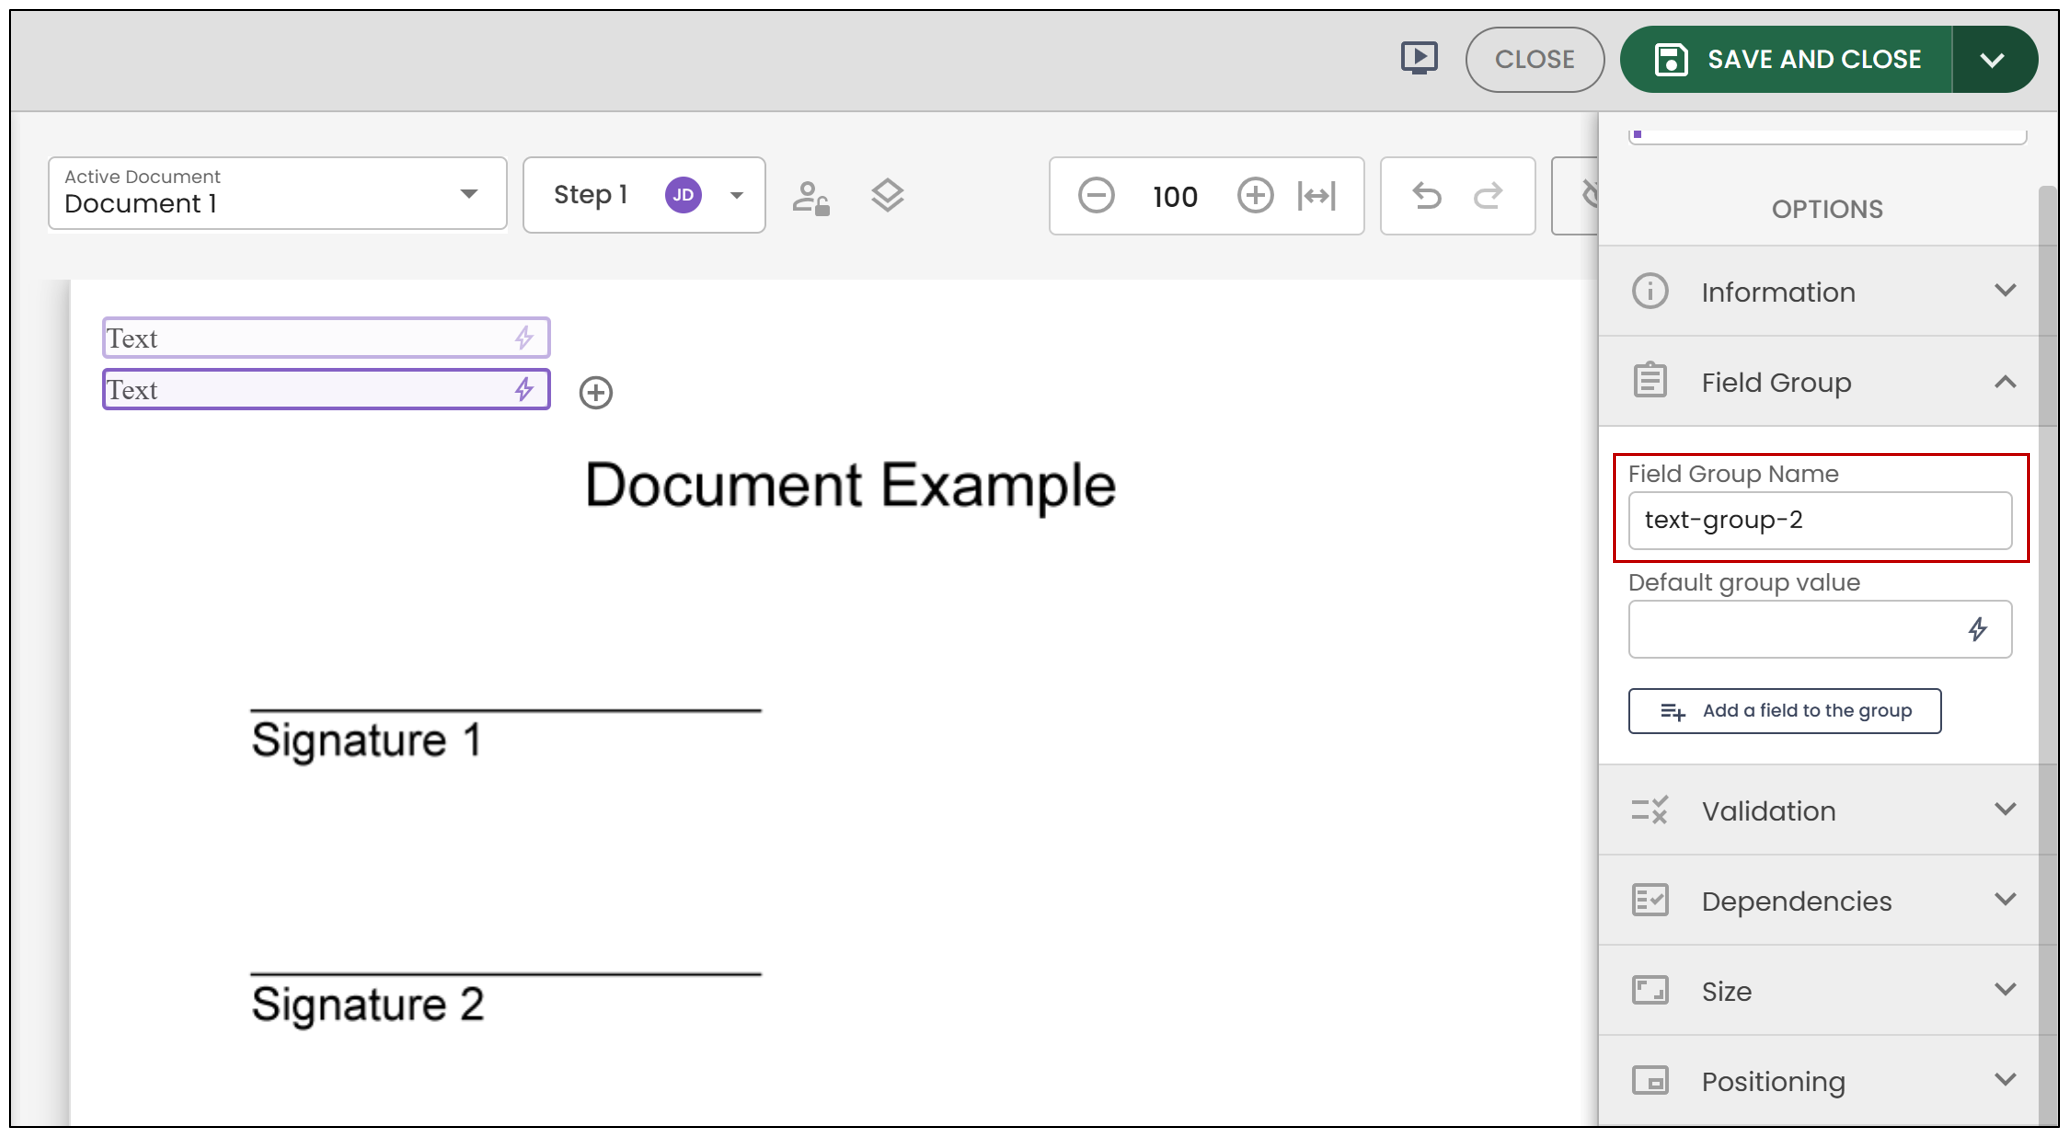
Copy Fields to Other Pages
- To copy a field onto other pages, click on the

icon. Then, enter the page numbers where you want to duplicate the element. This option allows you to copy the field onto the selected pages, maintaining its position and settings.
Copy for Each Signatory
- If you select the

icon, you can copy this same element for each signatory who has access to the document. For example, if the form has eight signatories, you will now have eight copies of this field.
Copy by Keyword
- If you select the

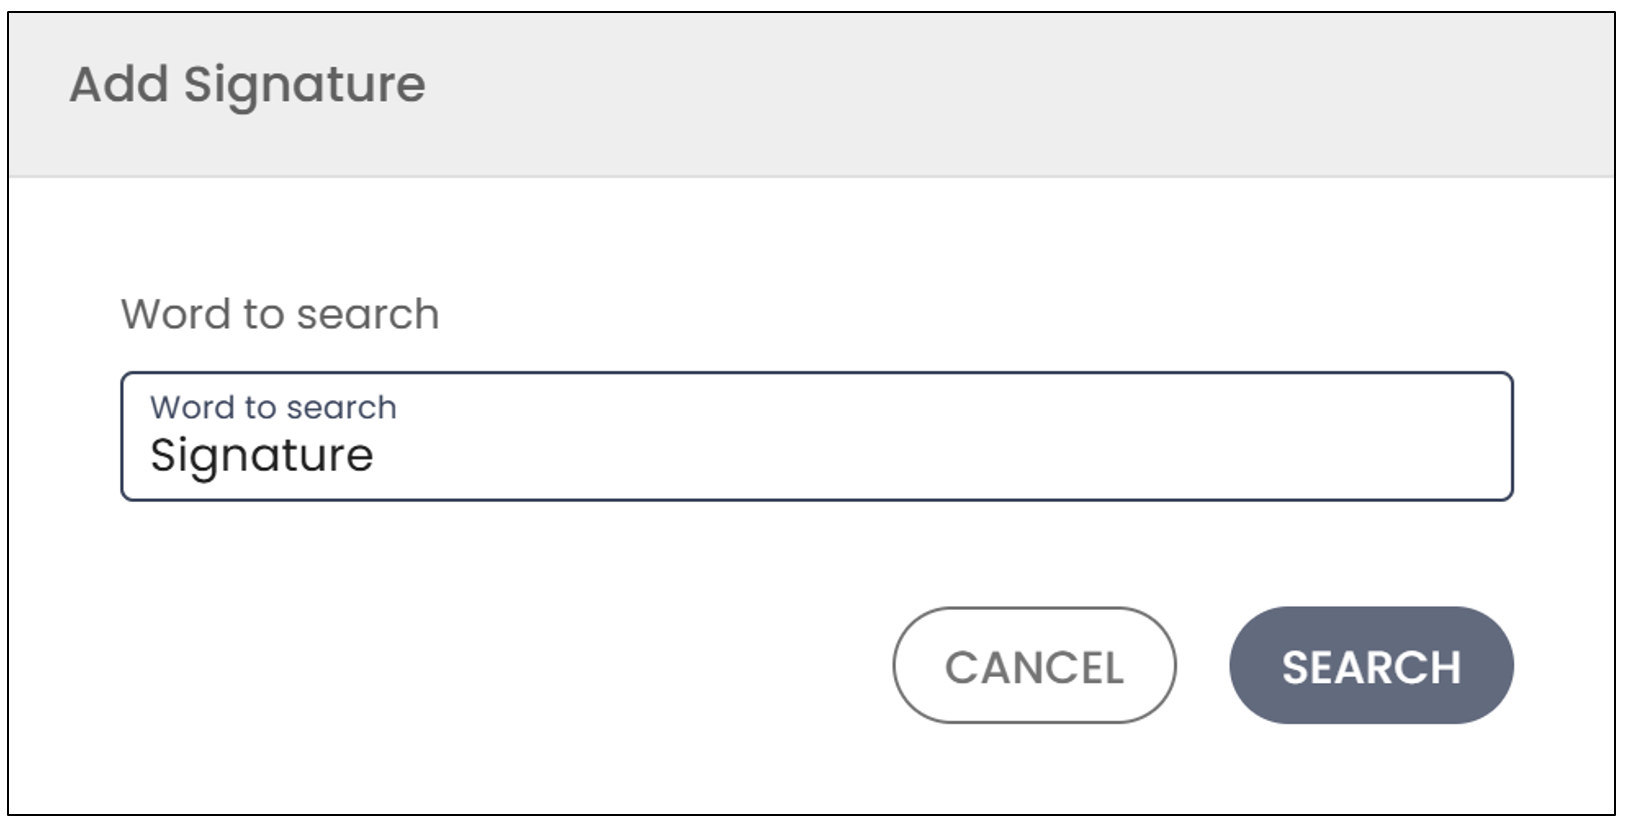
icon, you can search for a keyword of your choice within the document, allowing you to add a field at each location you check.
- Enter the keyword and click on Search.
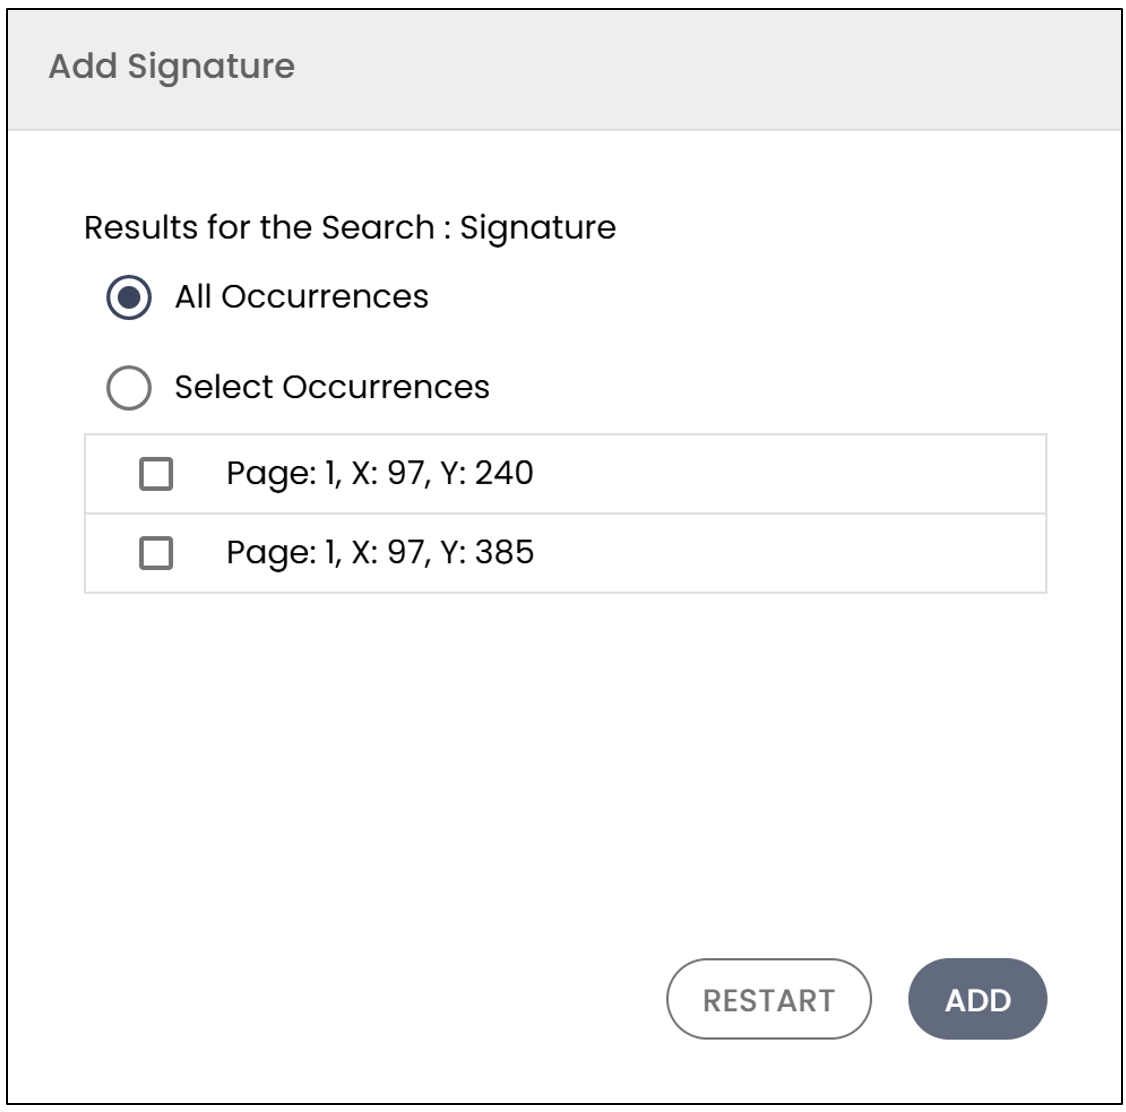
- After clicking on Add , the fields will be added to the document at the locations where occurrences have been selected.
Delete a field
There are several ways to delete a signature field from a document.
- The first option is to select the desired field and simply drag it outside the page. You will see the word ’Delete’ appear, and when you release it, the field will be deleted.
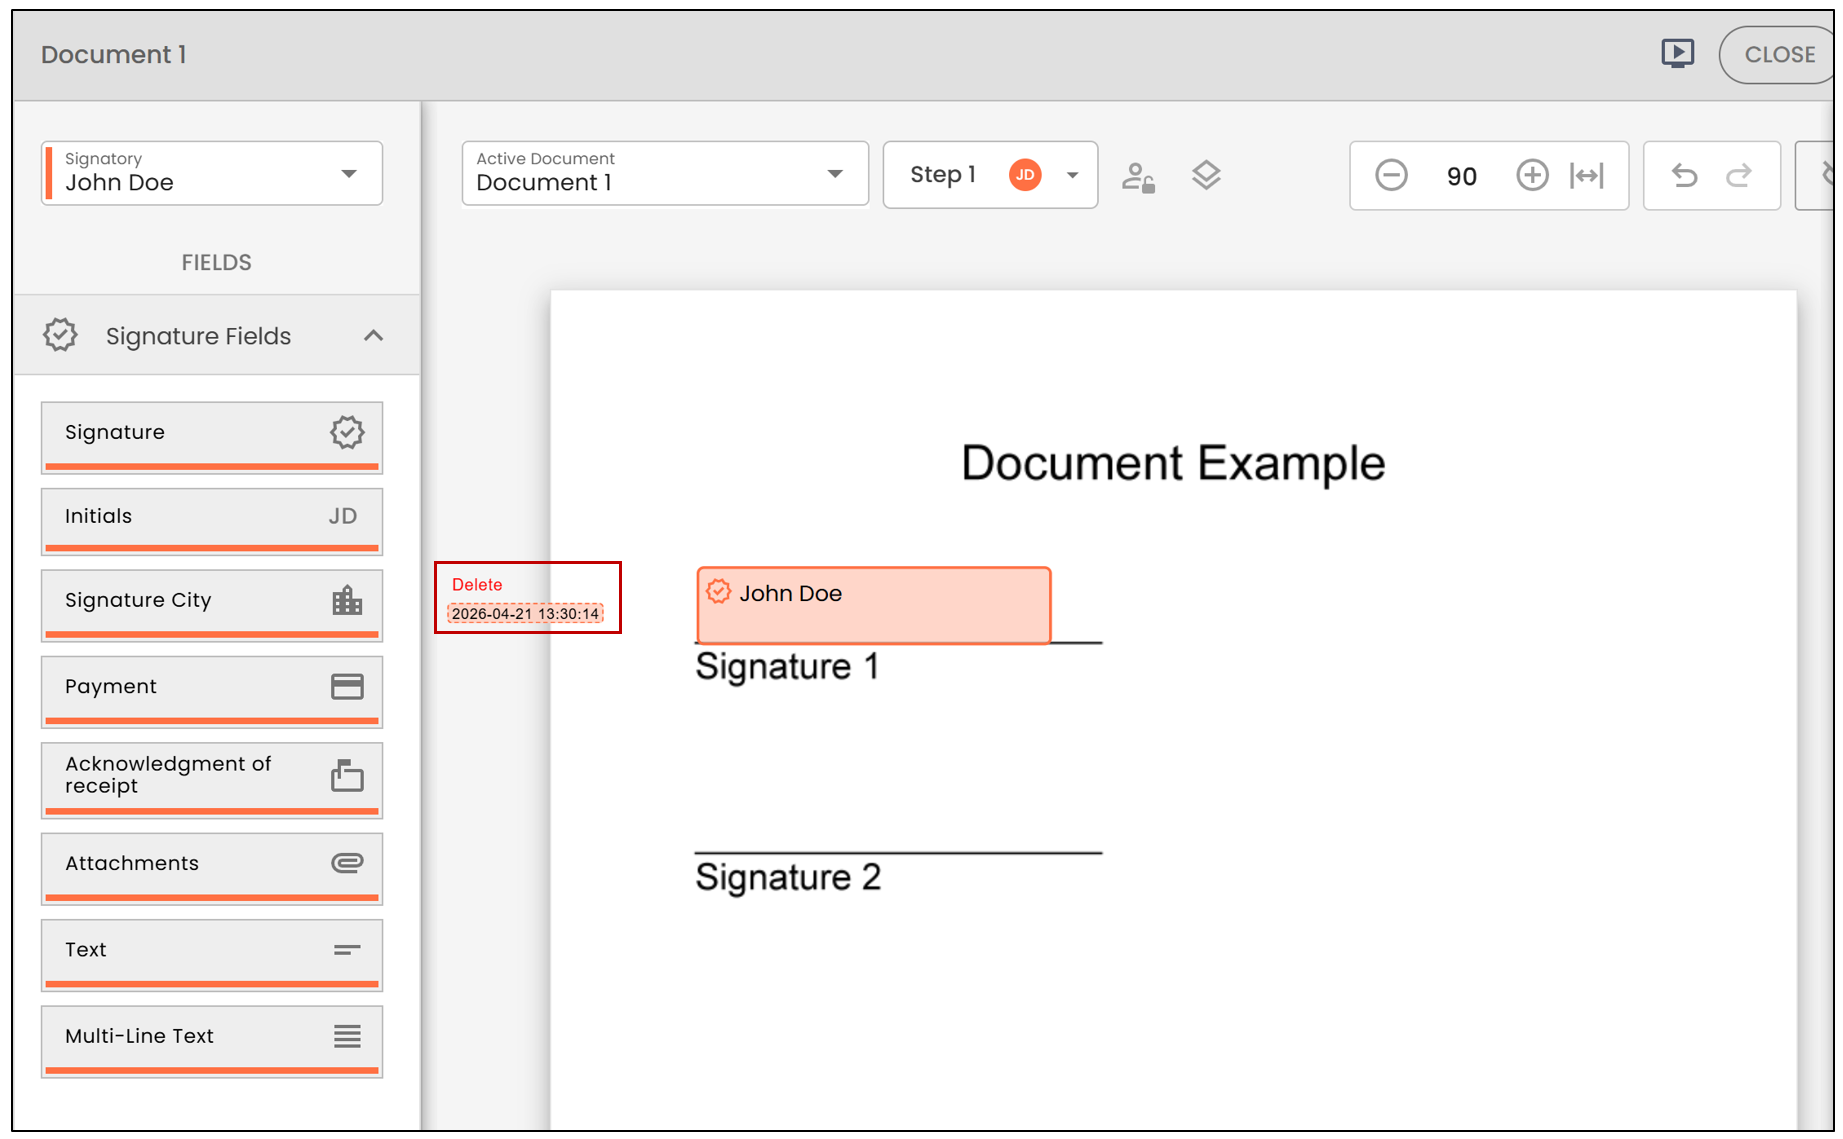
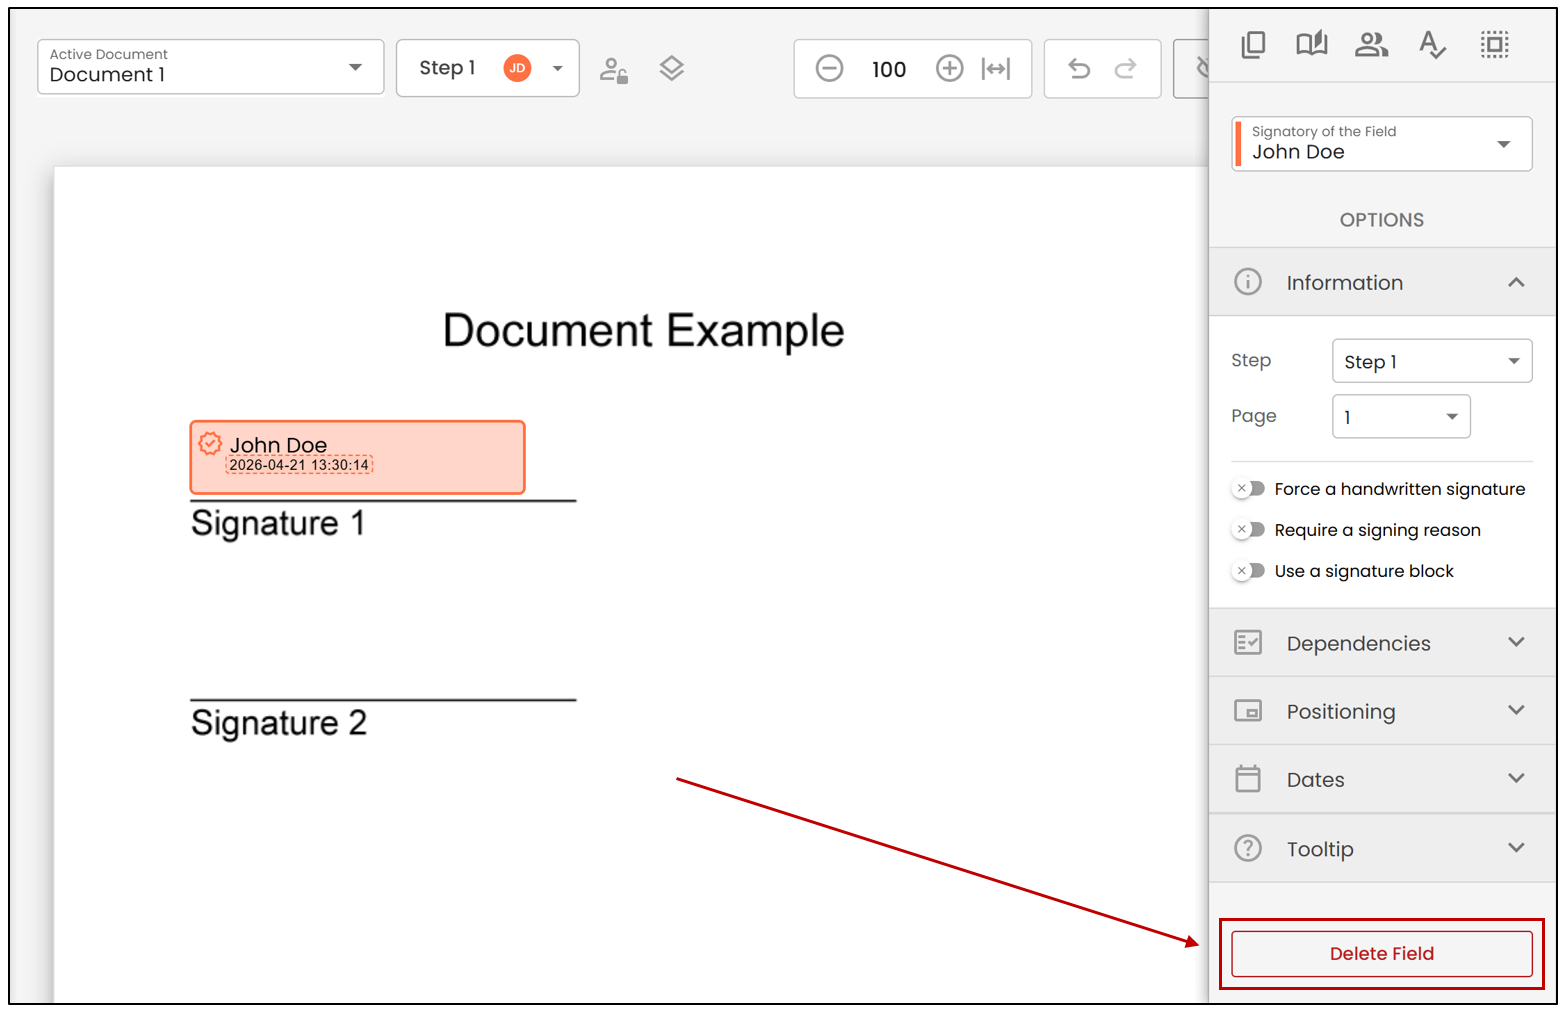
- The second option is to select the desired field, then choose the Delete Field option at the bottom right of the page.
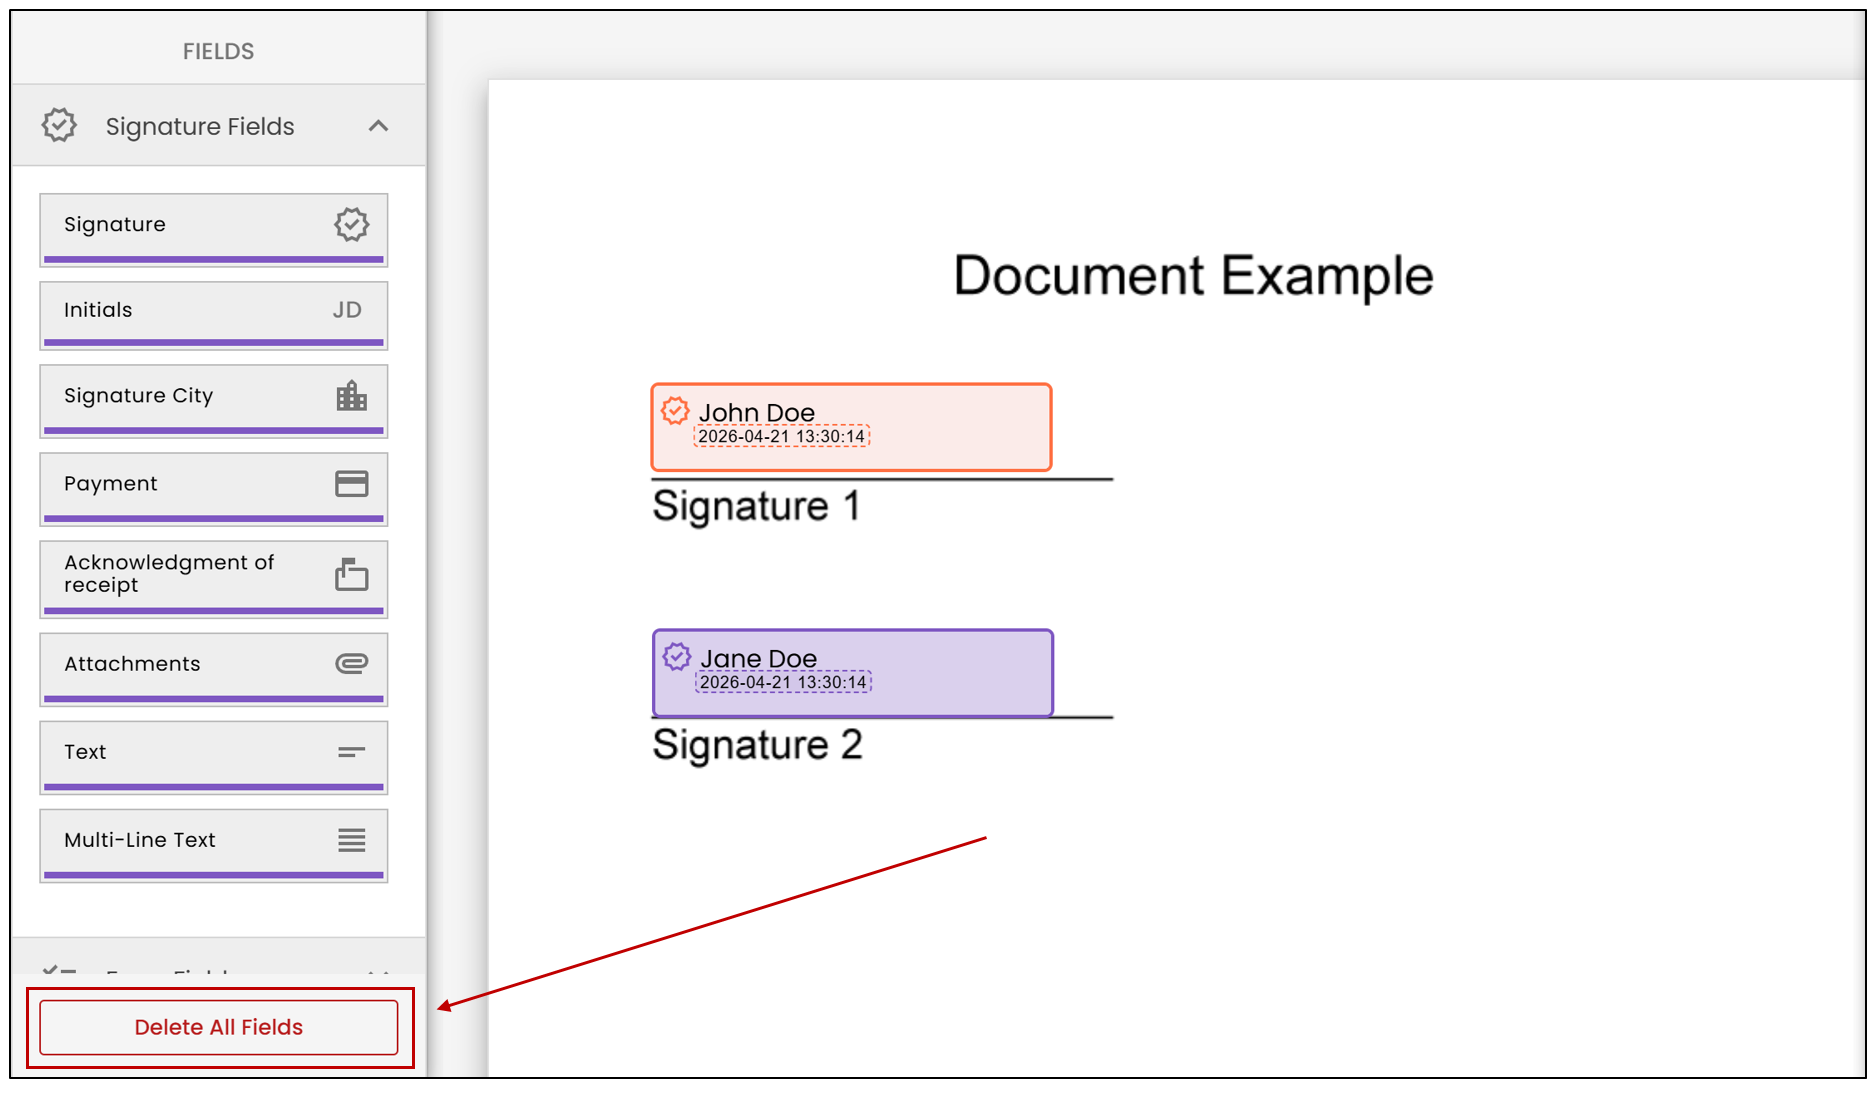
- If you want to delete all fields at once, select the Delete All Fields option at the bottom left of the page.
Signature Fields
Fixed Parameters
- Information
- Step : Indicates the order in which the signature must be applied. For more information, see the article Order in Which Signatories Sign.
- Page : Indicates the page of the document where the field will be added.
- Dependencies : Detailed article coming soon.
- Positioning
- By X and Y : Allows you to move the field left to right or top to bottom by adjusting the "X" or "Y" values.
- By Words : The field will be duplicated on pages where an occurrence of this word appears. Be sure to select the desired pages.
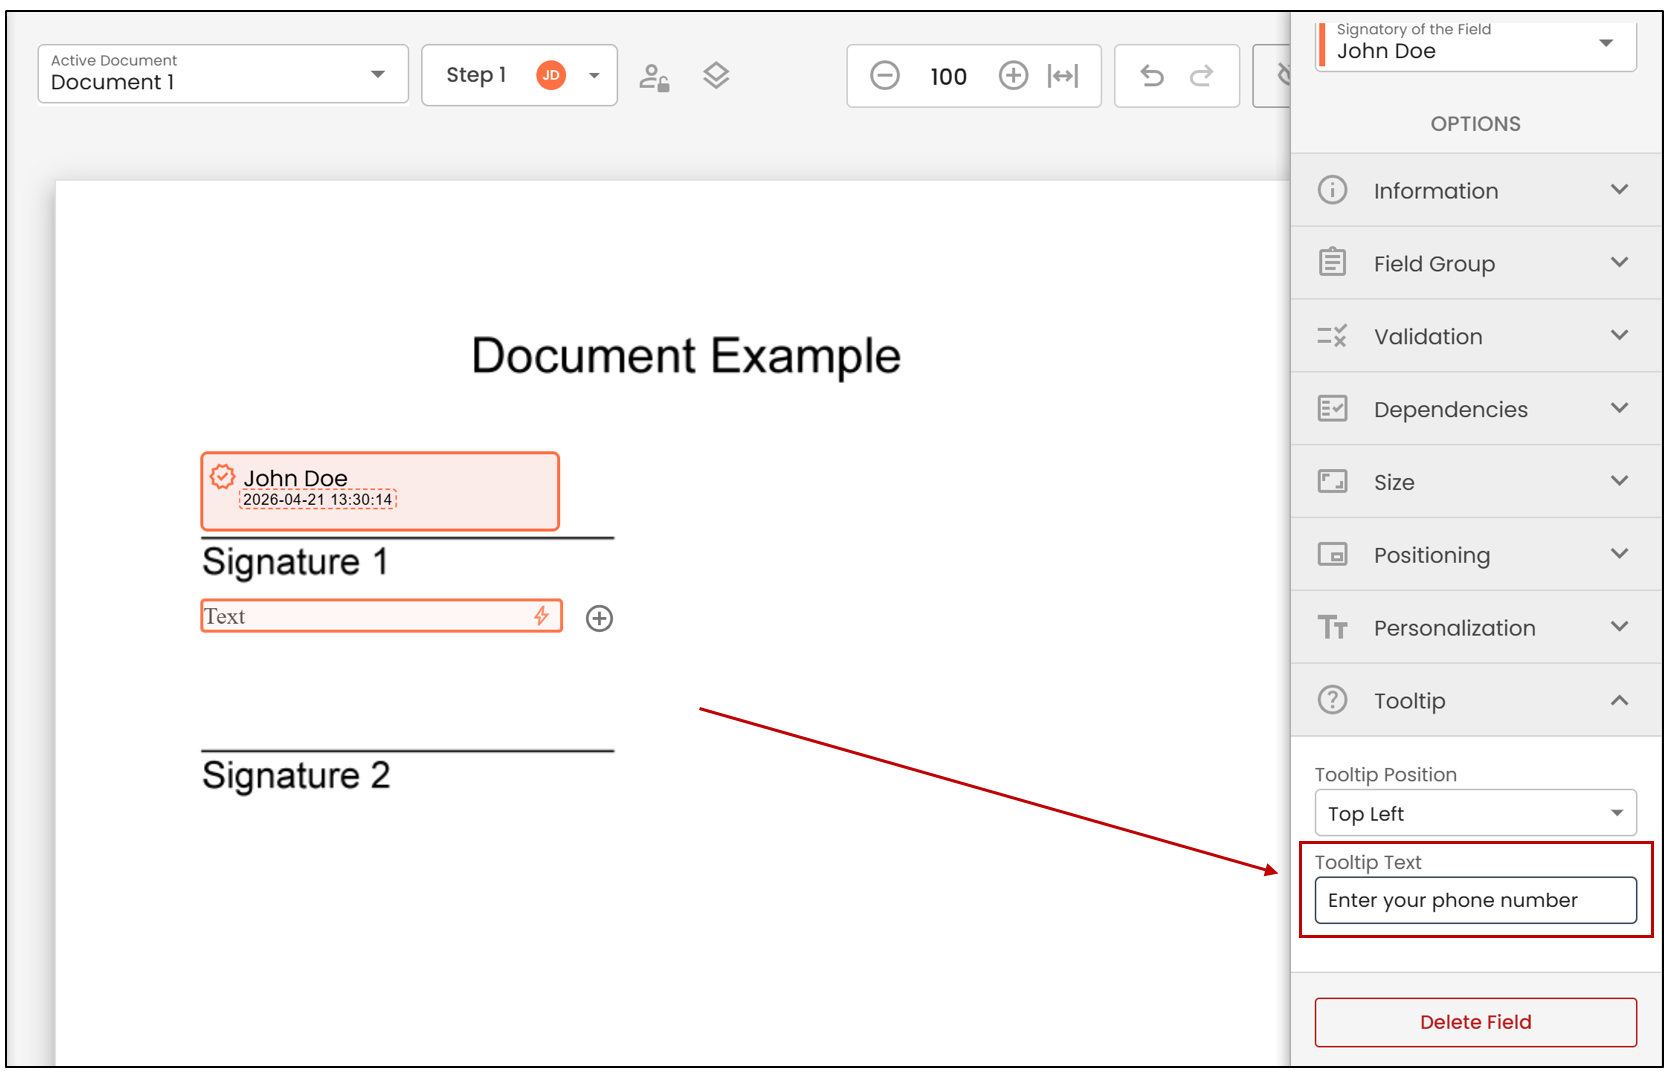
- Tooltip : You can add information that will appear during the electronic signing of the document, such as instructions on how to sign. (See below)
Signature
- This is the default field type. The signatory’s name will appear in either text or handwritten form, depending on the format selected by the user.
Field-Specific Parameters
- Information
You can select the Step at which you want this signature to be applied.
You also have the option to Force a handwritten signature or Require a signing reason.
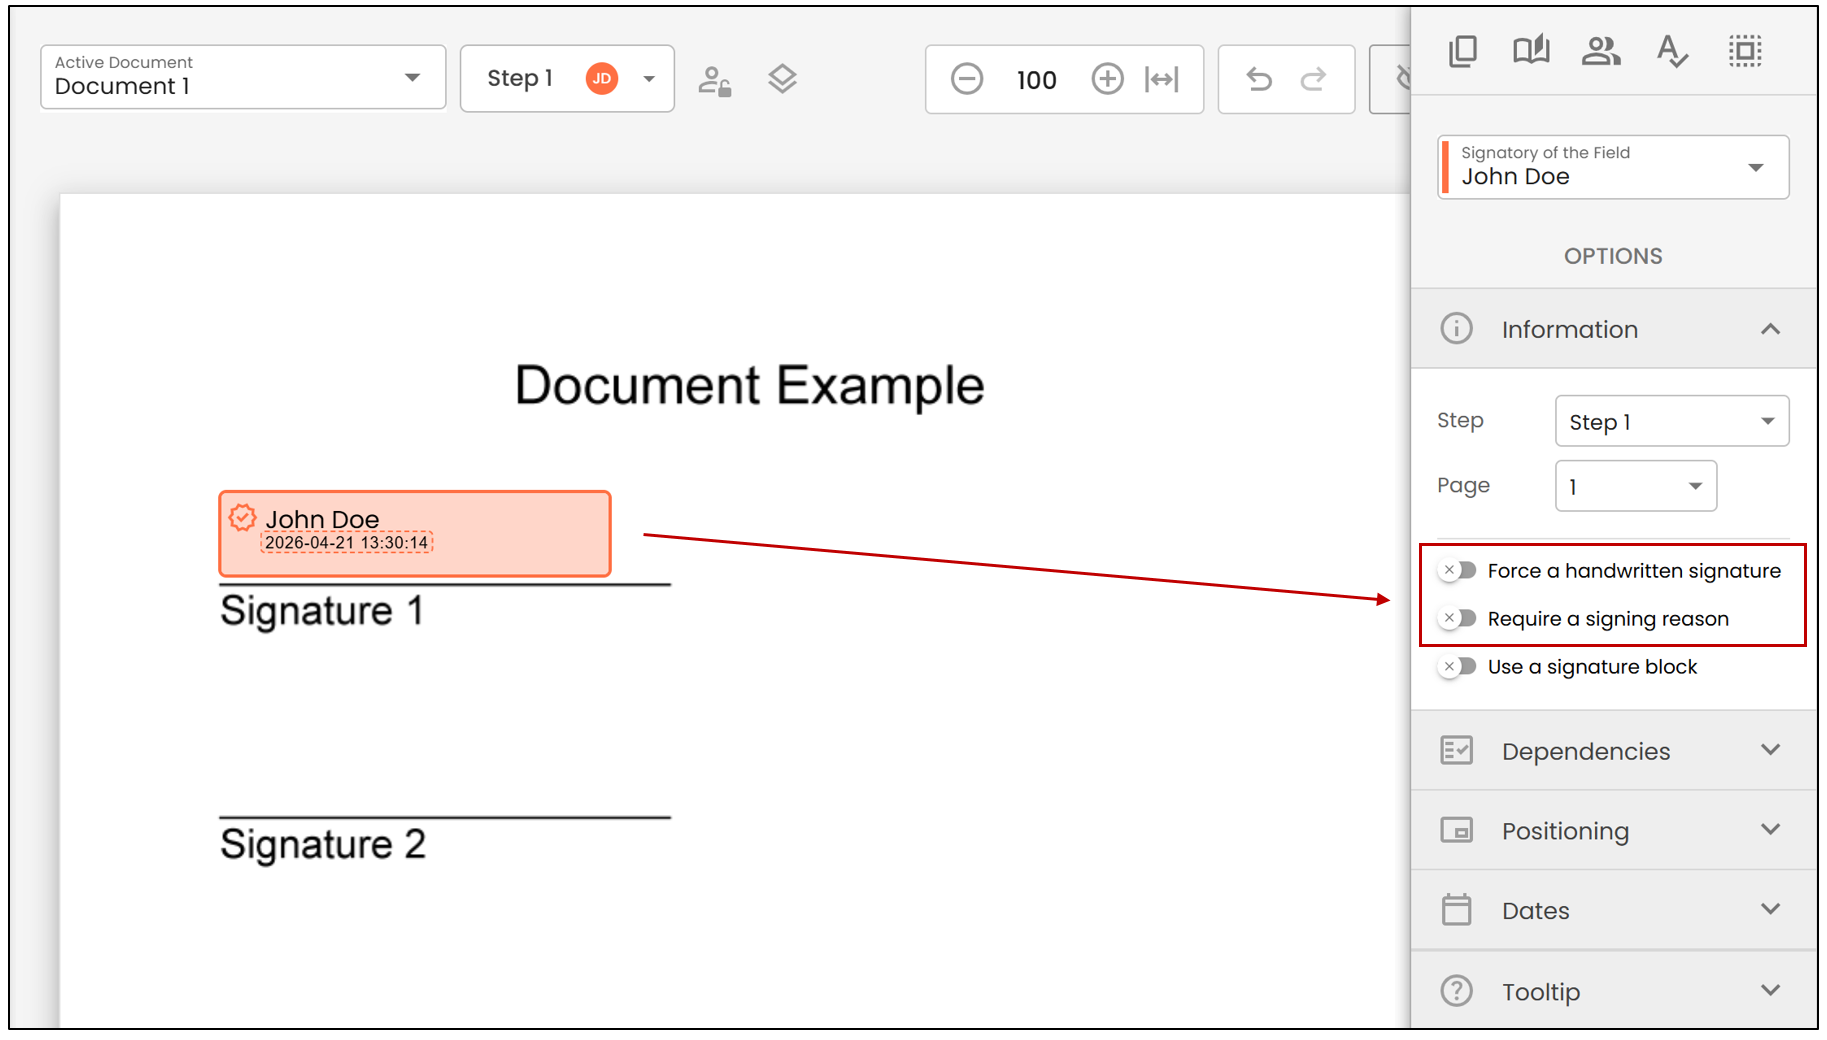
If you do not check either of these two options, the user will have the choice between a formatted signature or a handwritten signature when signing the document. For more information on the personalized signature, please refer to the article Personalized Signature.
Custom Dates
It is now possible to configure how the date associated with signature fields is displayed directly in the Folder Type.
You can now adjust this behavior according to your needs by choosing one of the following options:
- Use the default date : displays the full date and time.
- Do not use a date : the signature field is displayed without a date.
- Use custom dates : choose the format that meets your needs, for example, displaying only the date (YYYY-MM-DD).
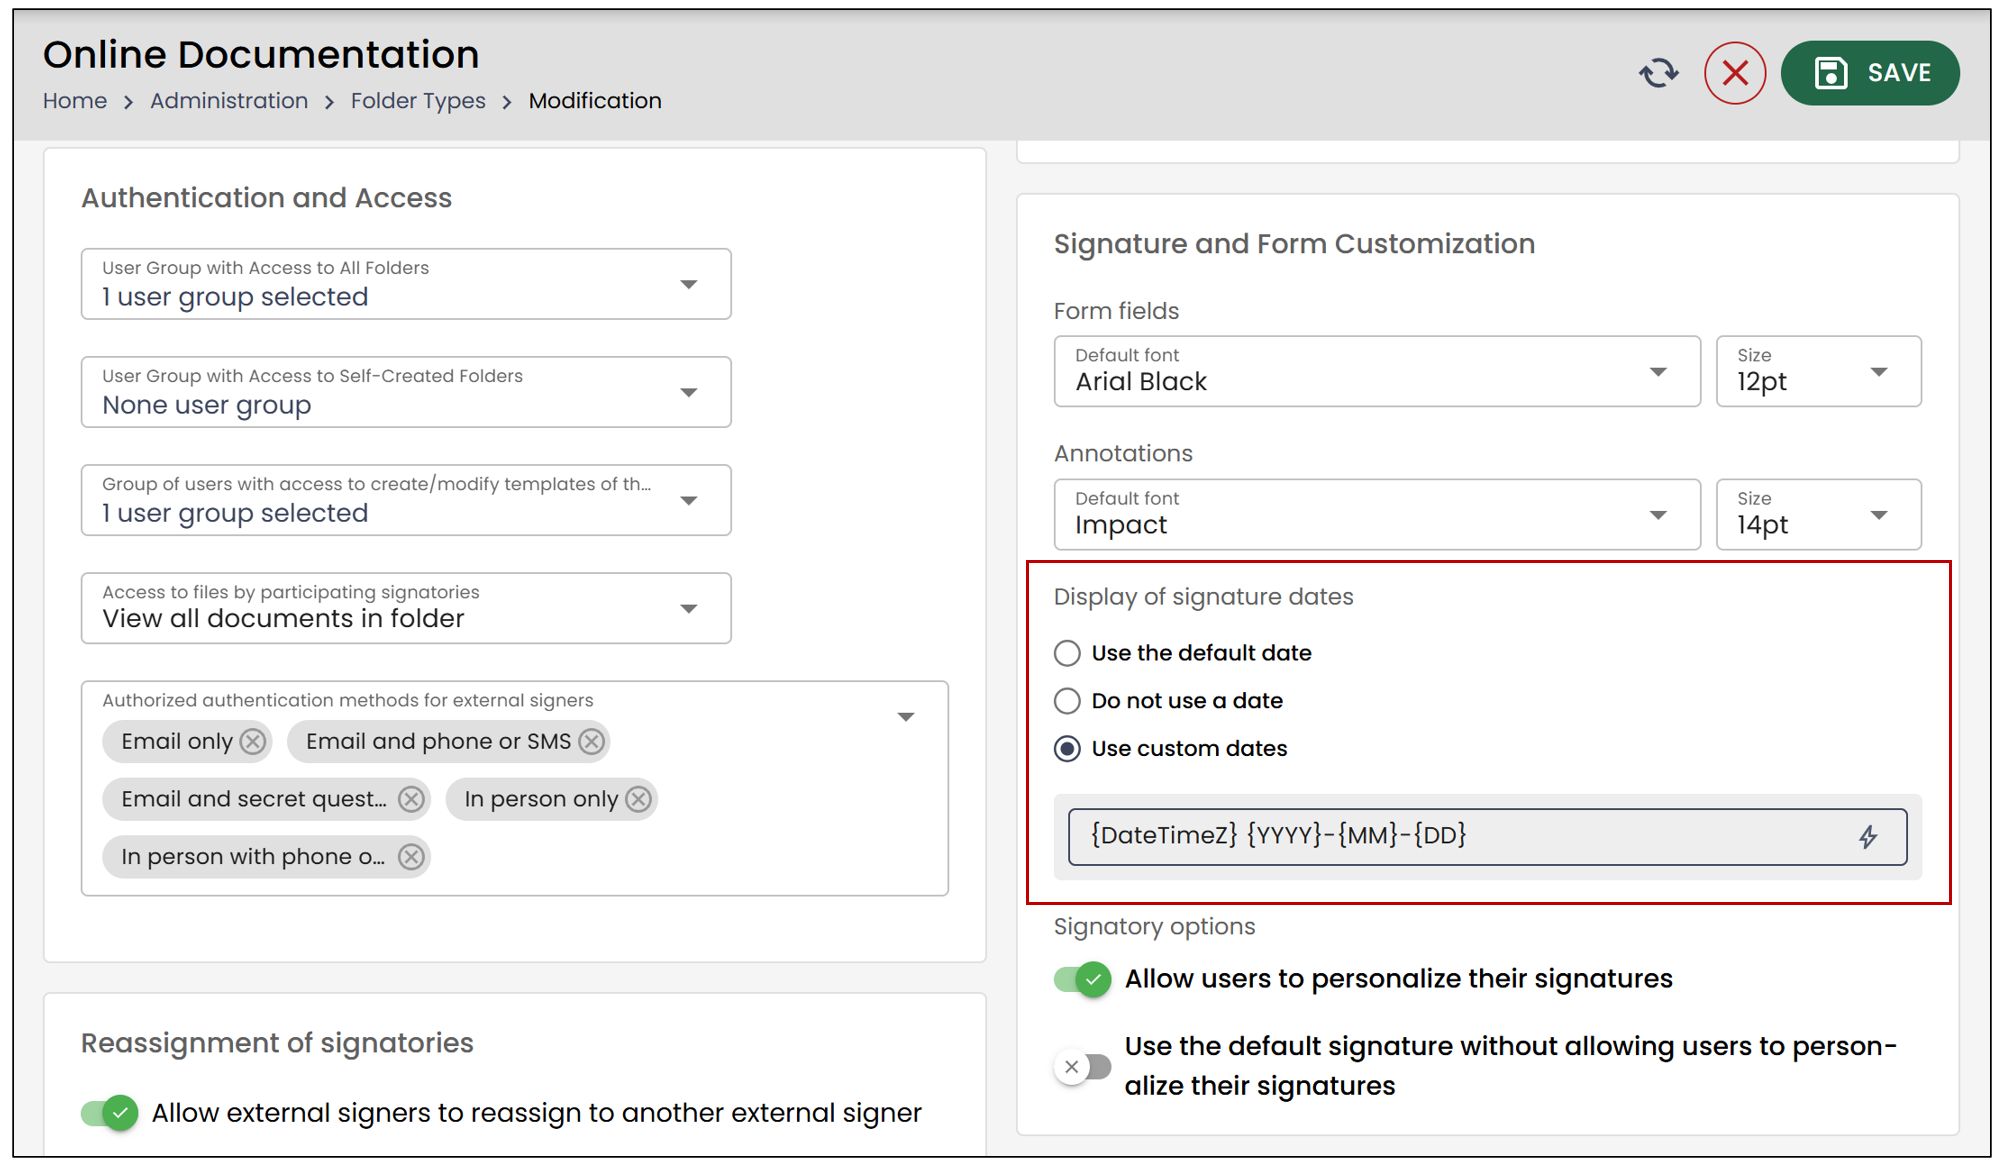
- When adding a signature field, you have the option to customize the date format associated with the signature field by entering it manually below Use a Personalized Date , or by dragging a date field onto the document.
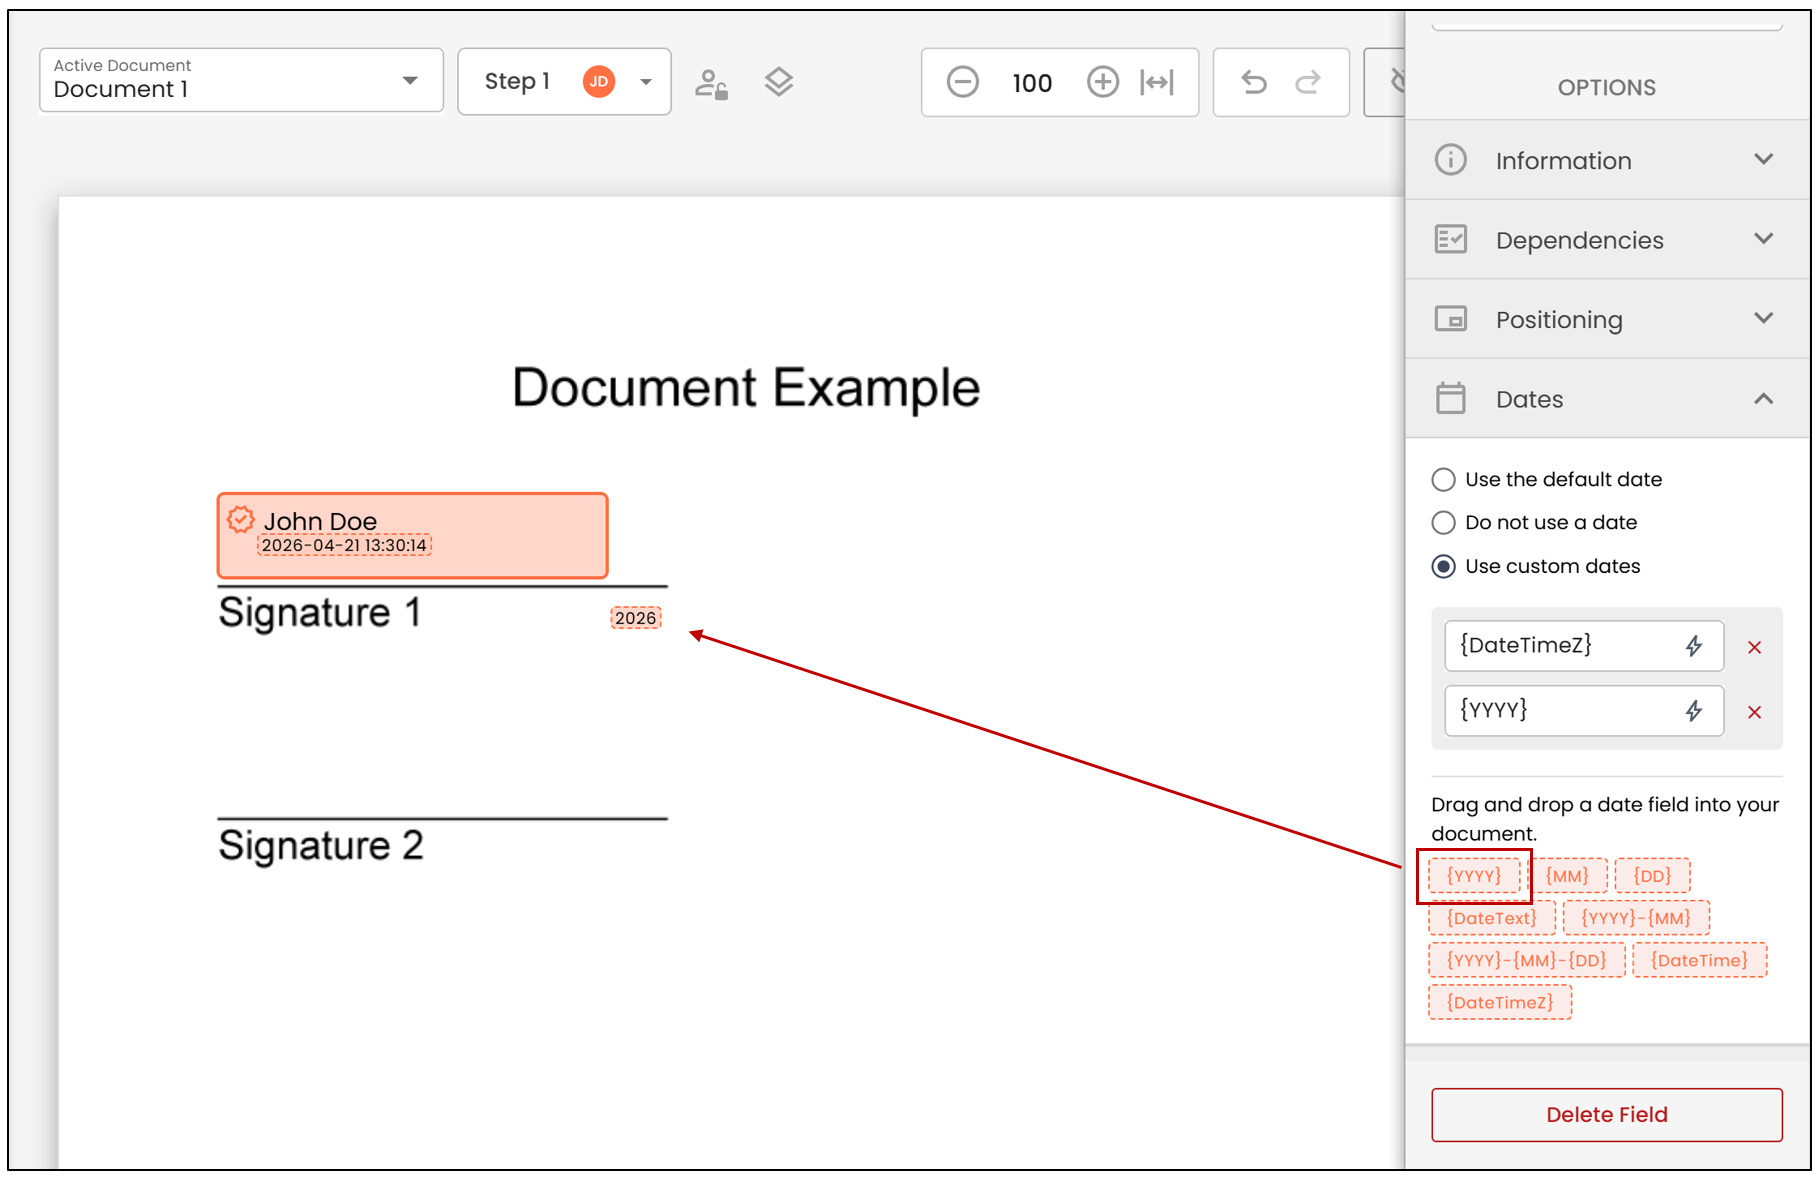
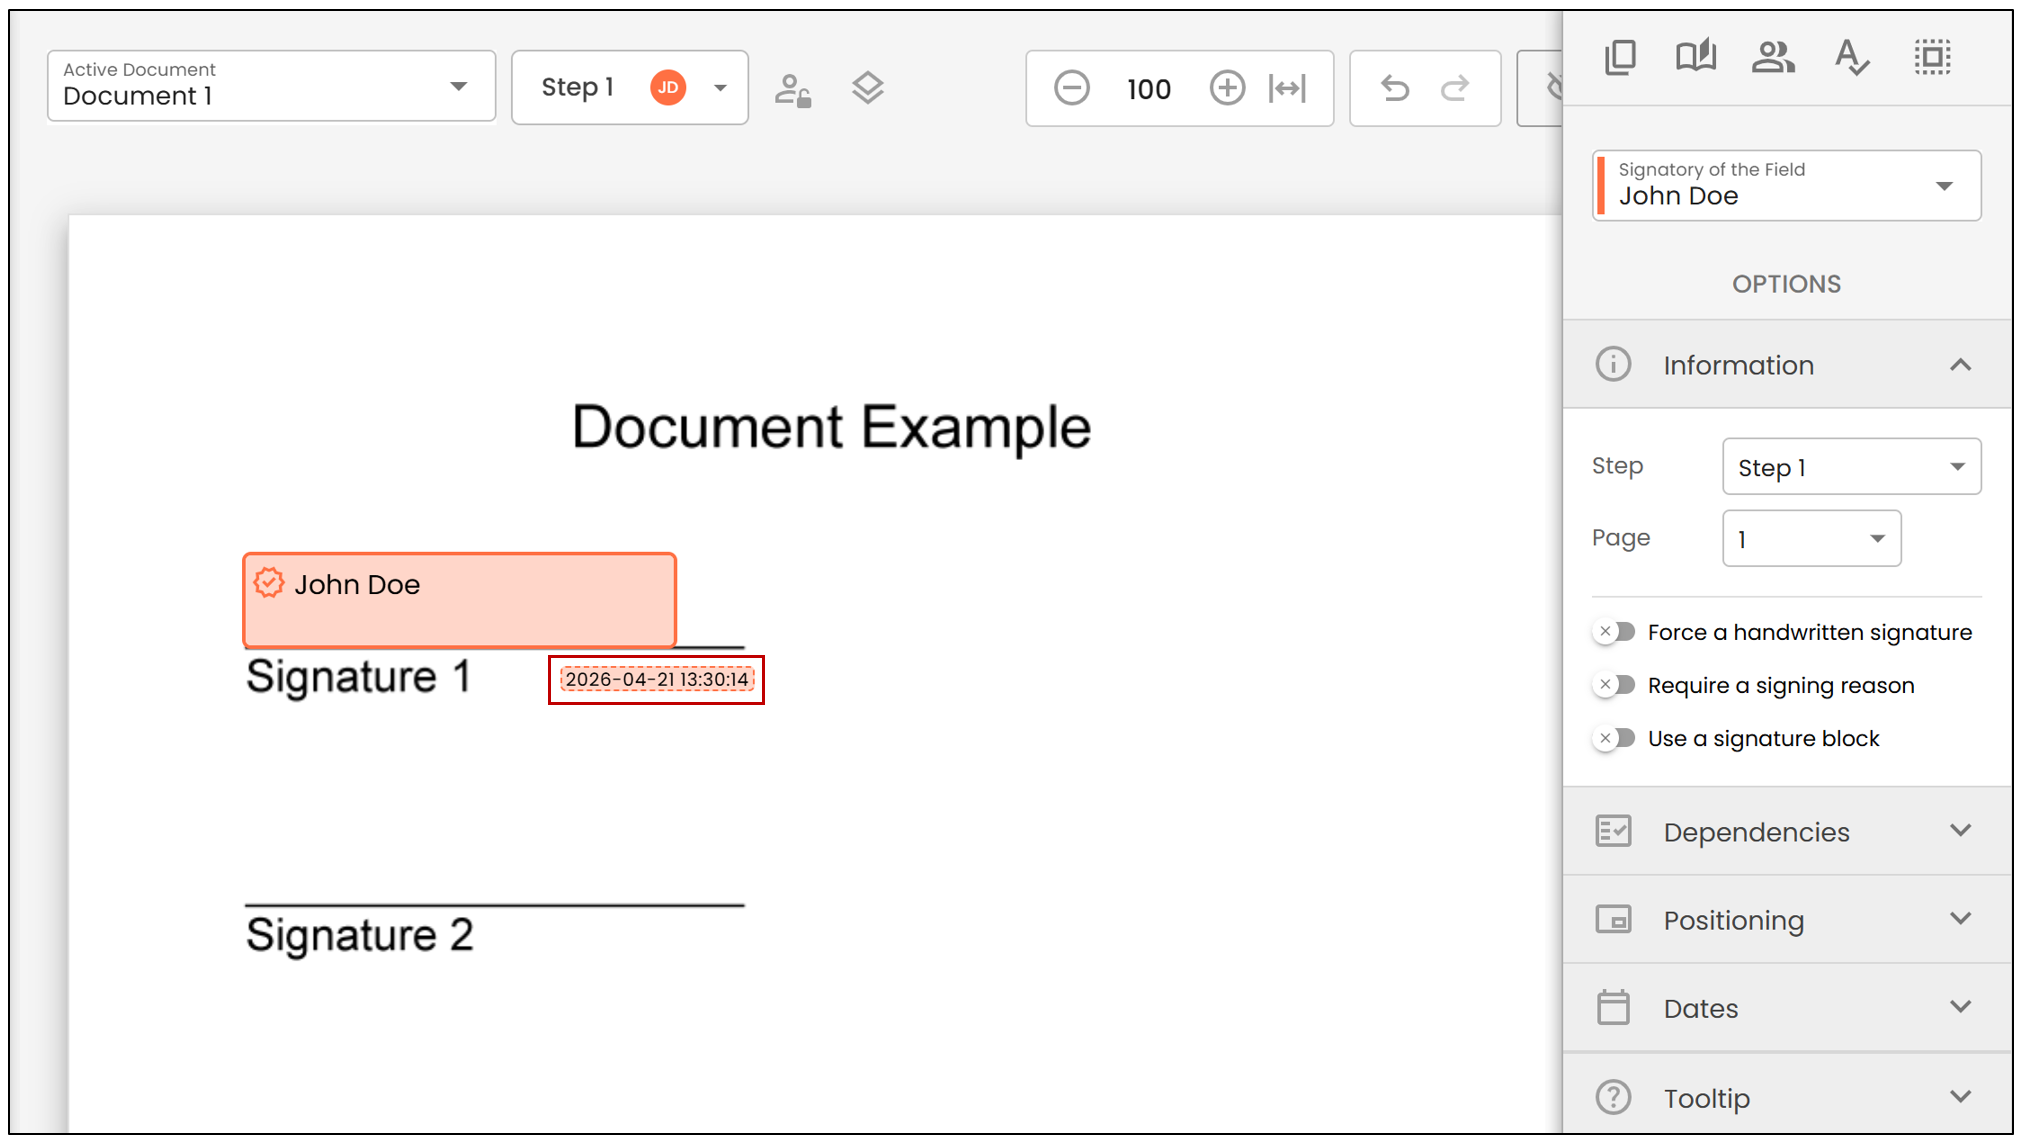
- You can also drag the date field to place it in the desired location.
NOTE: When using a custom date with a signature field, the date and signature field can be moved separately by dragging the date to the desired location. To select and move both elements simultaneously, double-click the signature field. You can also click and hold the mouse button, then drag the cursor to select both elements before moving them.
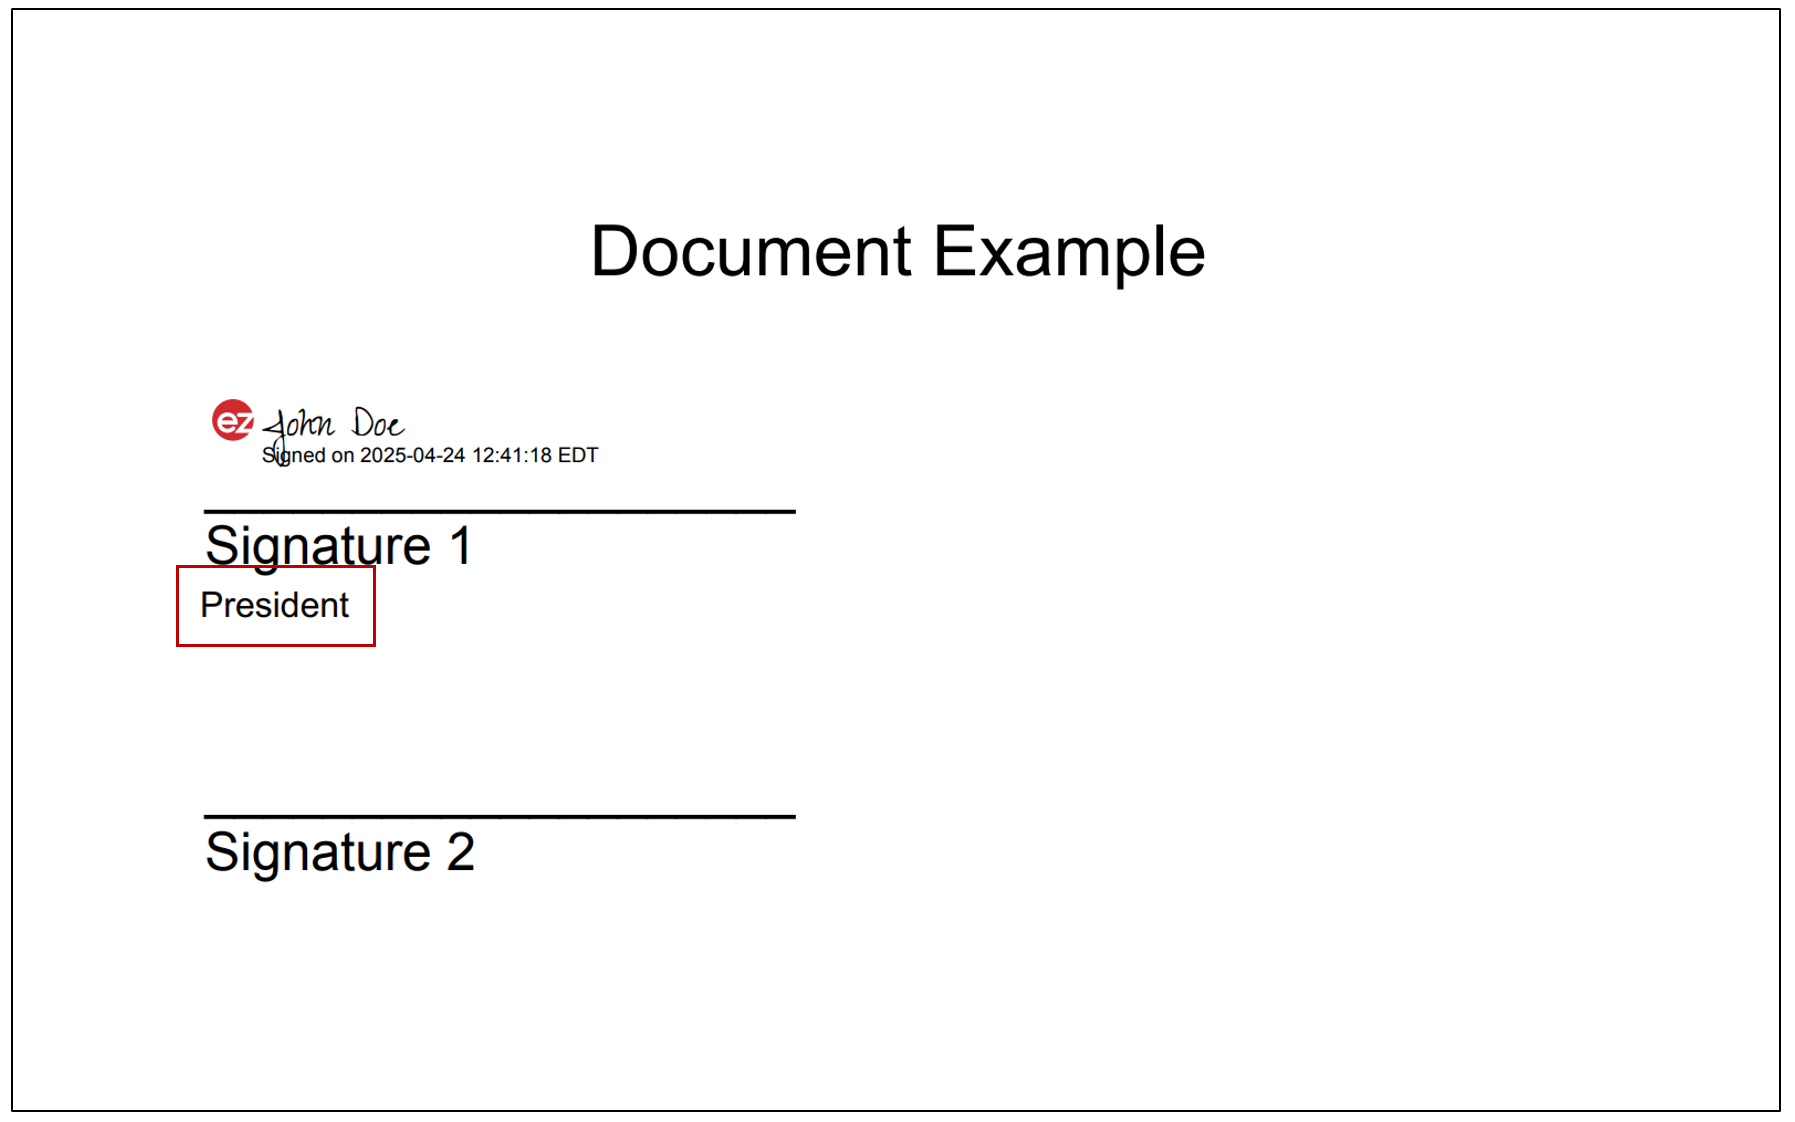
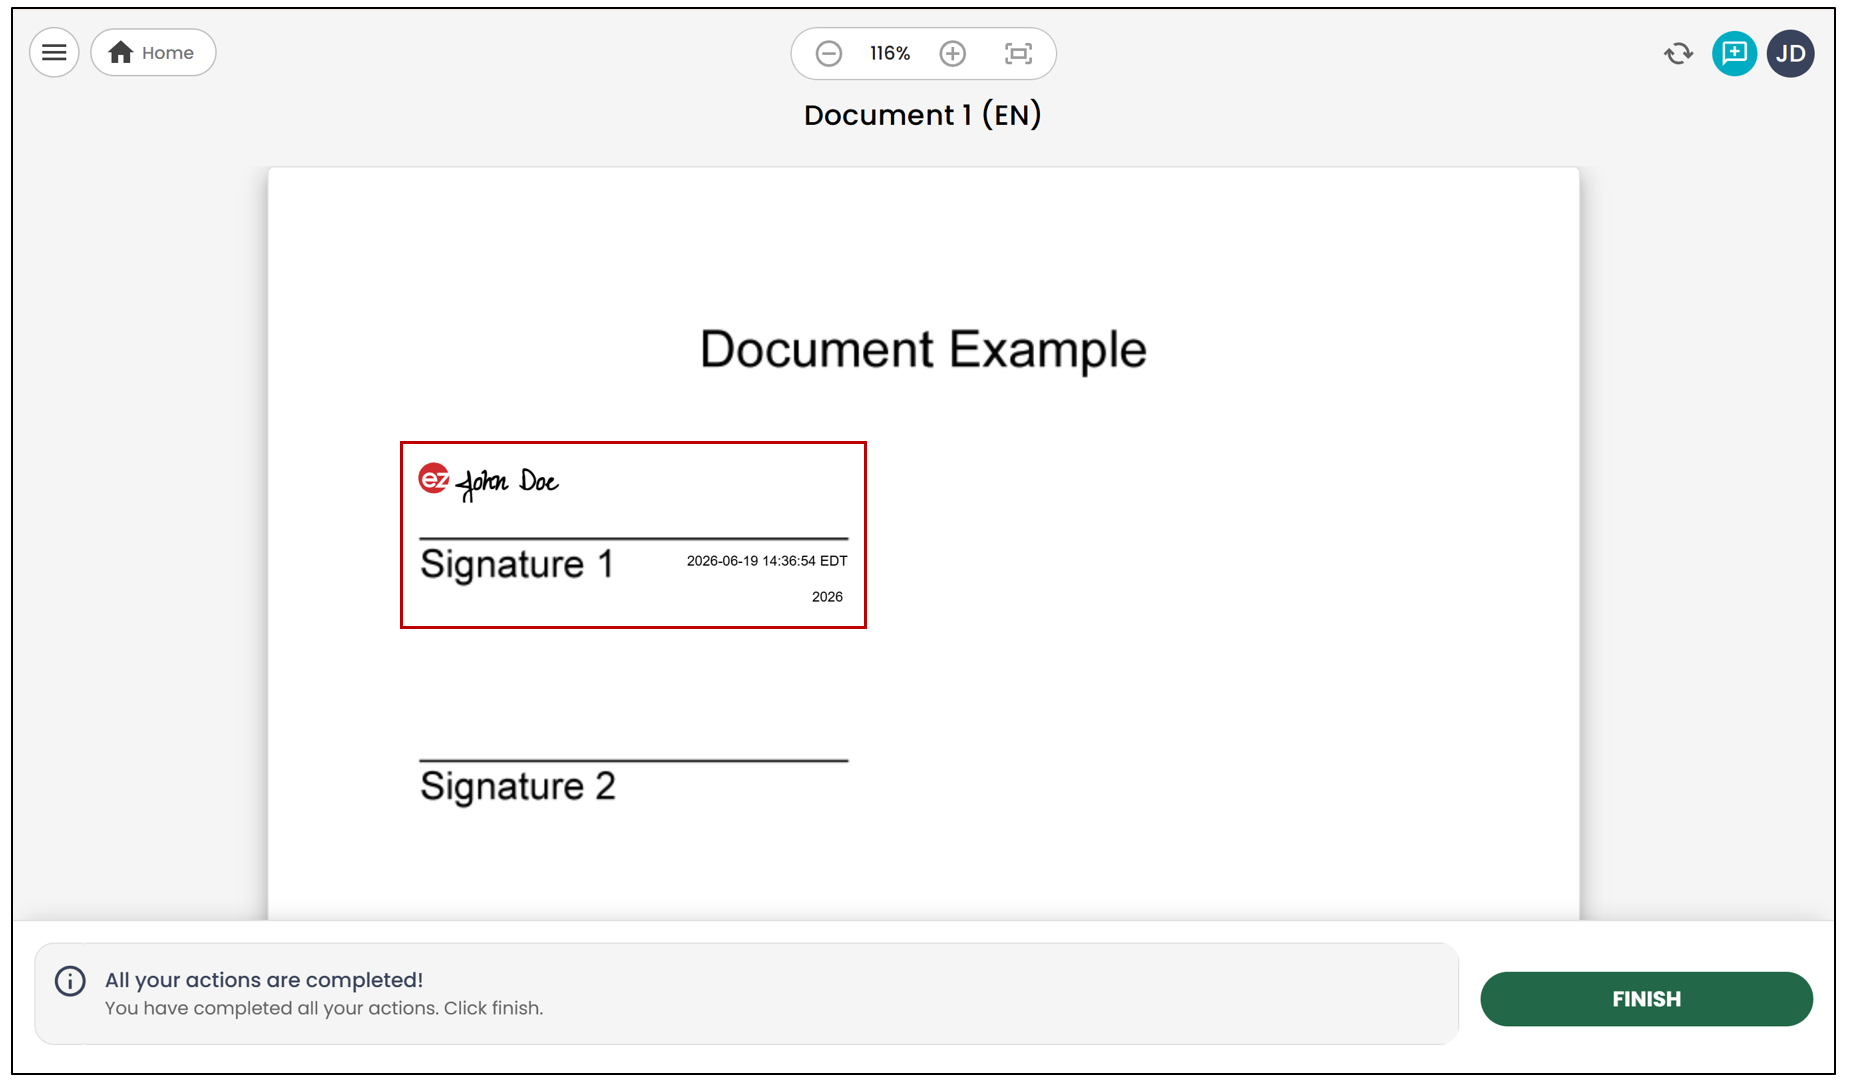
Here’s how the field will appear on the document once the electronic signature is completed with a Personalized Date.
Signature with reason
To set up the signature with a reason, you will need to select the option Require a signing reason when adding a signature field.
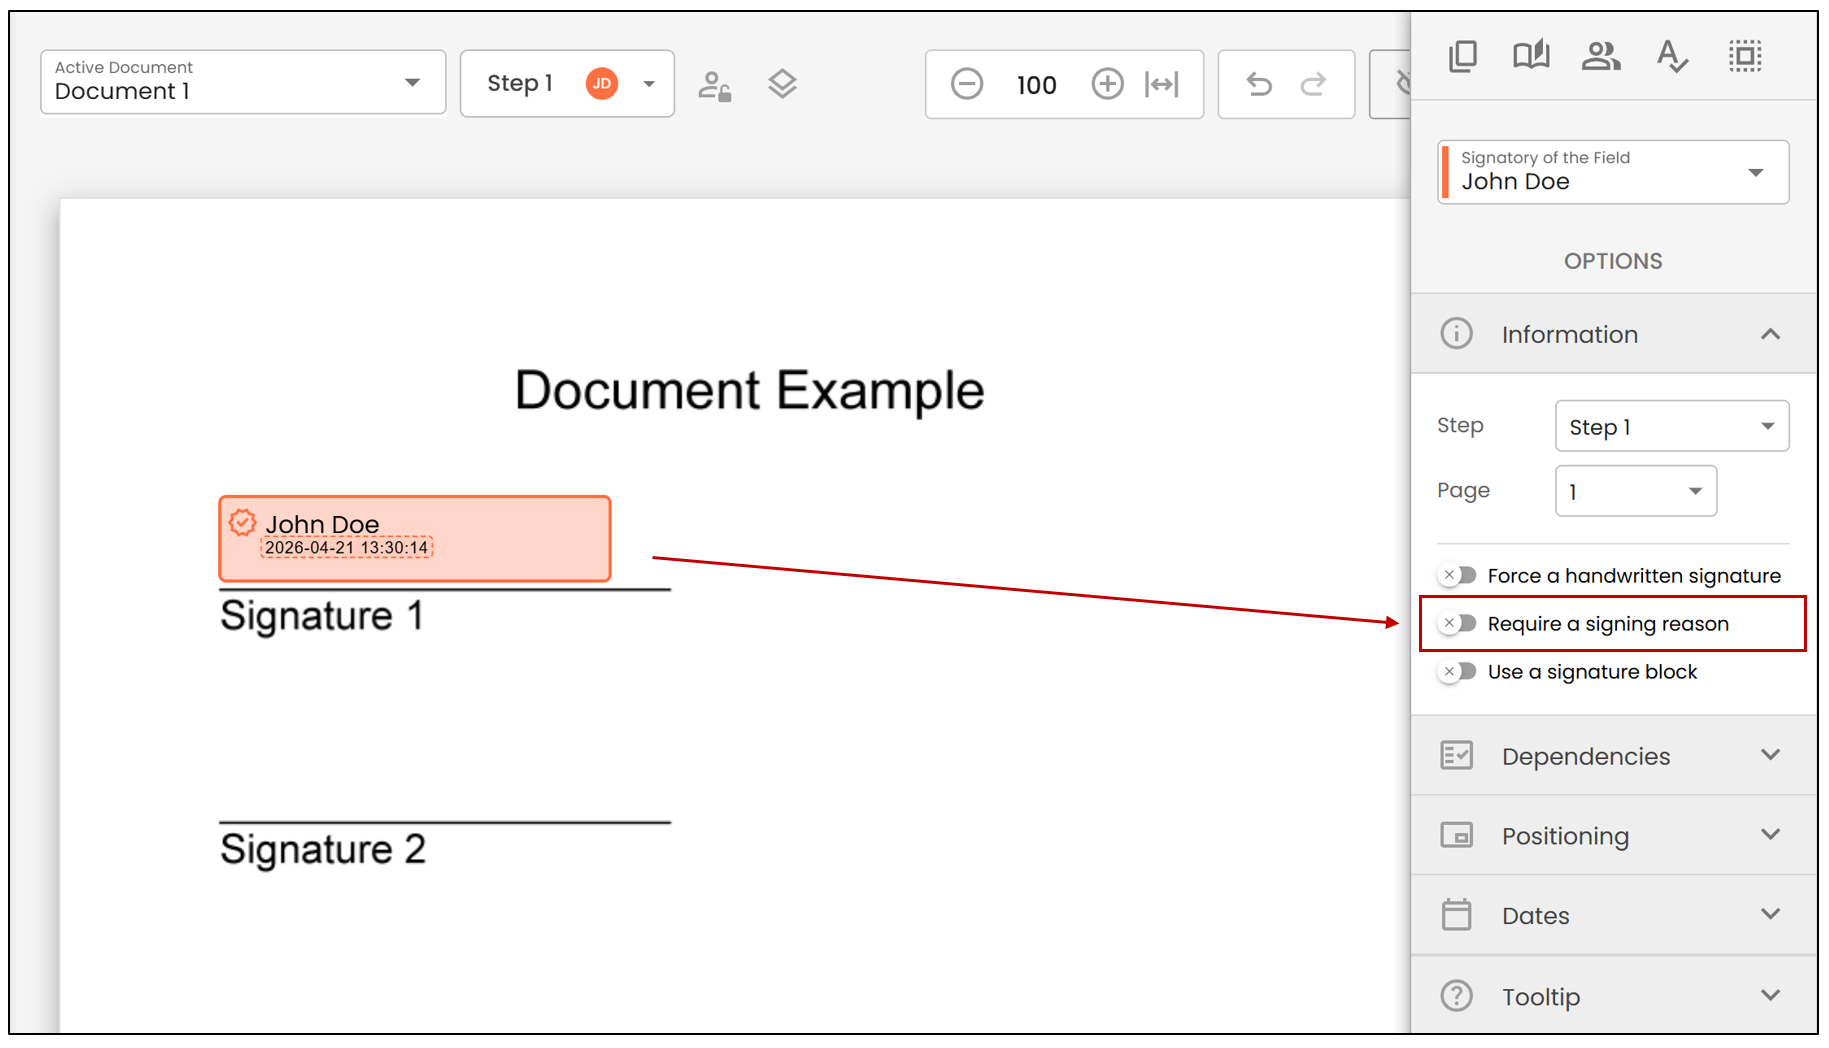
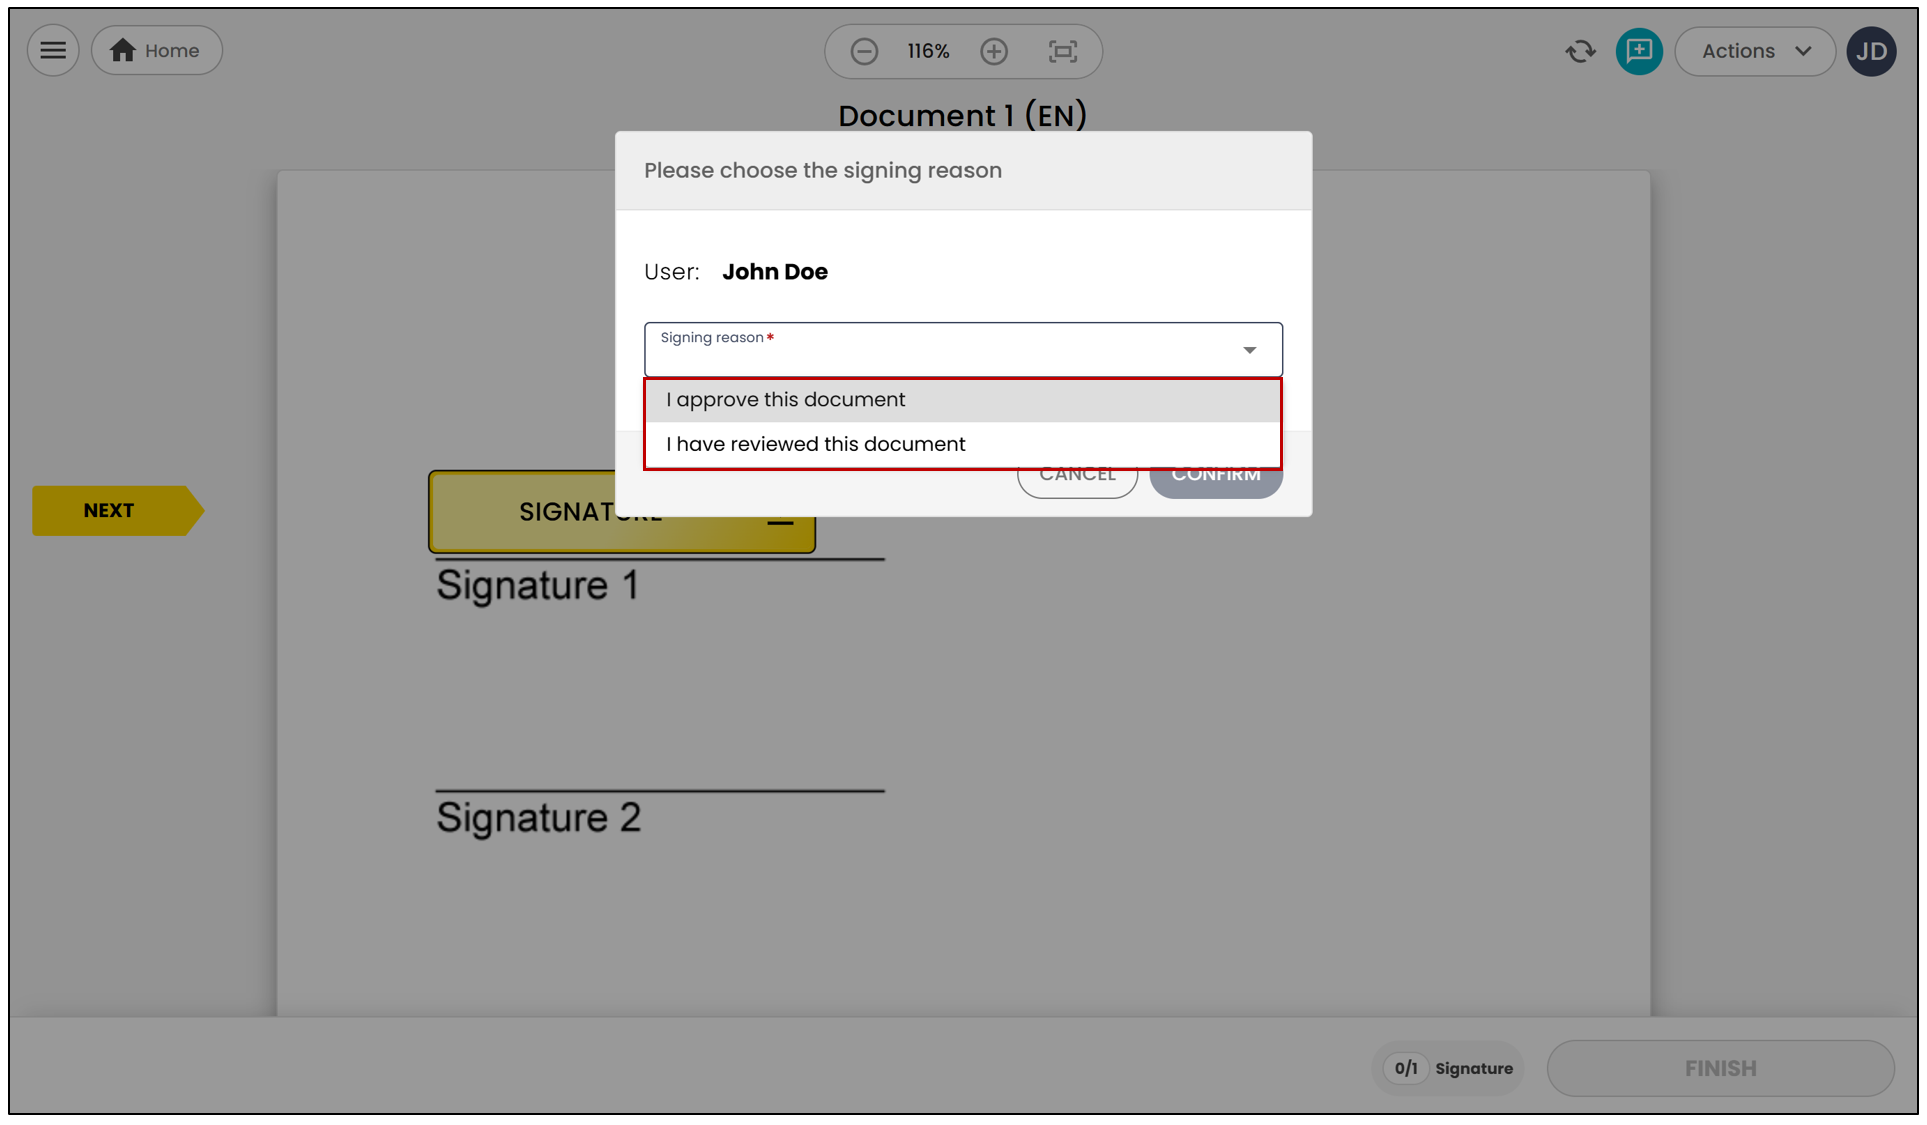
- When the signatory adds their signature, they will need to choose a signature reason. The signature reasons will be configured by the administrator.
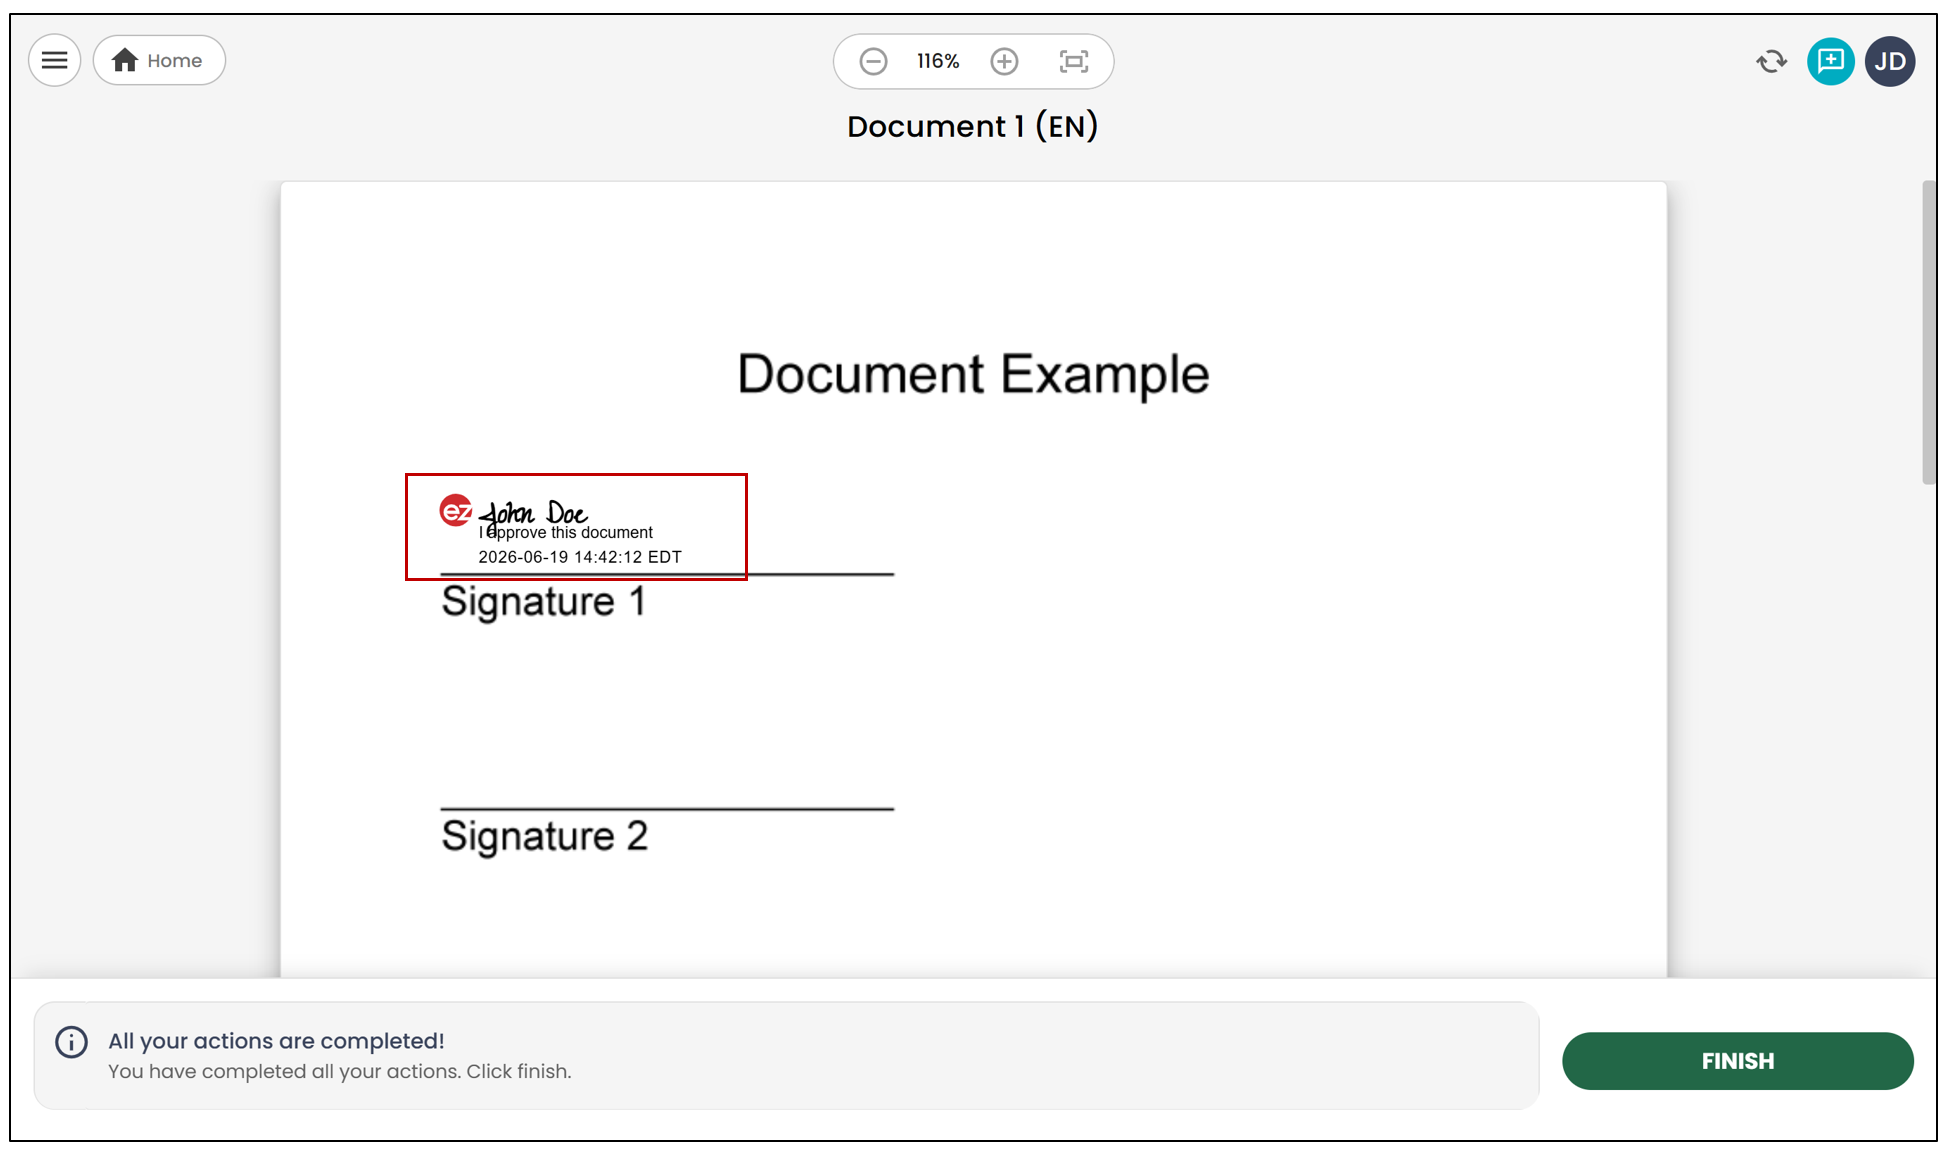
Here’s how the field will appear on the document once the electronic signature is completed.
NOTE: The option to sign with a reason is only available for certain types of accounts; you may not have access to this type of field.
Handwritten Signature
To set up the handwritten signature, you will need to select the option Force a handwritten signature when adding a signature field.
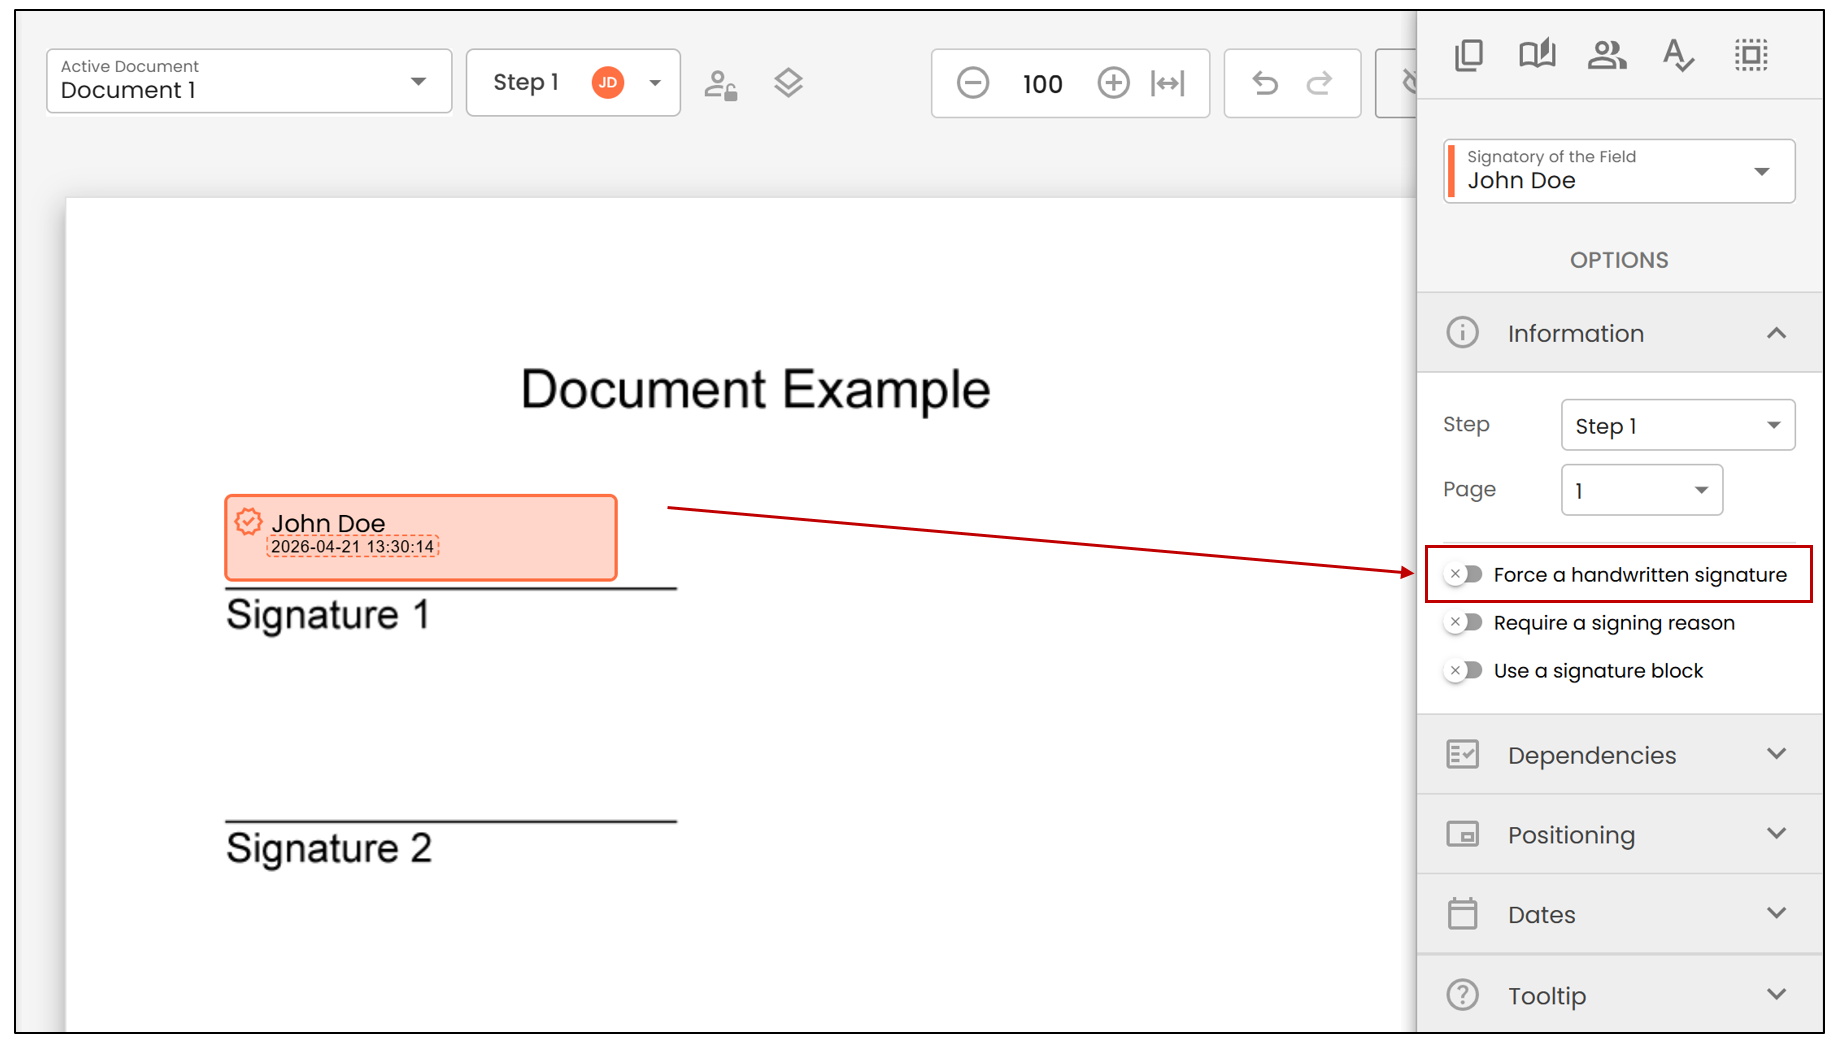
- Force Handwritten Signature : The signatory will be able to draw their signature on the document using their mouse or finger on a mobile device.
Here’s what the signatory will see during the signing process:
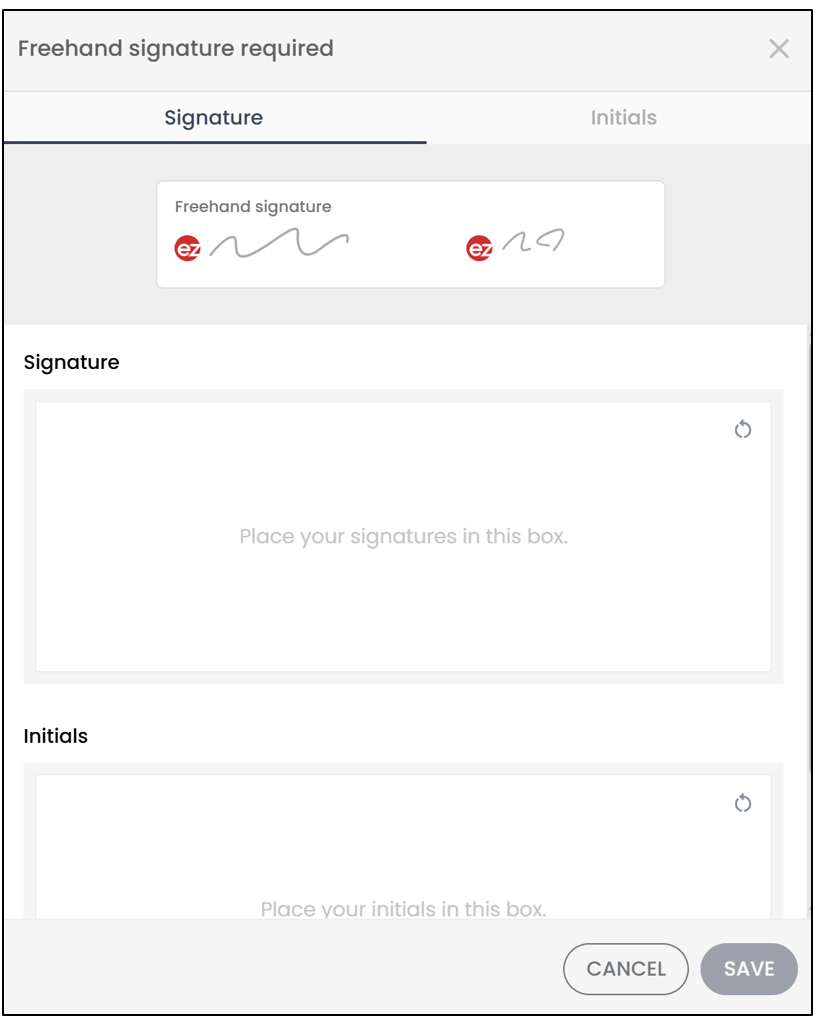
The signatory will need to add their handwritten signature and then click on Save.
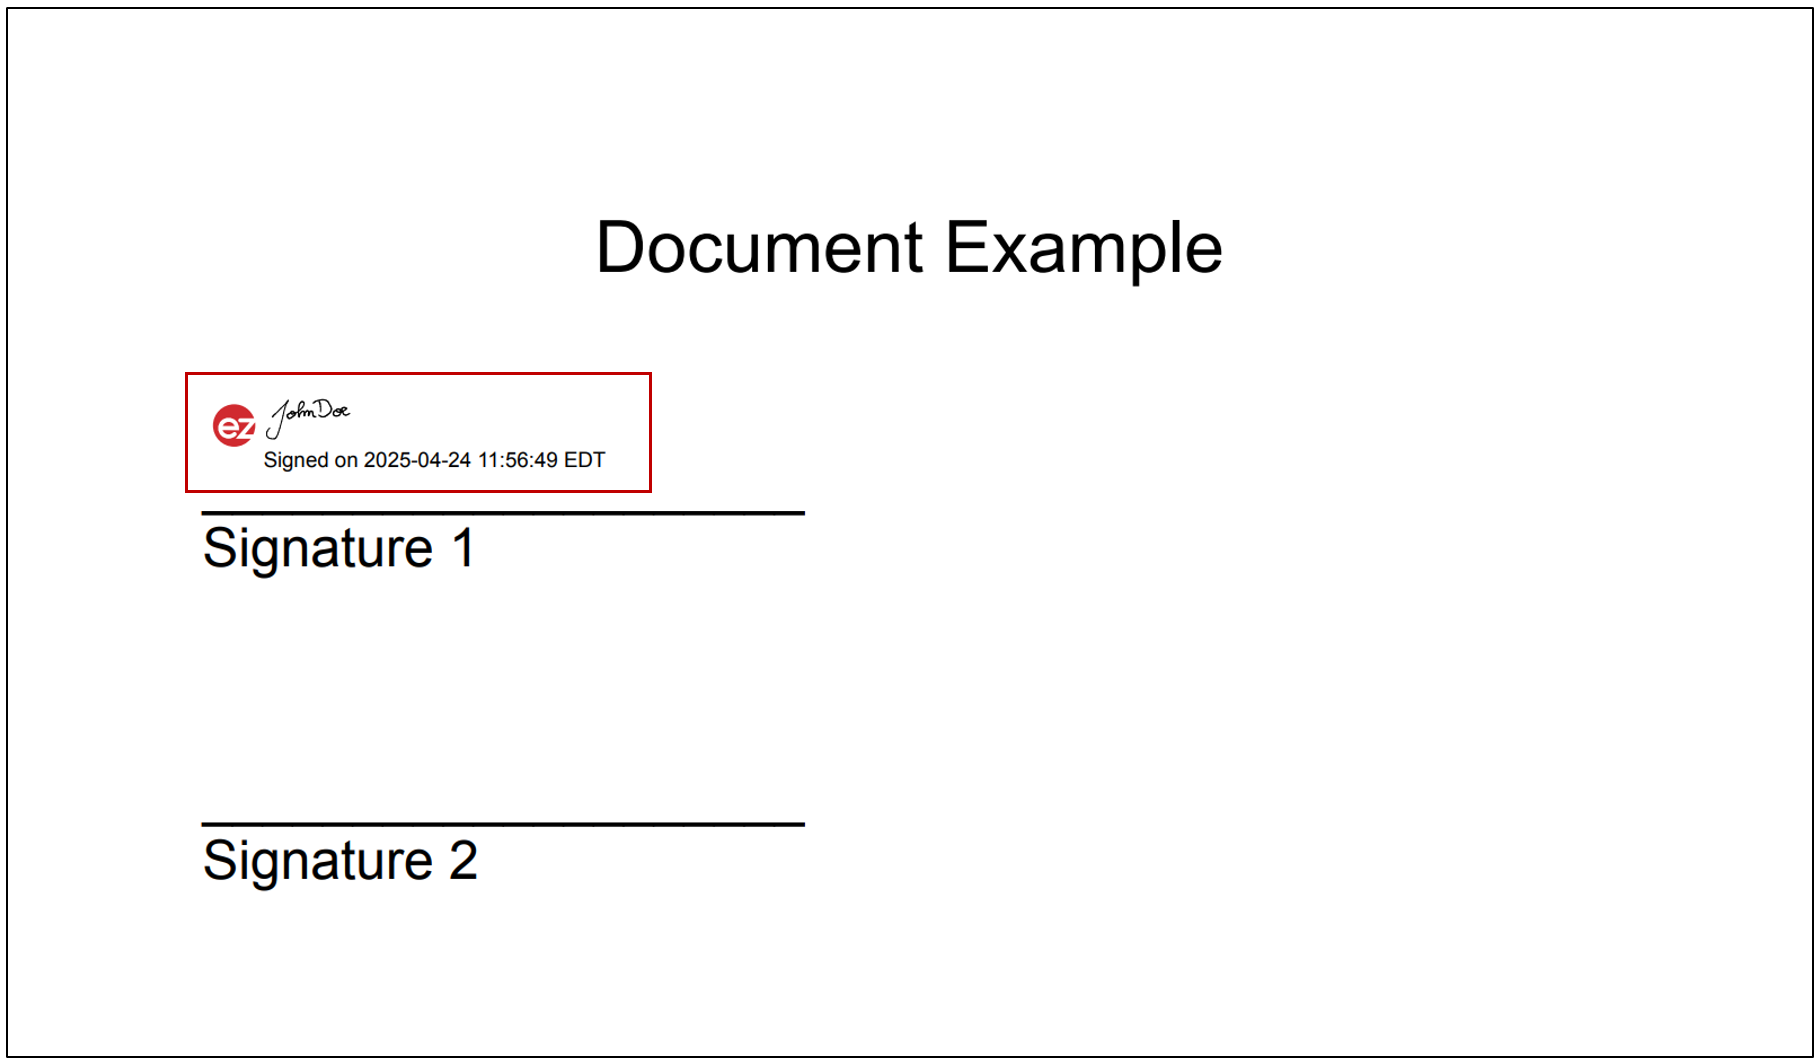
Here’s how the field will appear on the document once the electronic signature is completed.
Initials
- The signatory’s initials will appear on the document. The initials will be displayed in text or handwritten form, depending on the format selected by the user.
If the user selects Force a handwritten signature when adding the initials field, the signatory will need to manually enter their initials to sign.
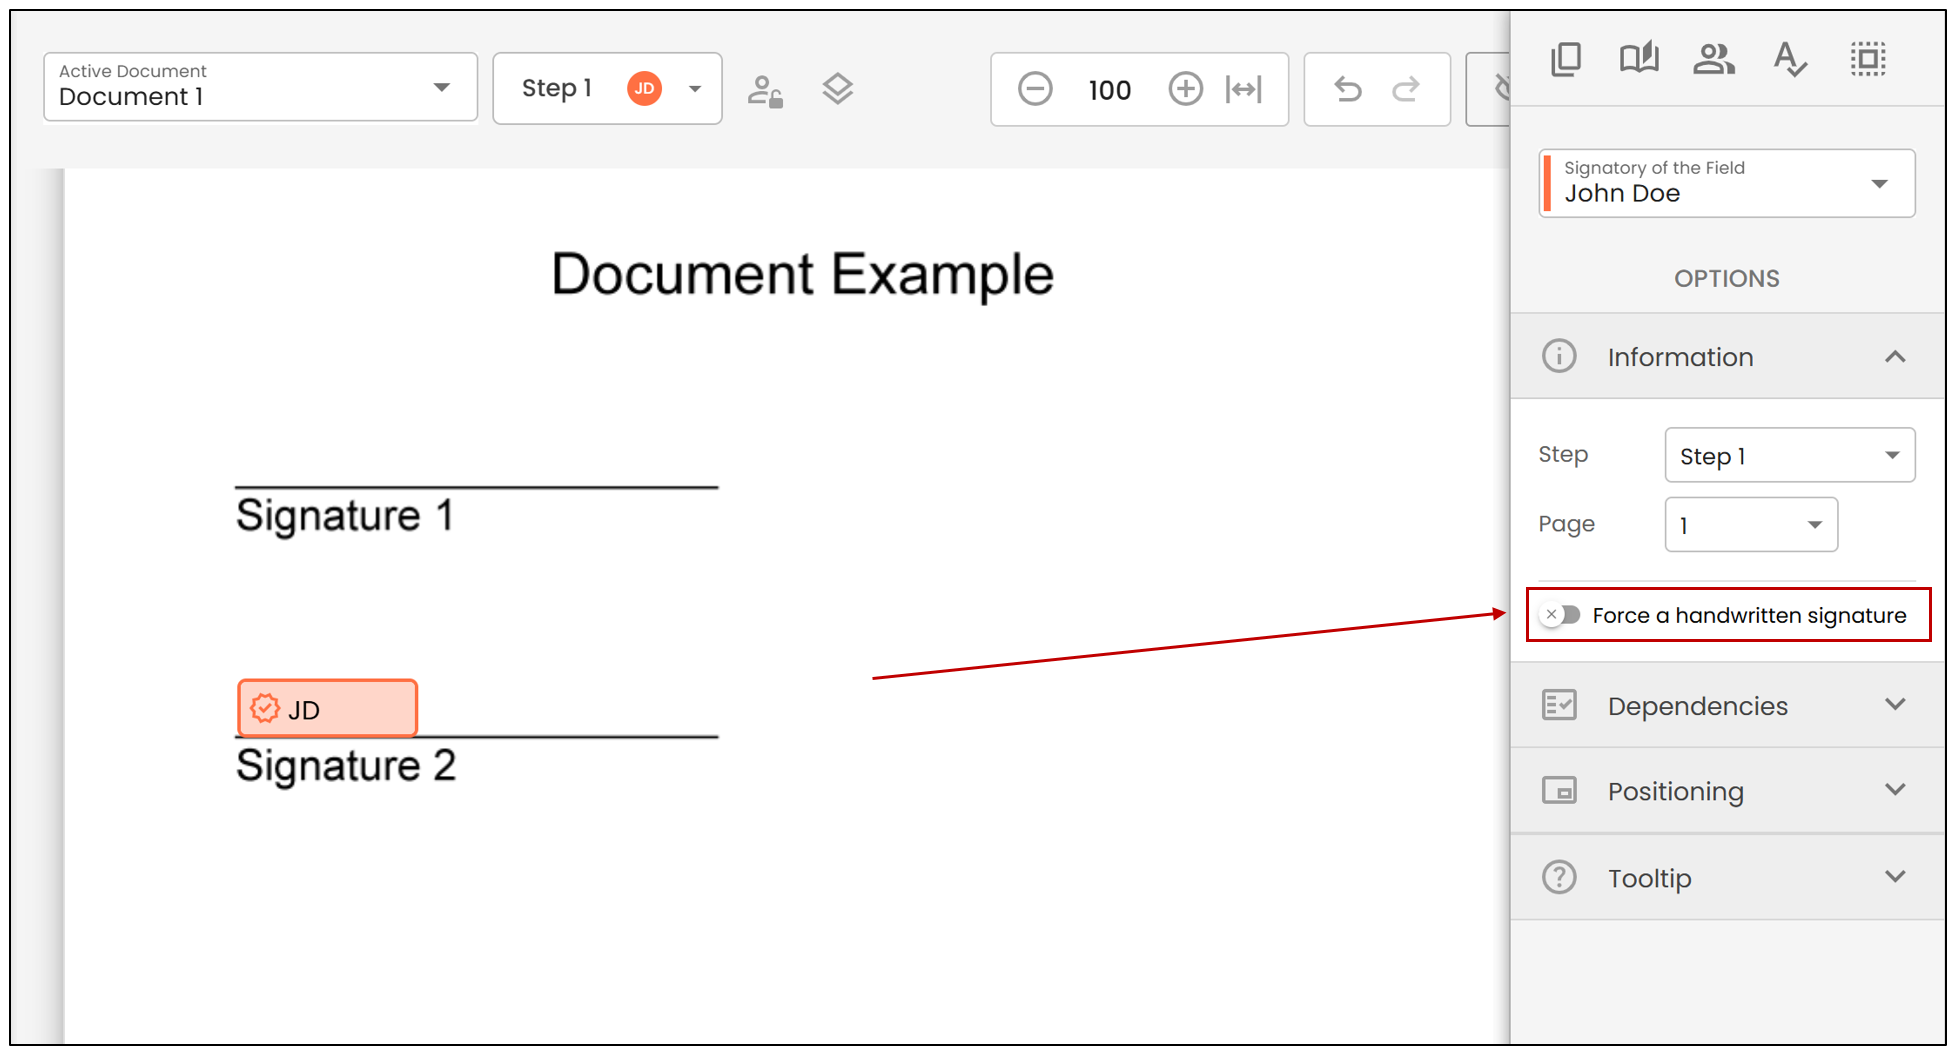
Here’s what the signatory will see when filling out the initials field if the handwritten signature is not enforced.
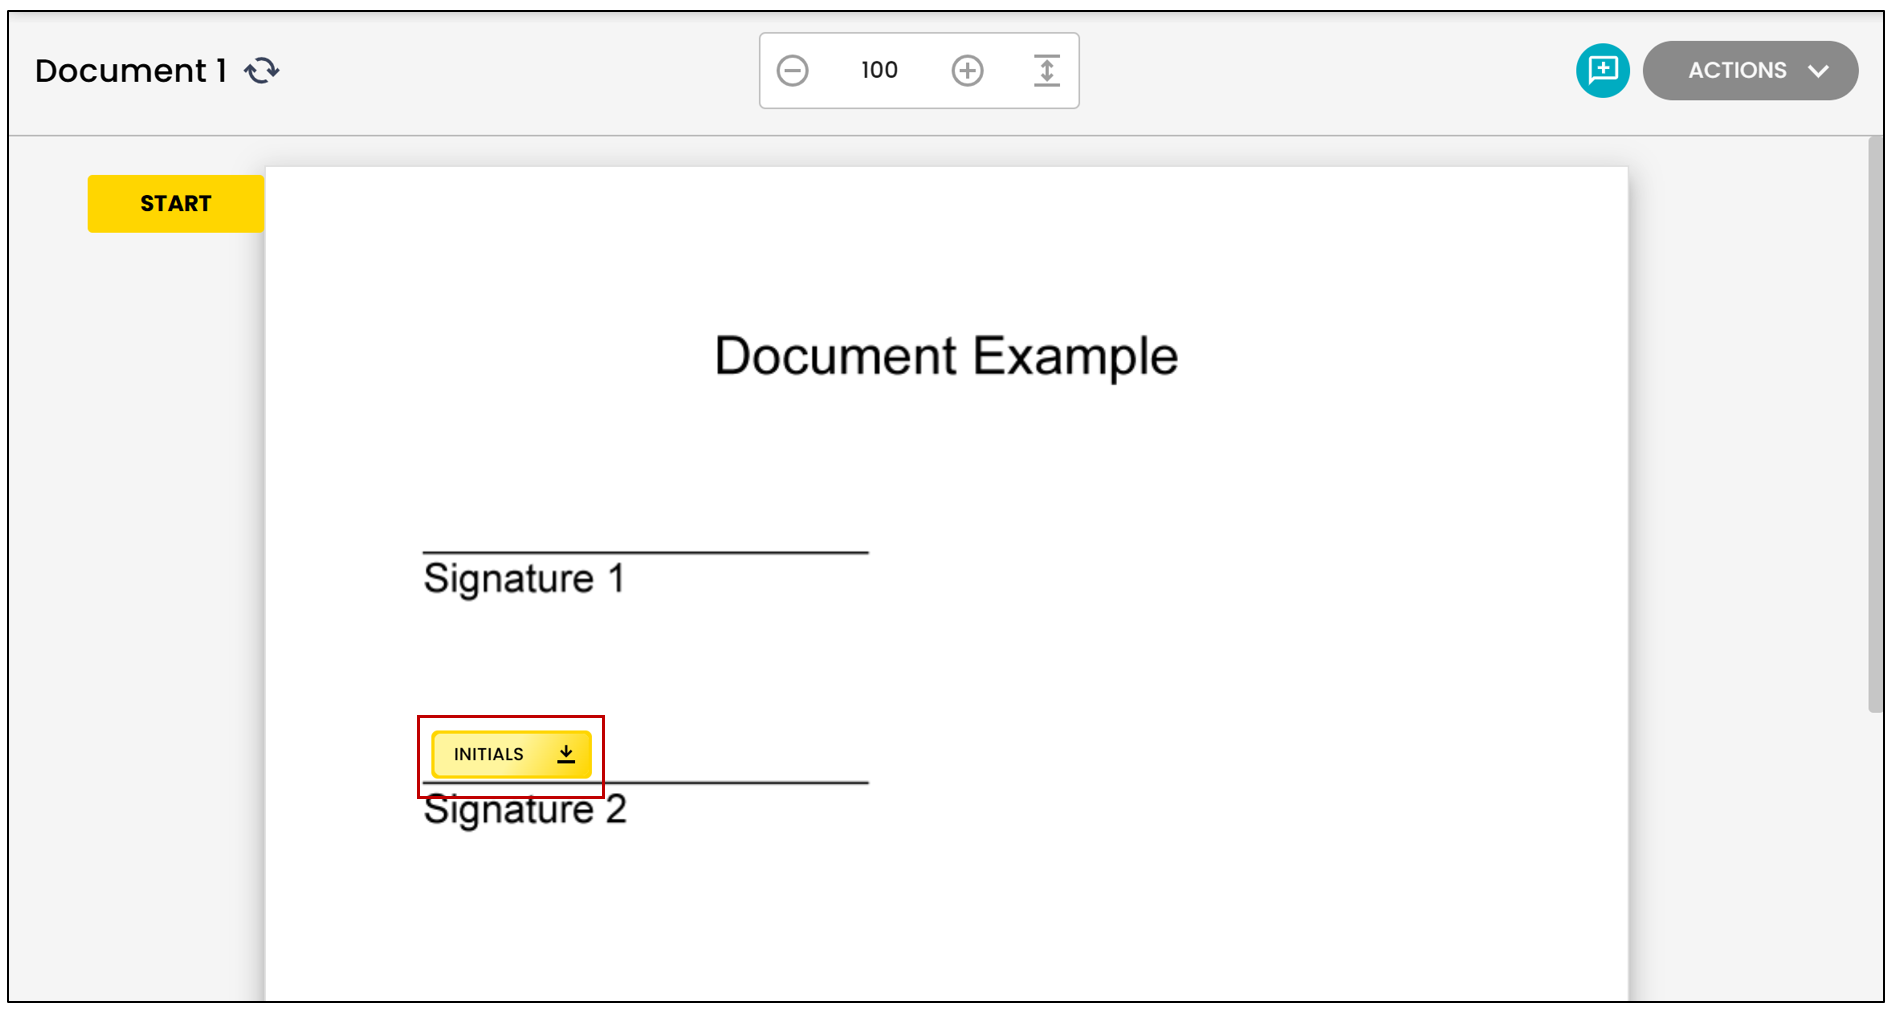
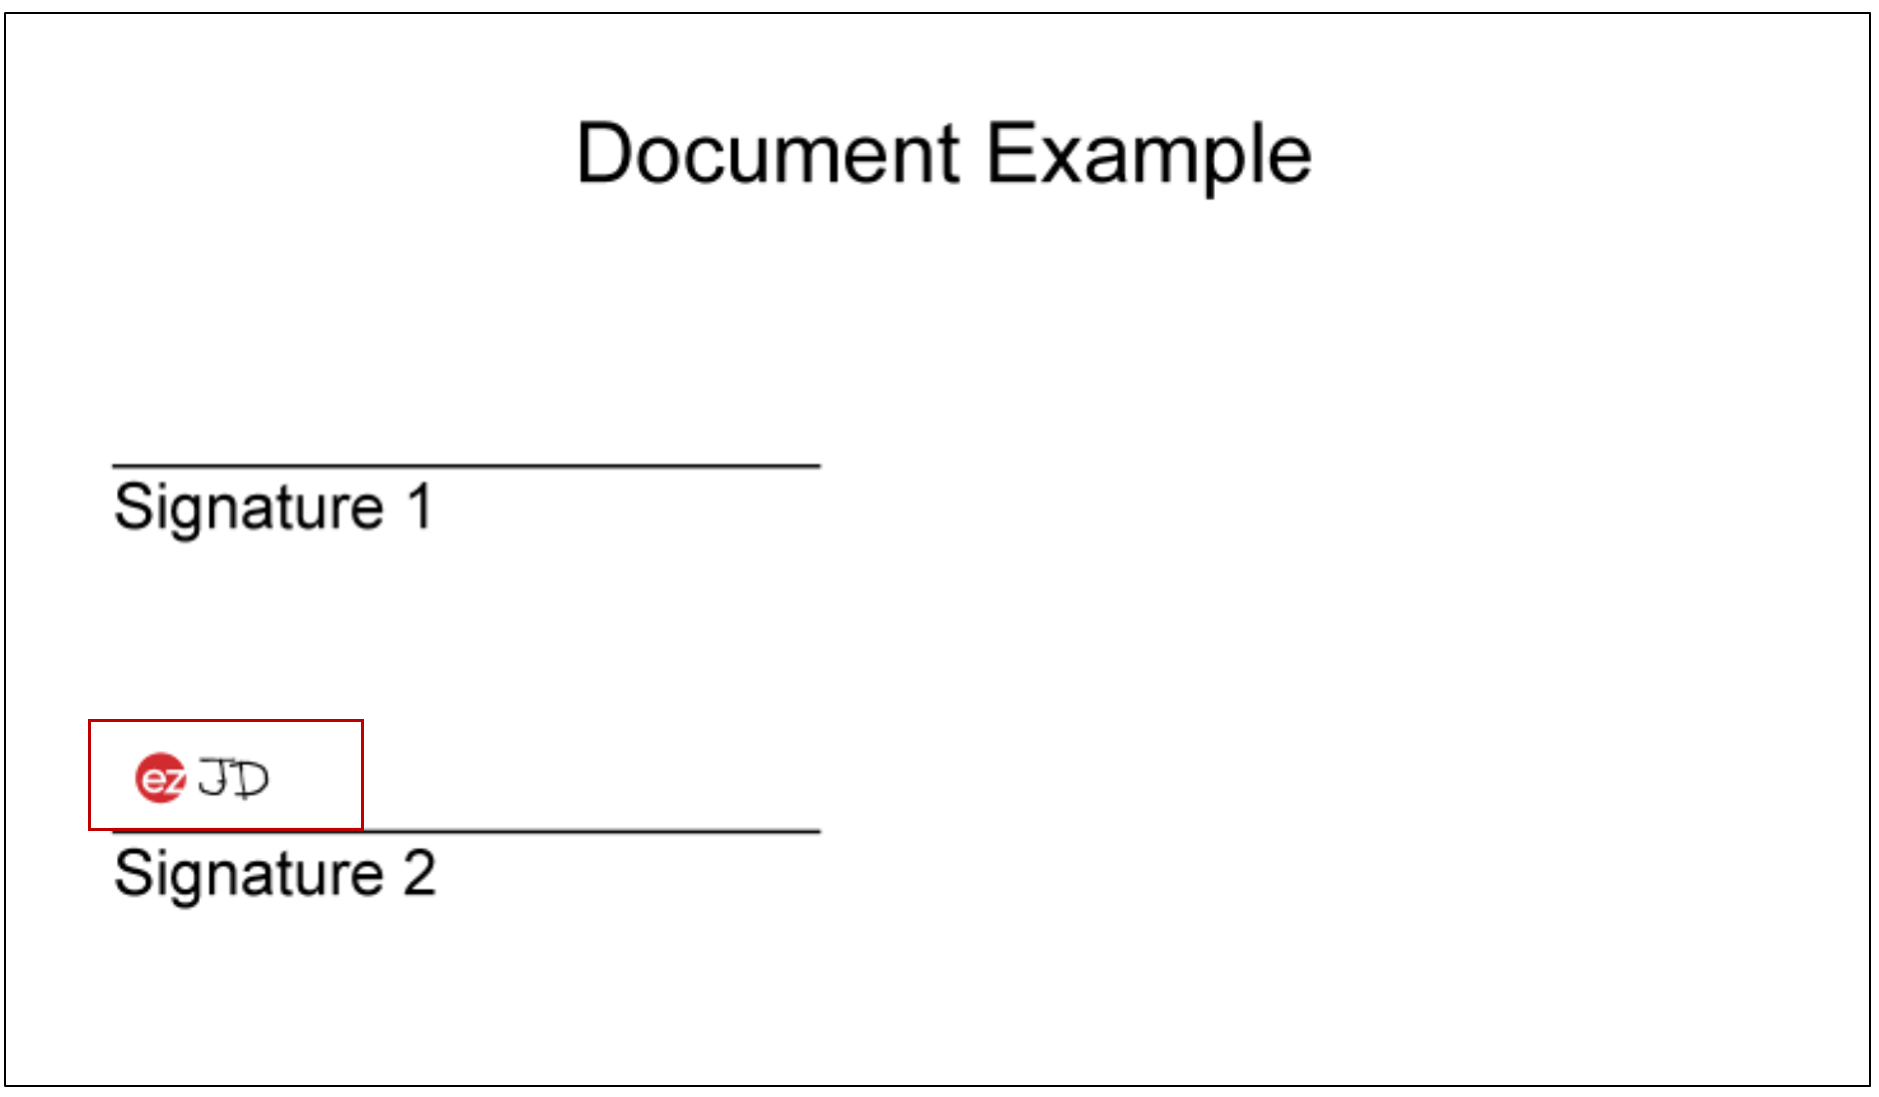
Here’s how the field will appear on the document once the electronic signature is completed.
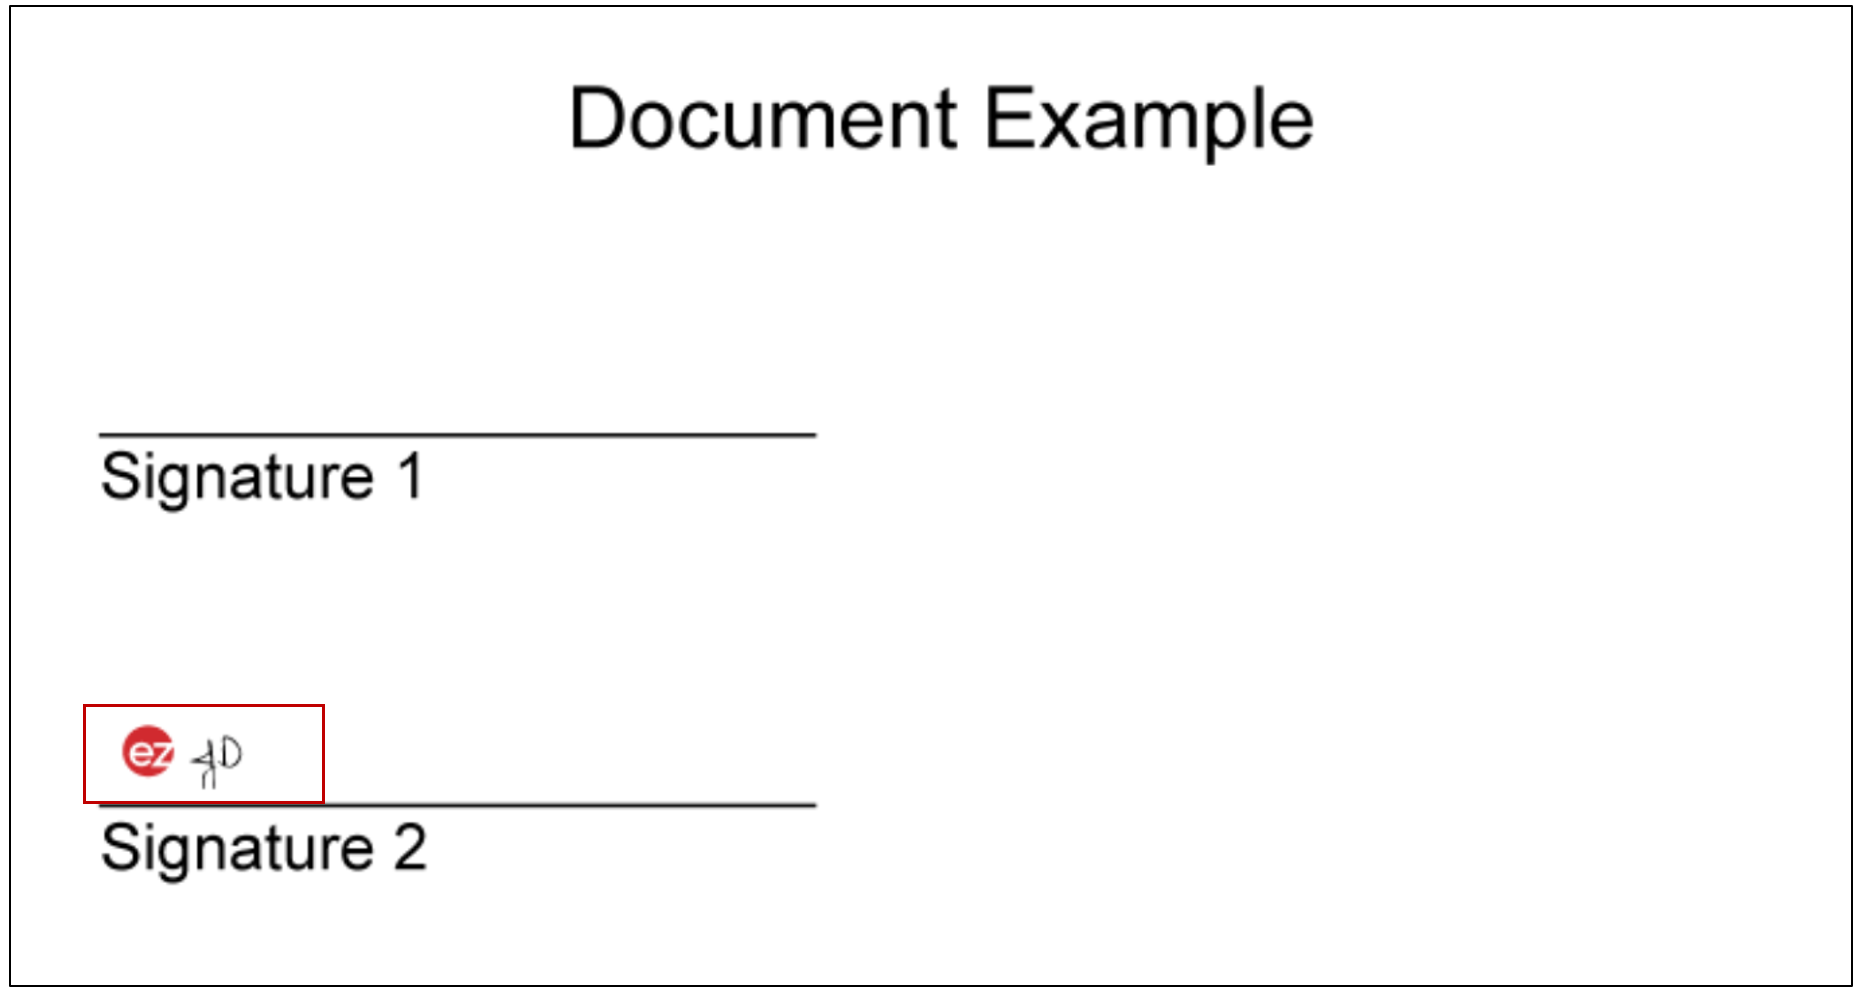
Here’s how the field will appear on the document once the electronic signature is completed with an enforced handwritten signature.
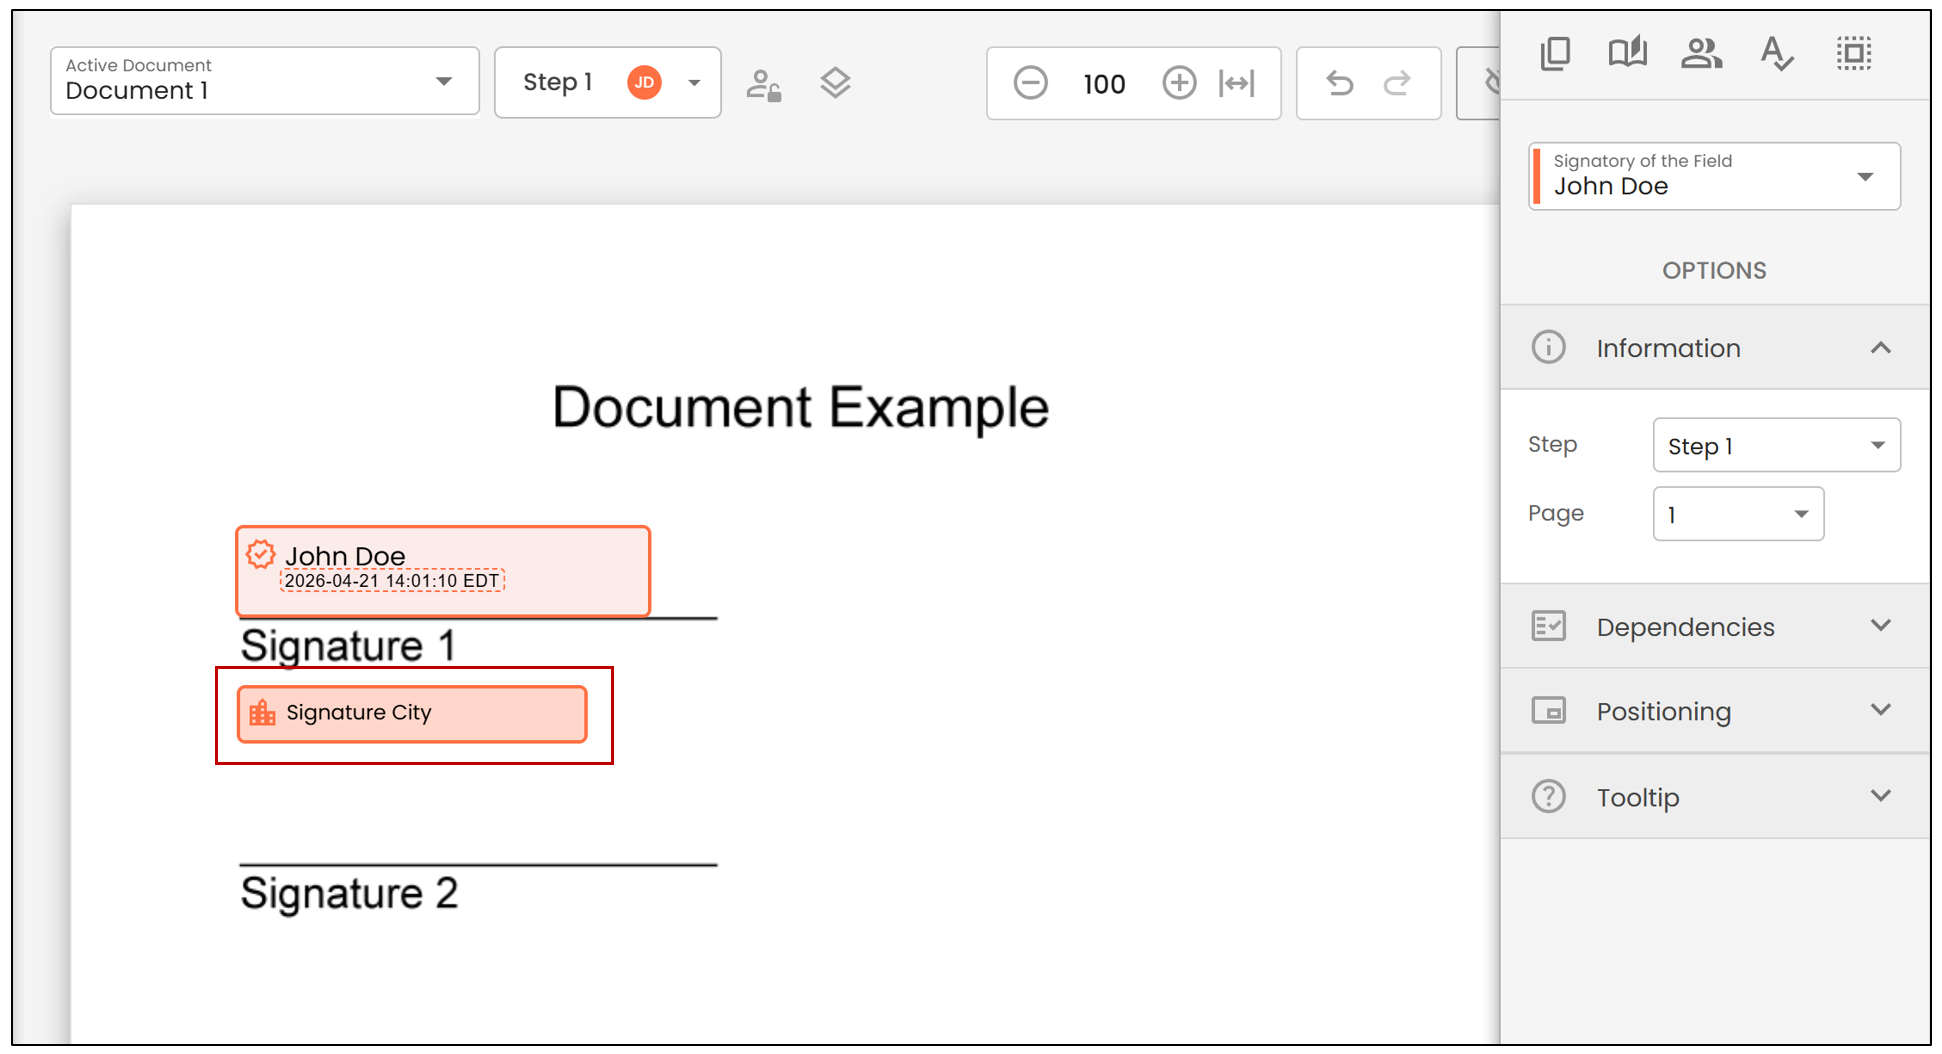
Signature City
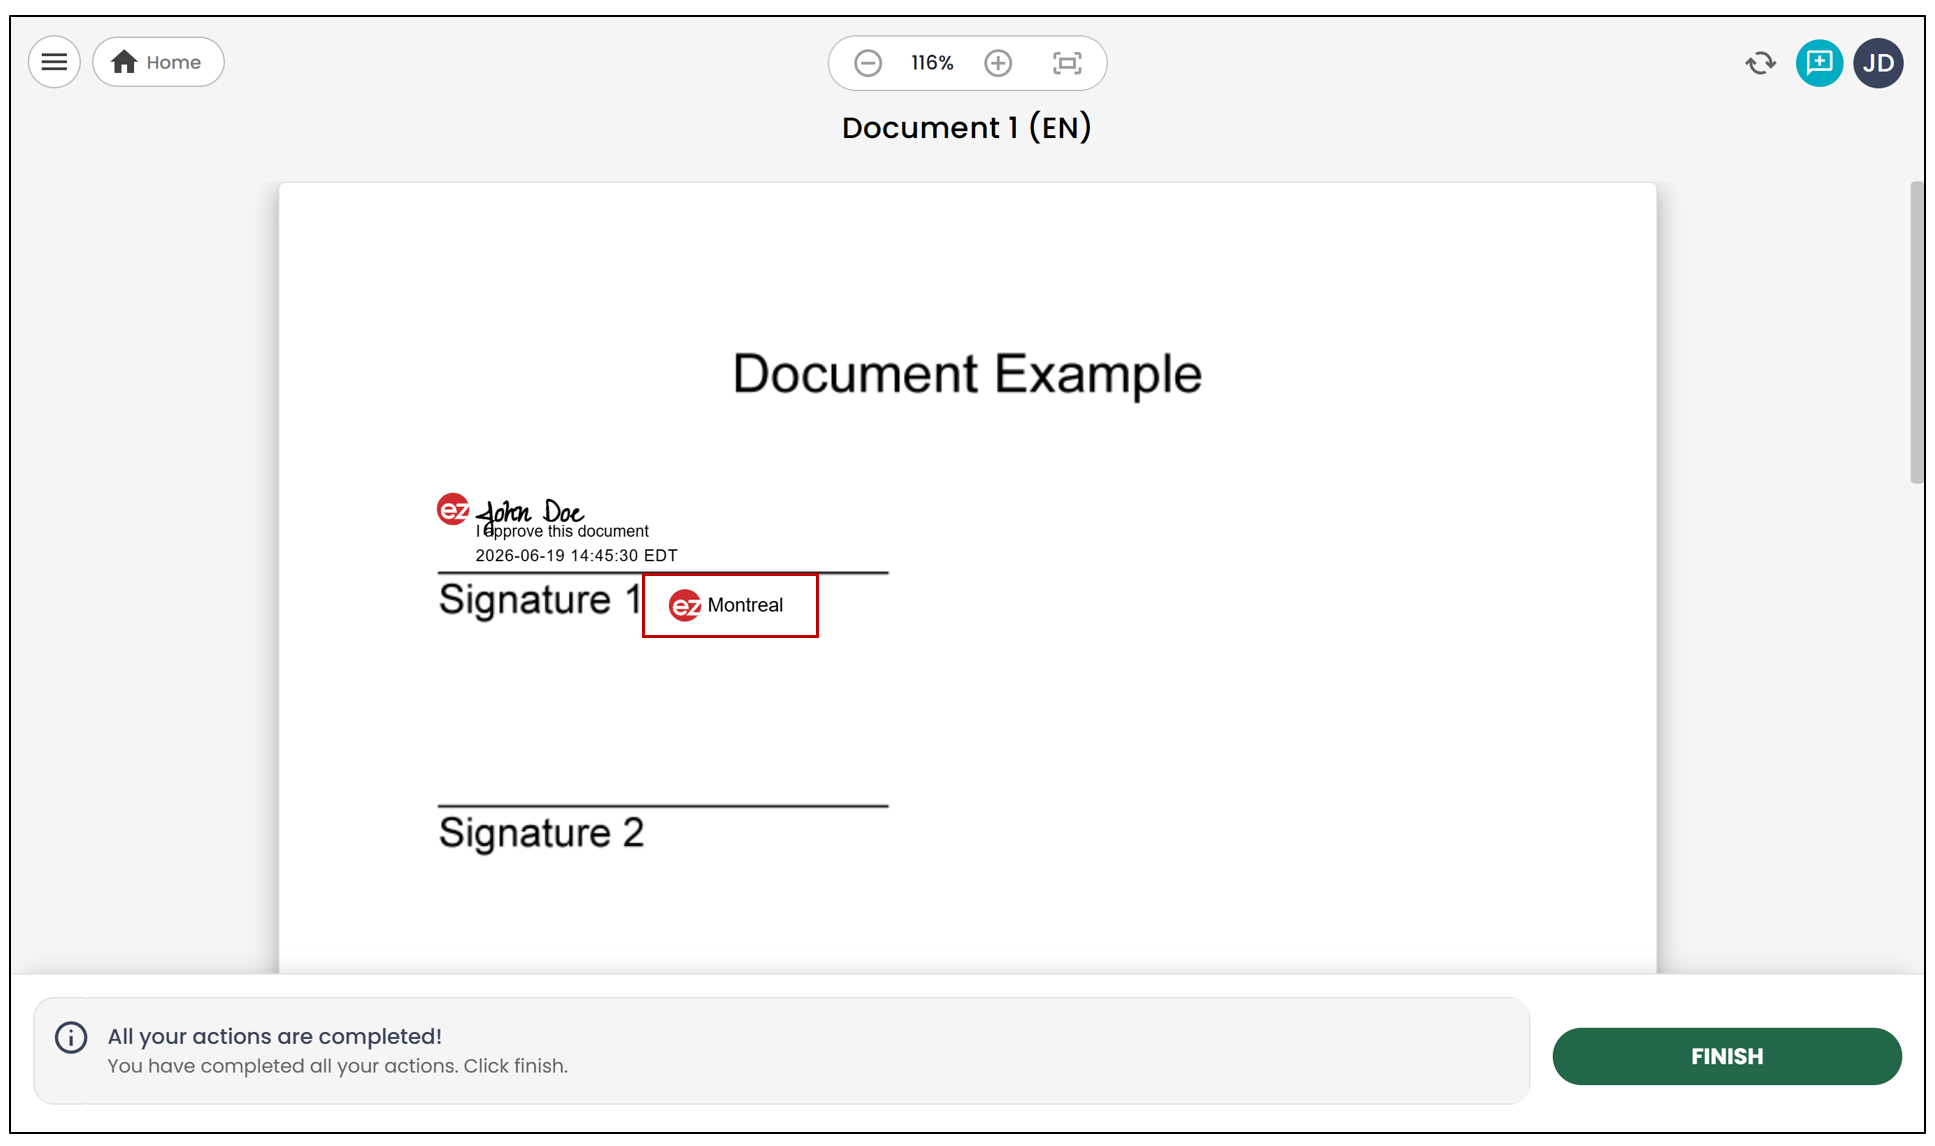
- Signature City : The signatory will enter the city from which they are signing in the designated field.
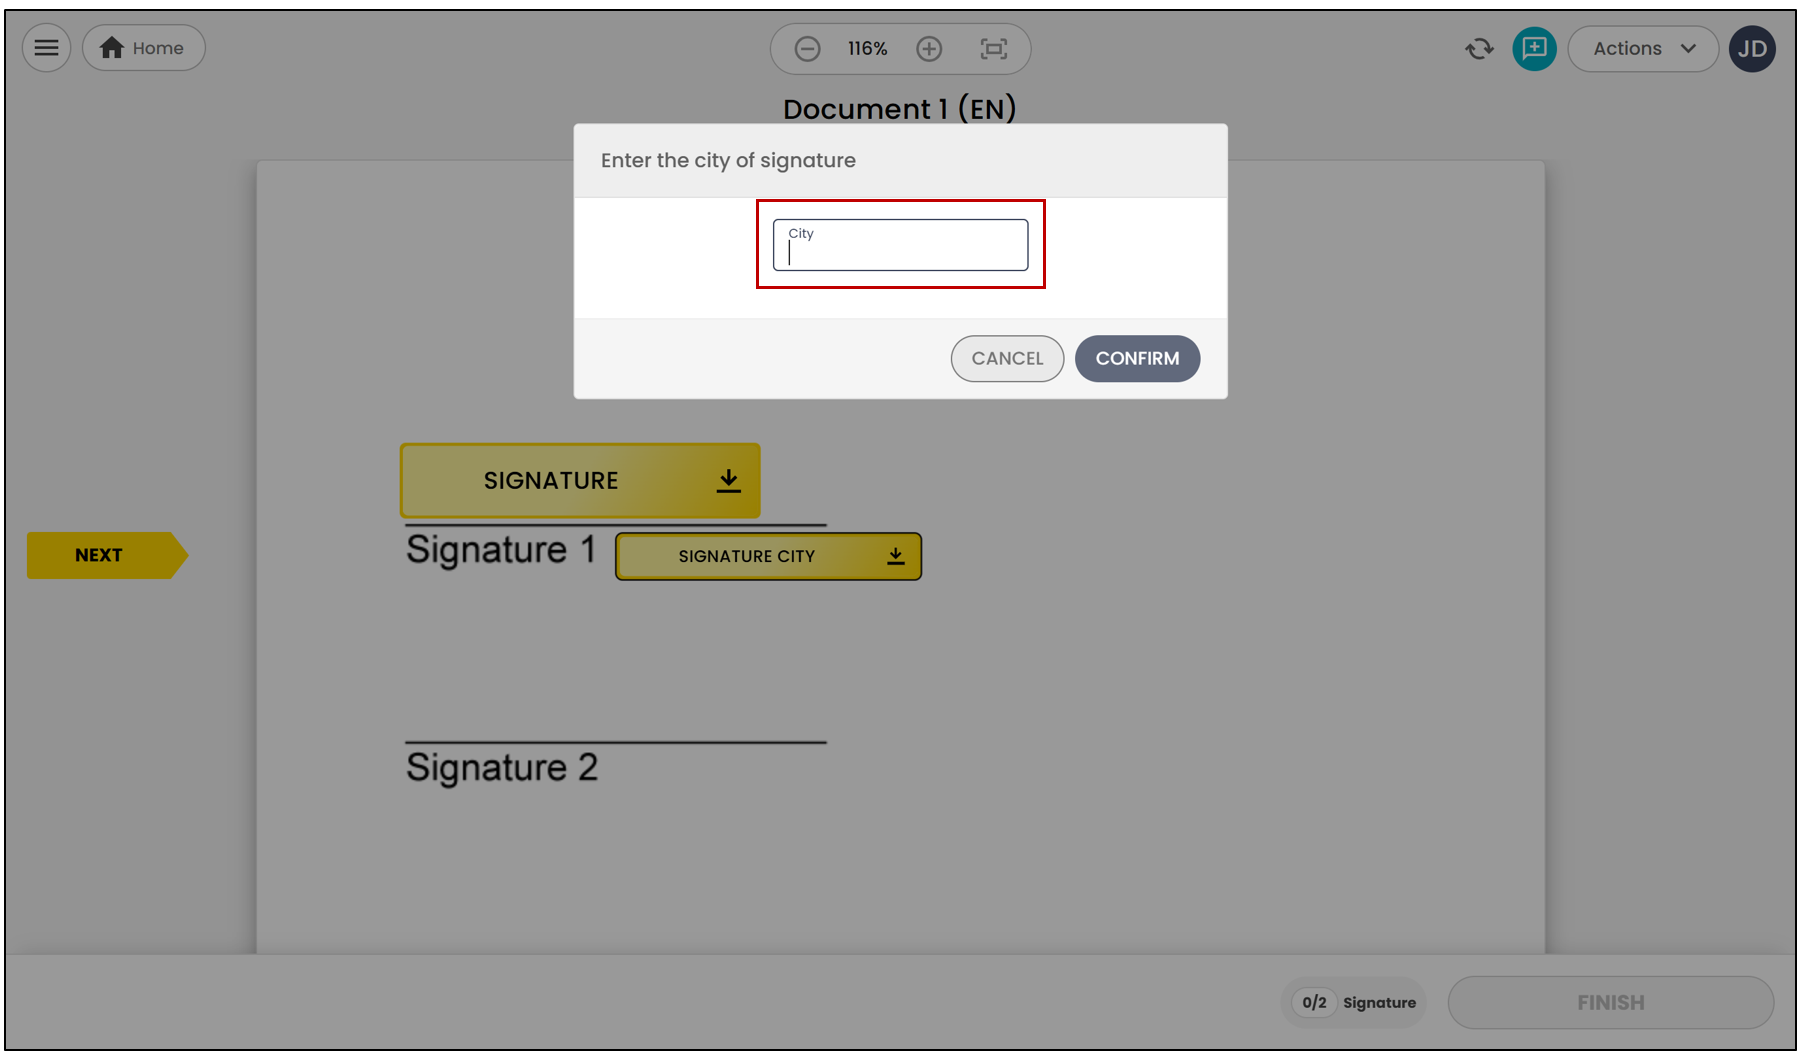
Here’s what the signatory will see when filling out the form field.
Here’s how the field will appear on the document once the electronic signature is completed.
Receipt Acknowledgment
- The text Receipt Acknowledgment by (signatory’s name) will appear on the document.
Here’s what the signatory will see when filling out the form field.
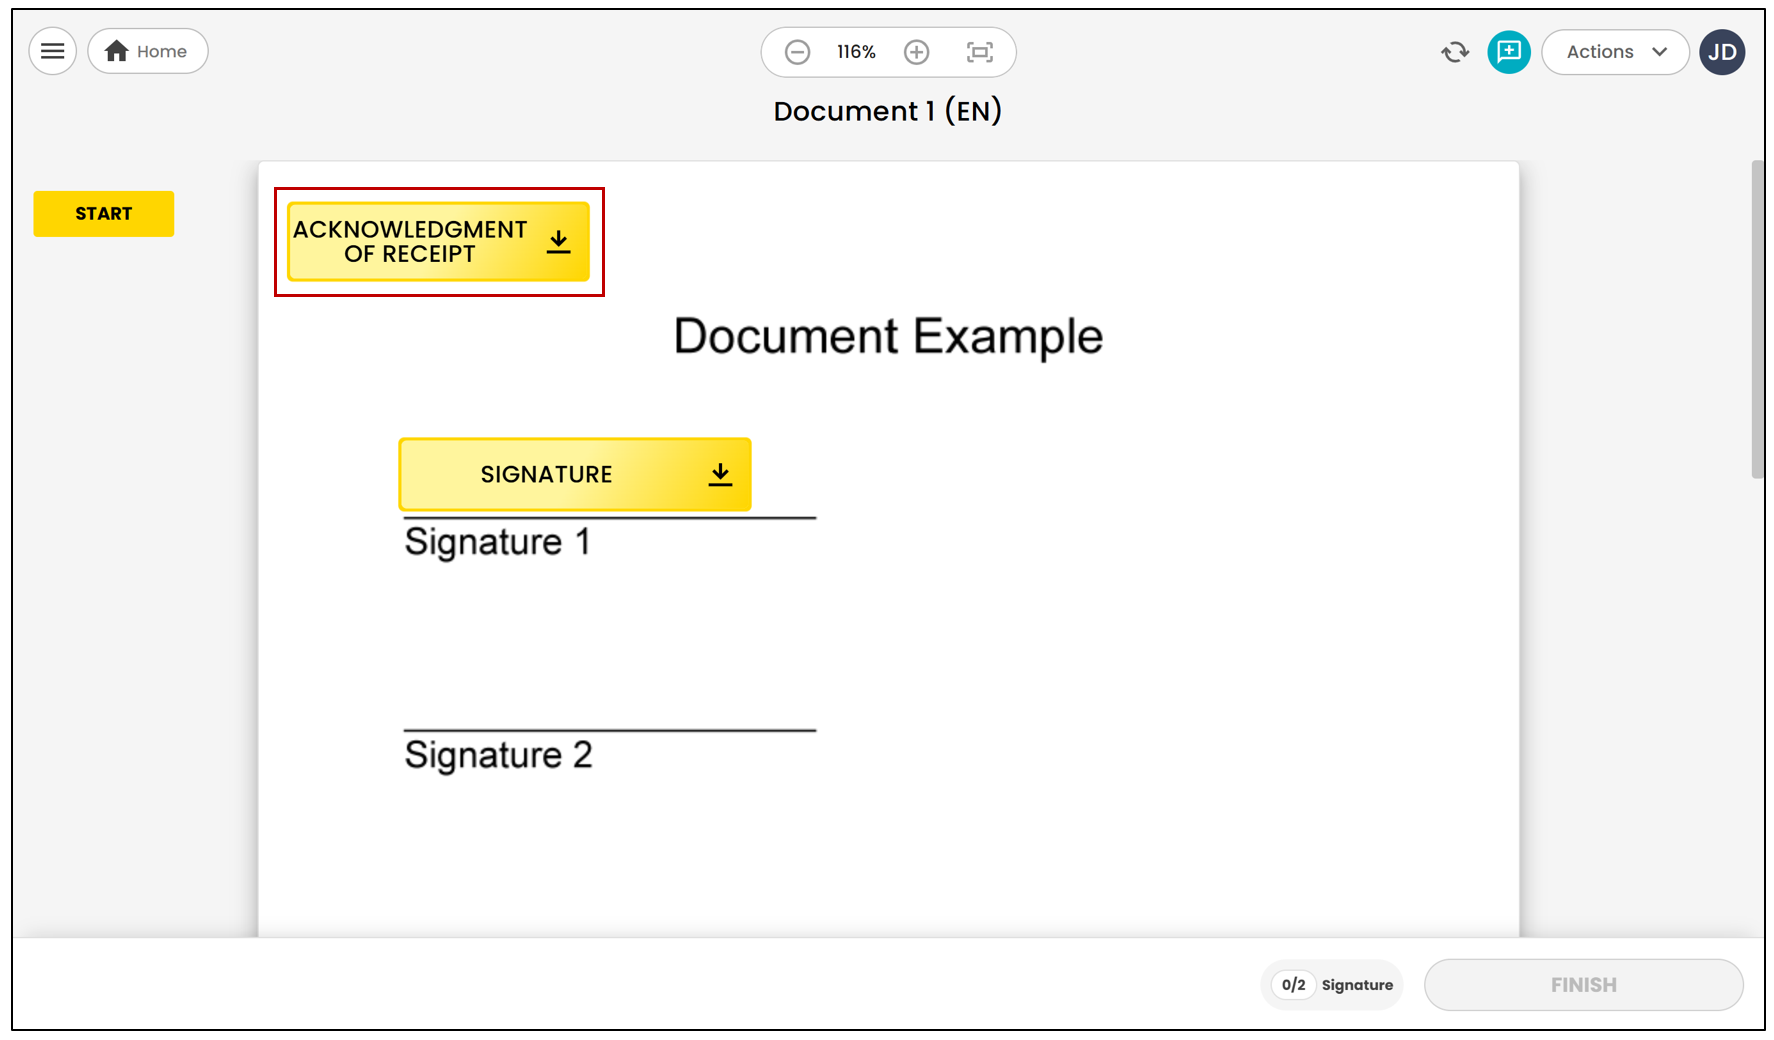
Here’s how the field will appear on the document once the electronic signature is completed.
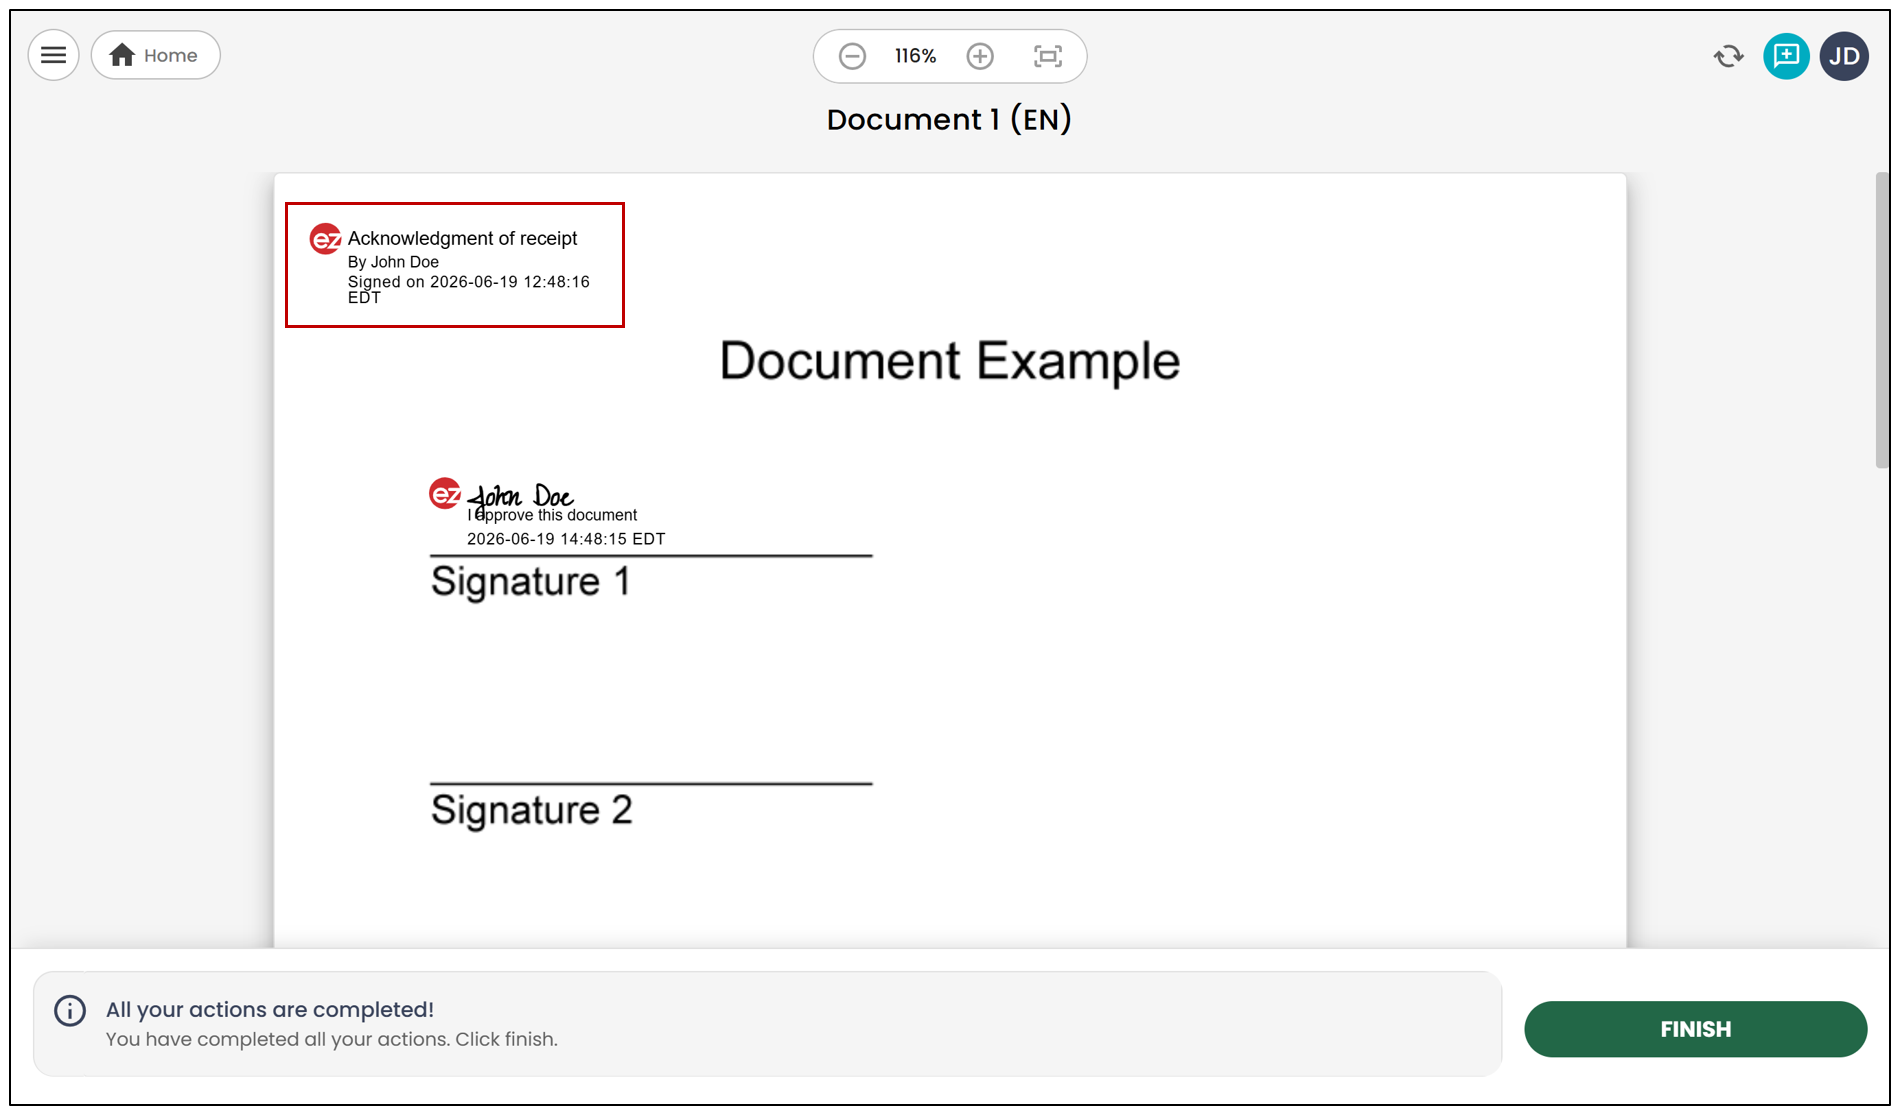
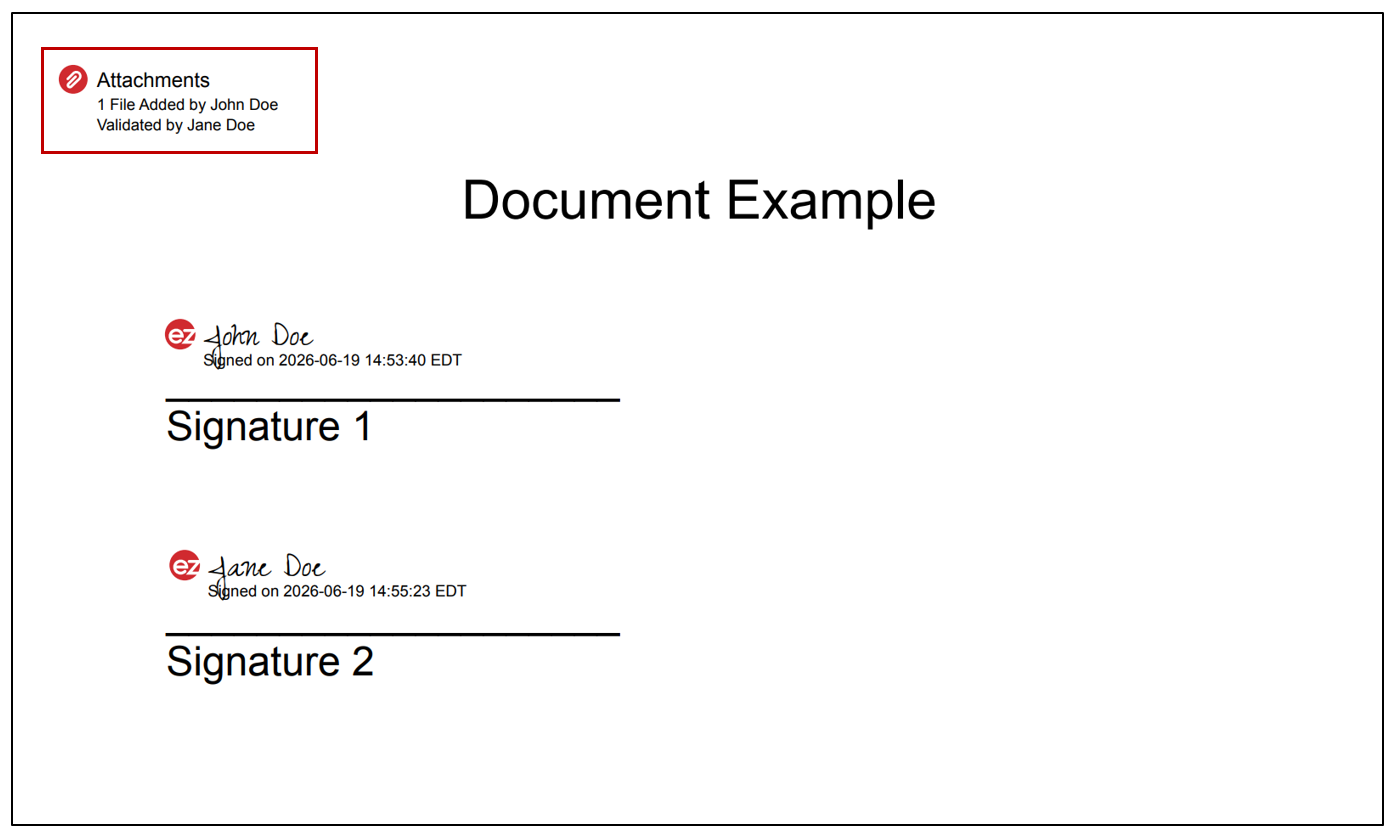
Attachments
- Allows signatories to add attachments to the document.
Field-Specific Settings
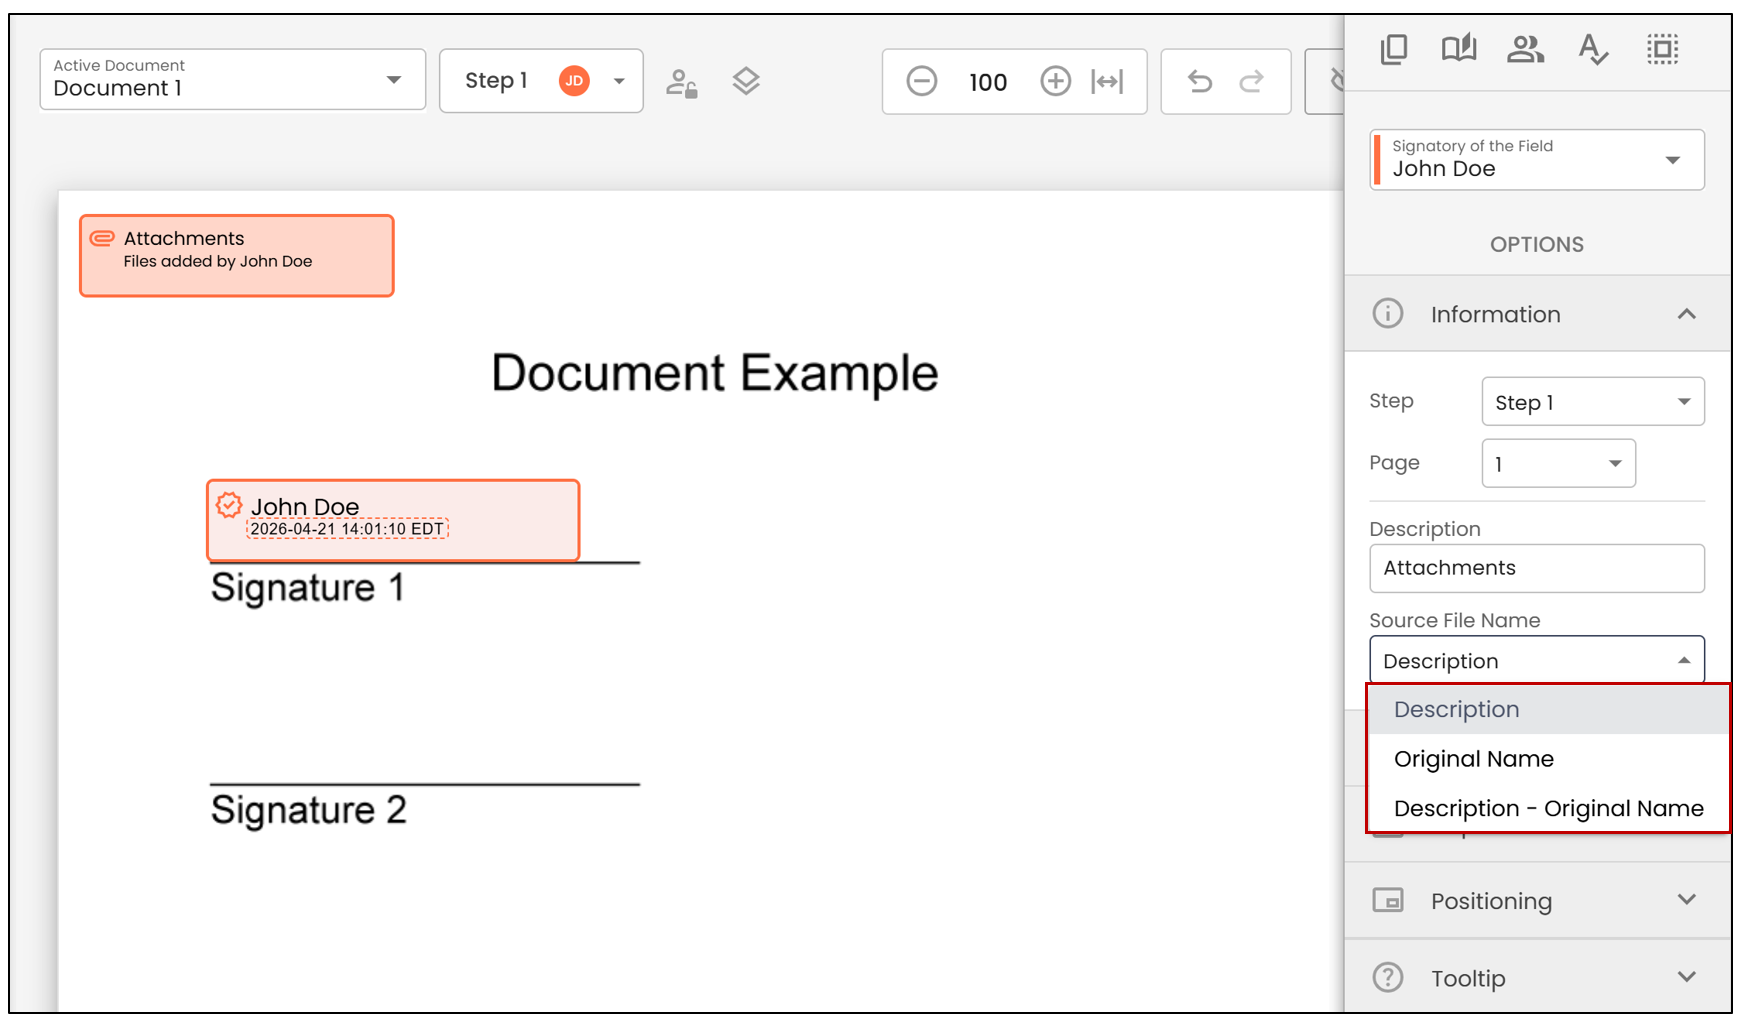
Identification
- Description : By default, the description is "Attachments," but you can modify it and enter the desired file name to be added.
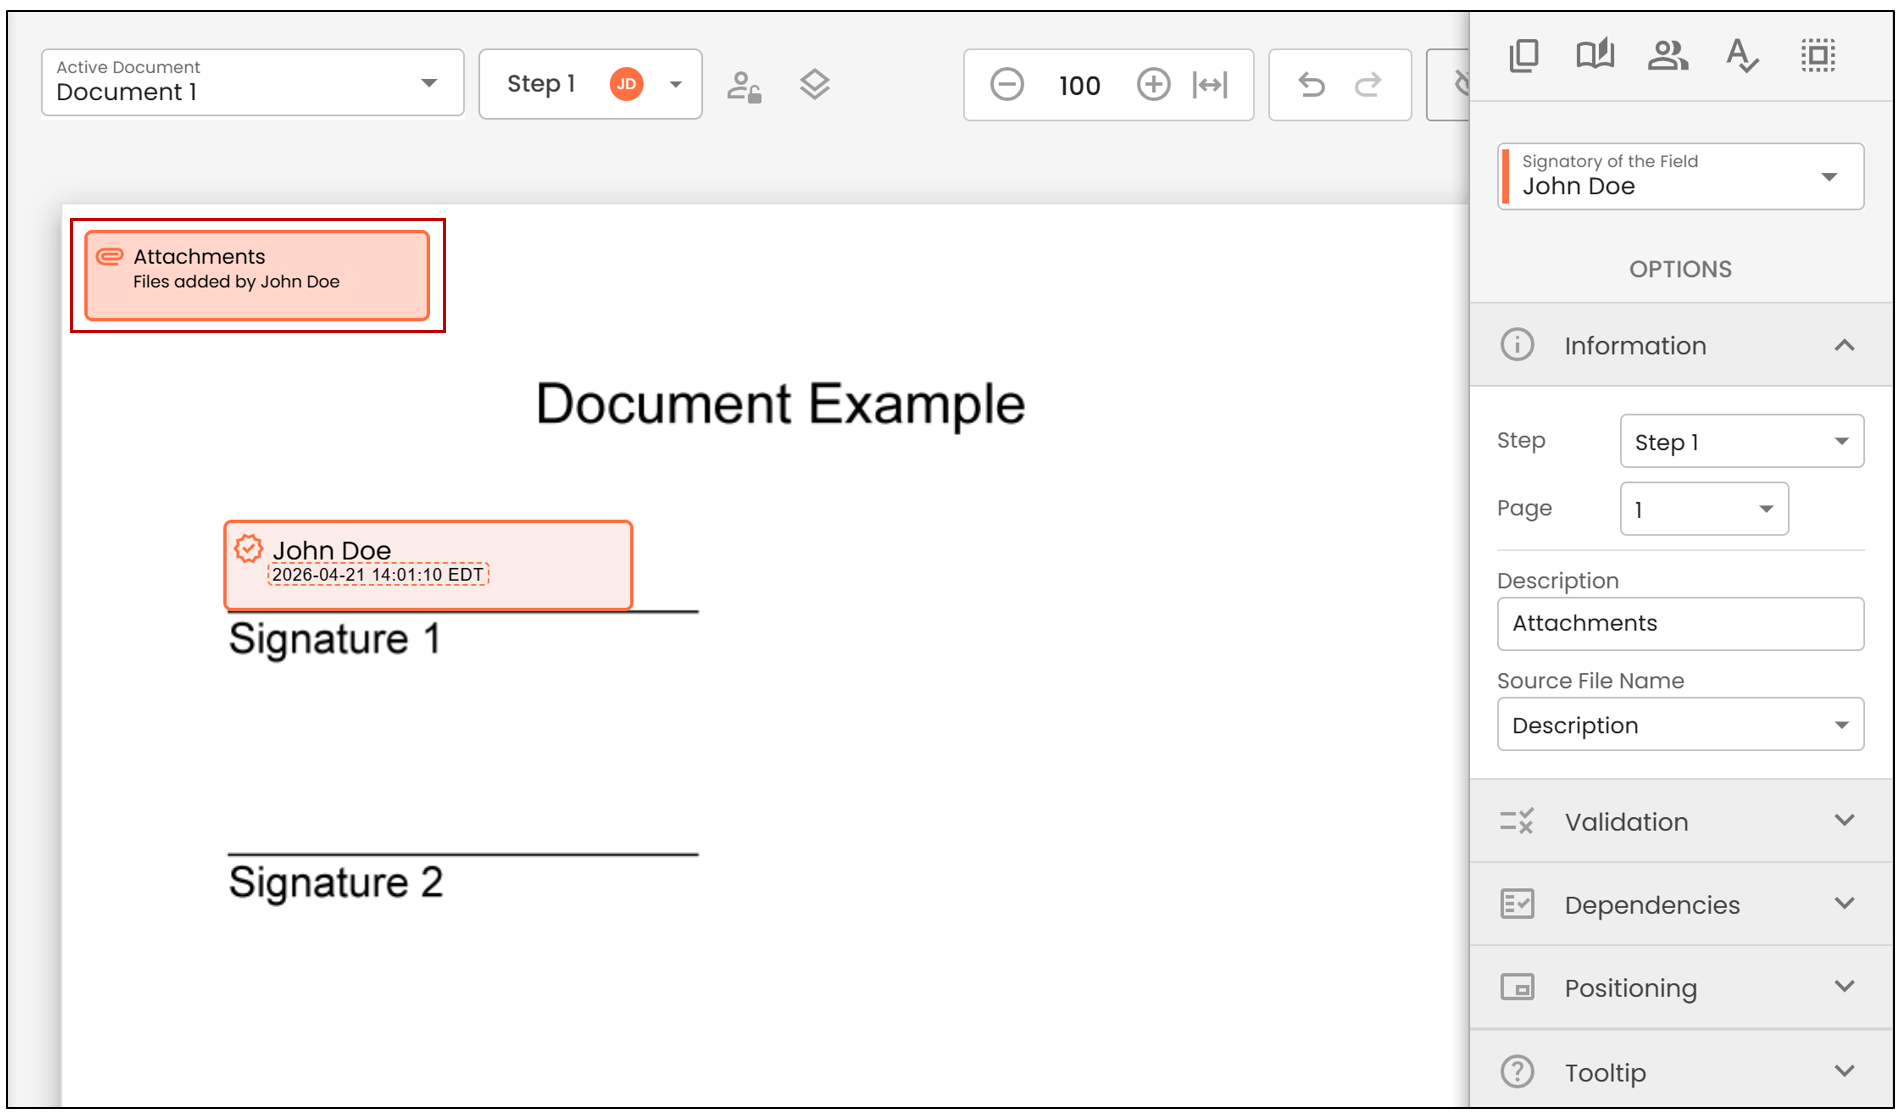
Source File Name: From the drop-down list, you can select:
Description : By default, the name entered in the Description field will appear in the document.
Original Name : The name the file has when uploaded (the name the client gave to their file) will appear in the document.
Description - Original Name : Both the name given in the description and the name the file has when uploaded (the name the client gave to their file) will appear in the document.
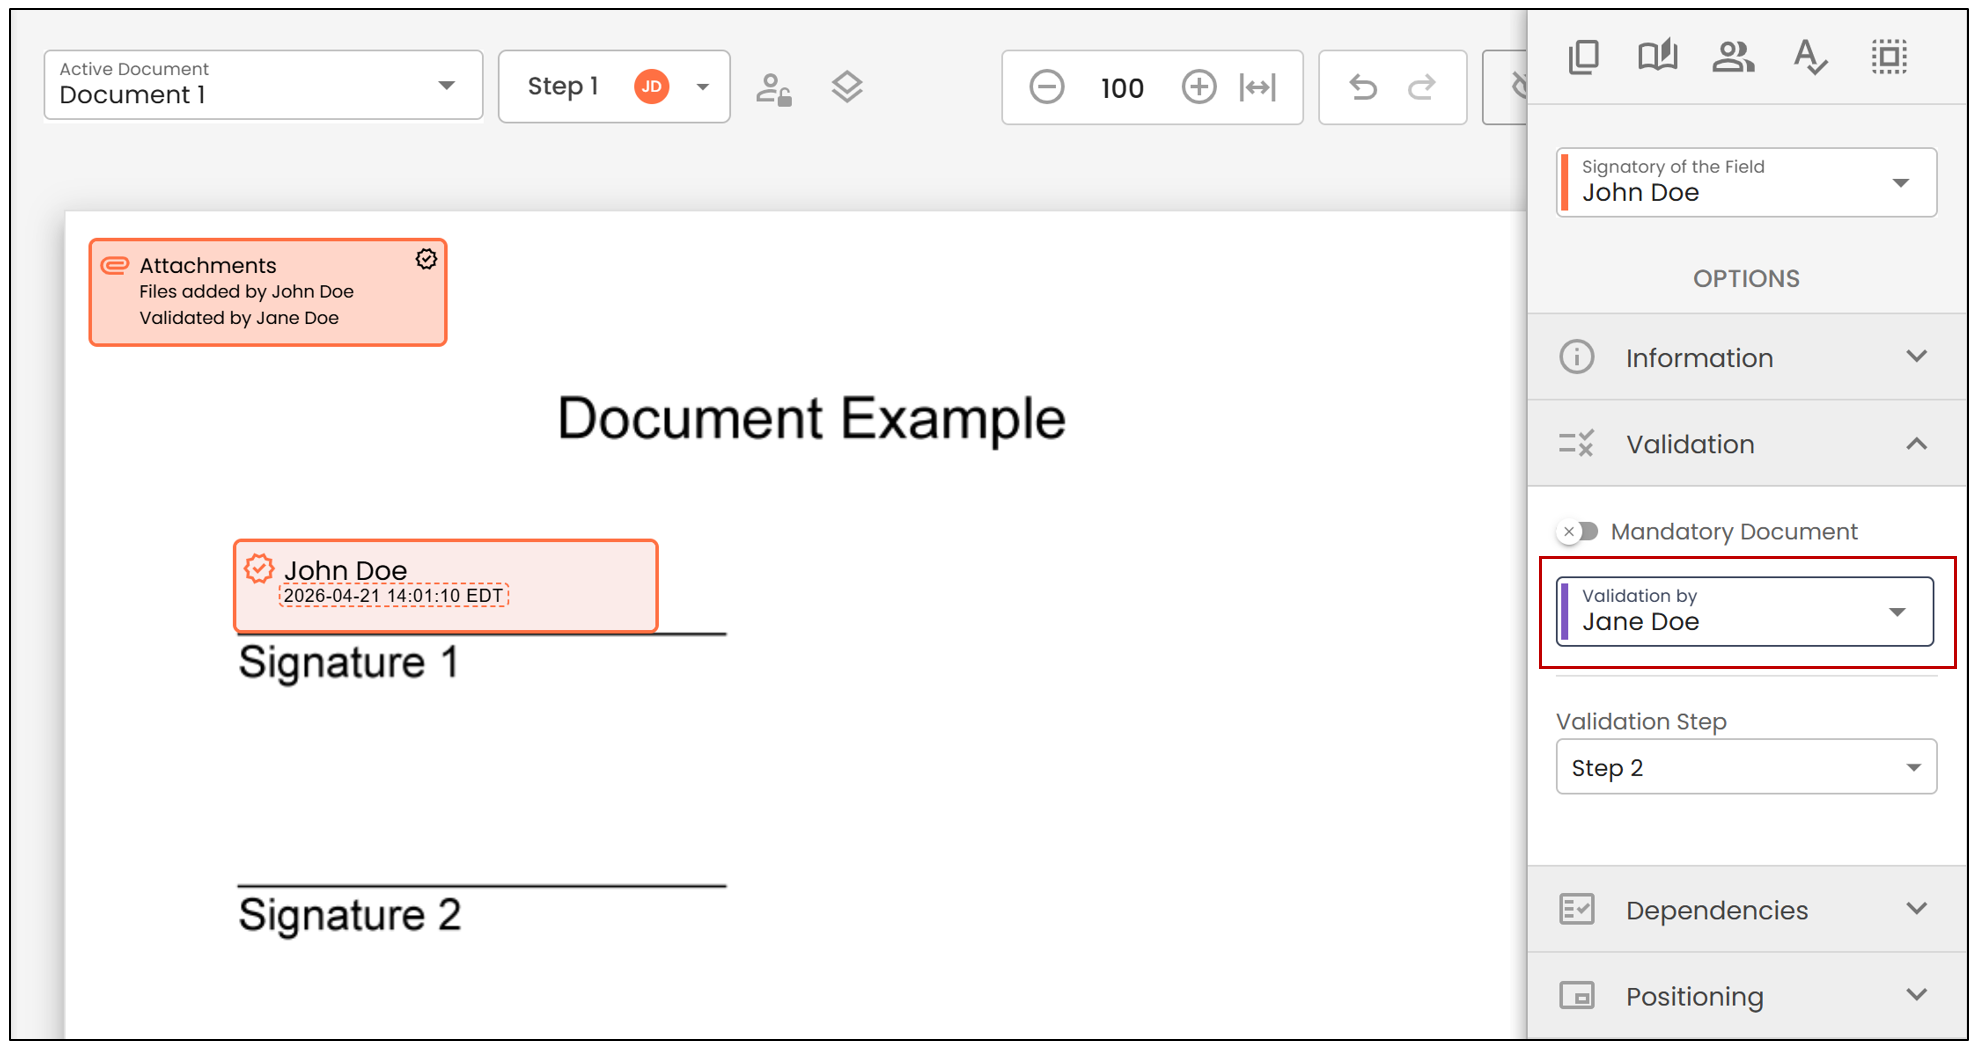
Validation
Mandatory Document : If checked, the signatory must add one or more attachments.
Validation By : Choose a system user who can validate the signatory’s attachment. For more information, see the article Attachment Validation.
Validation Step : Indicates the order in which validation must be performed and select the validation step.
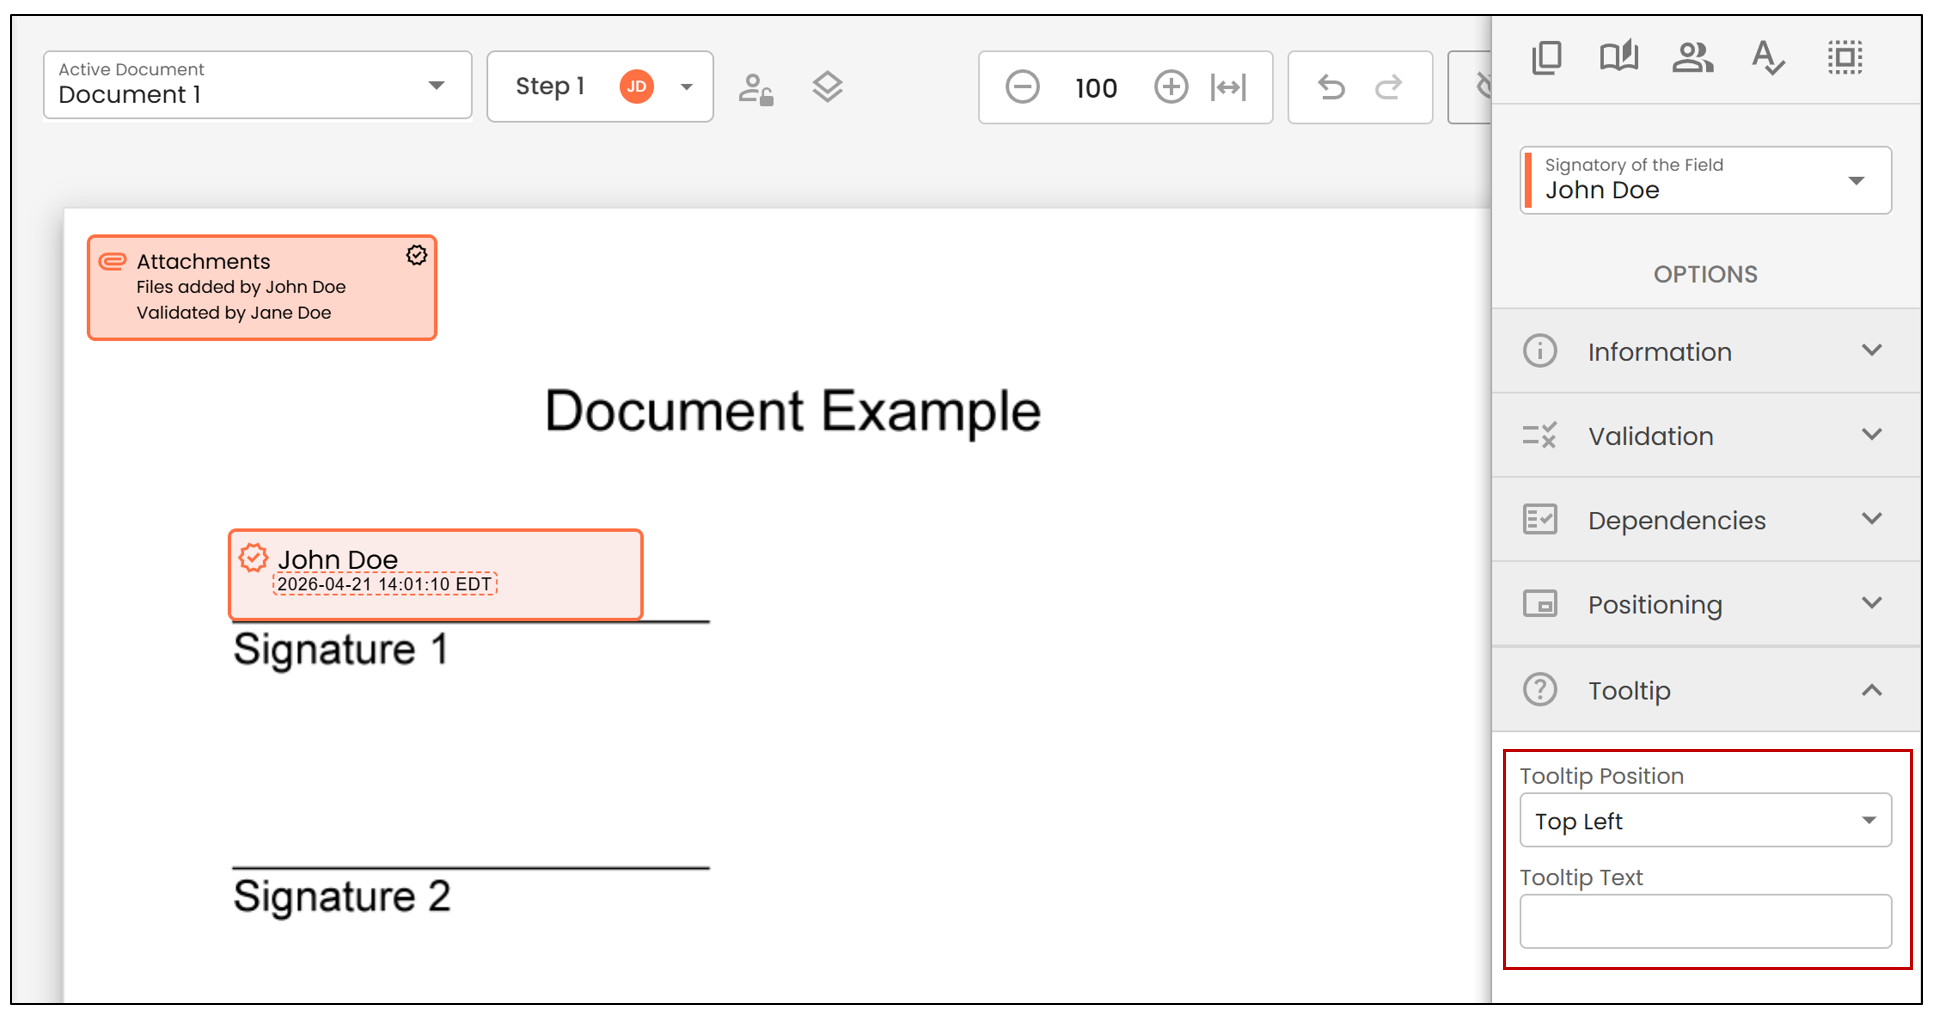
Tooltip : You can enter information for the signatory regarding the file to be added.
When all the desired fields are added/modified, click on Save.
NOTE: Only the user who created the folder can validate an attached file.
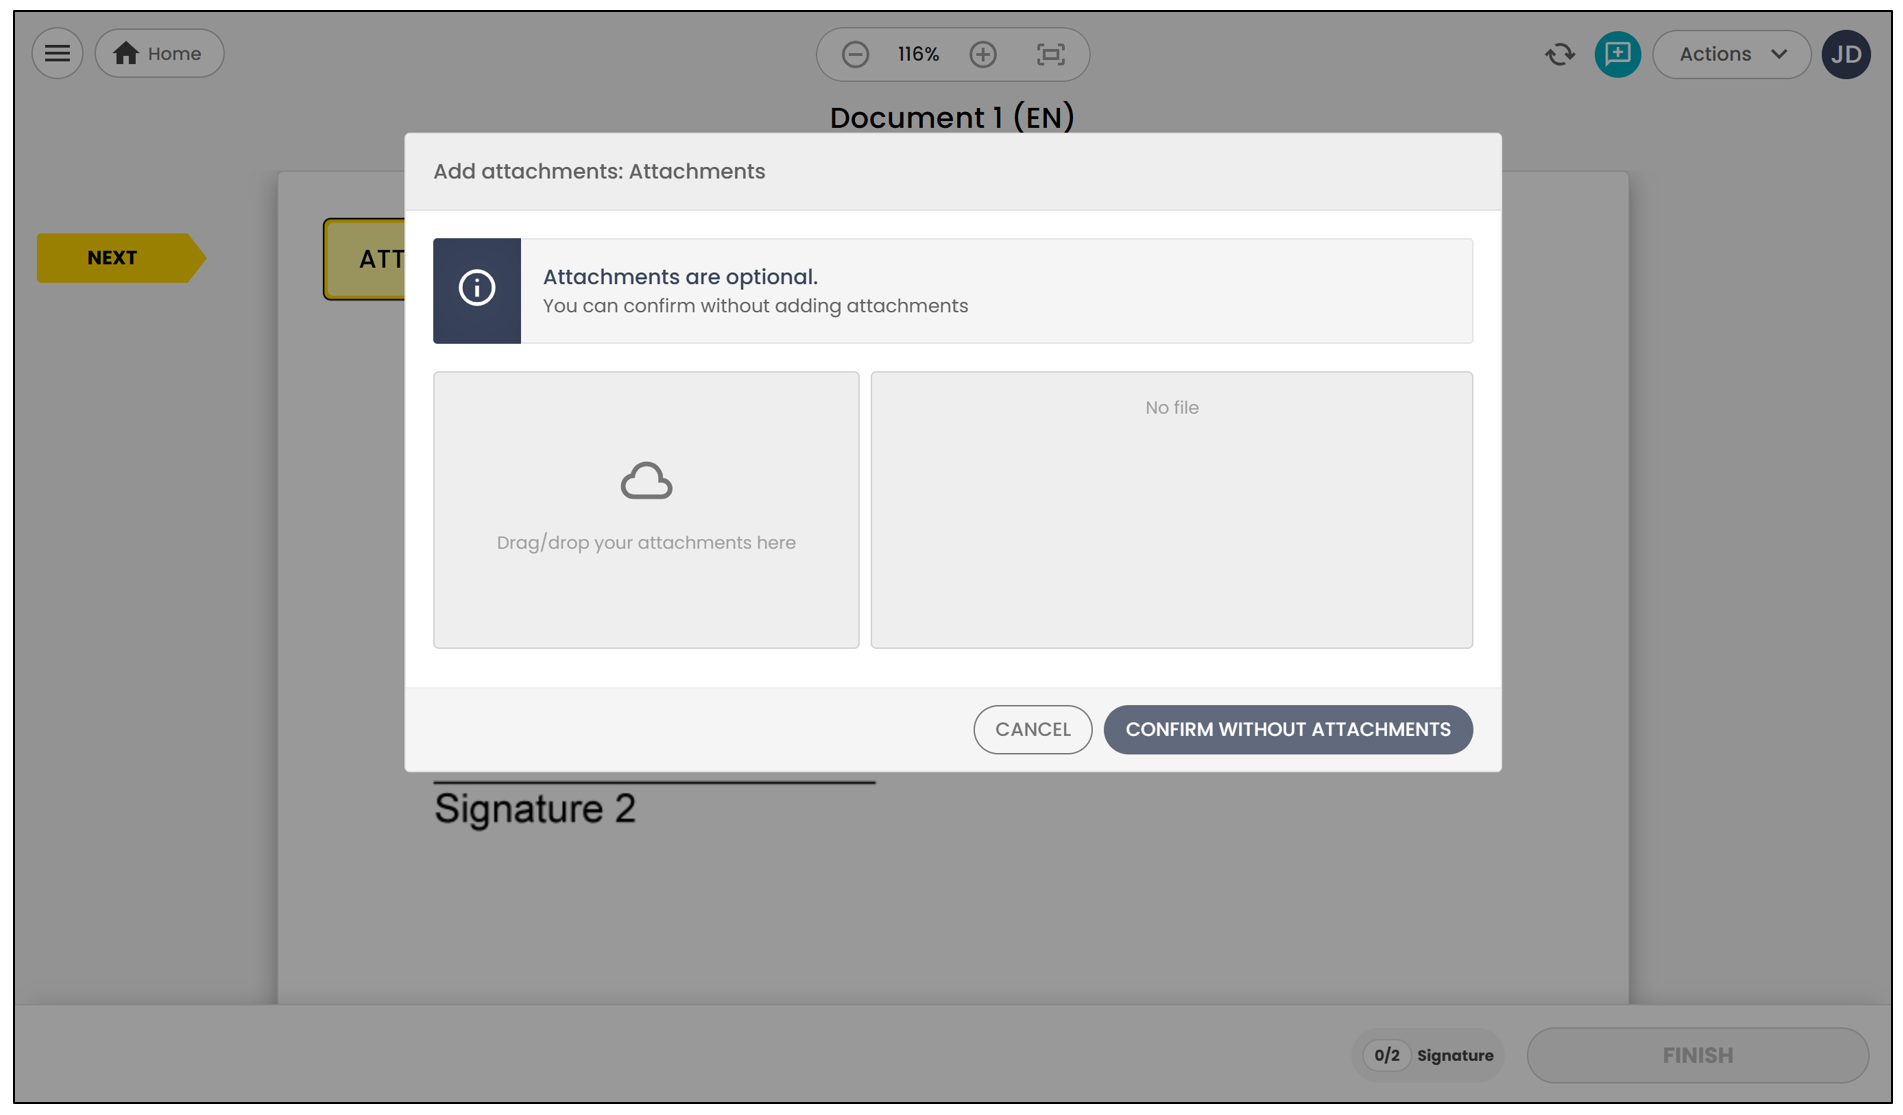
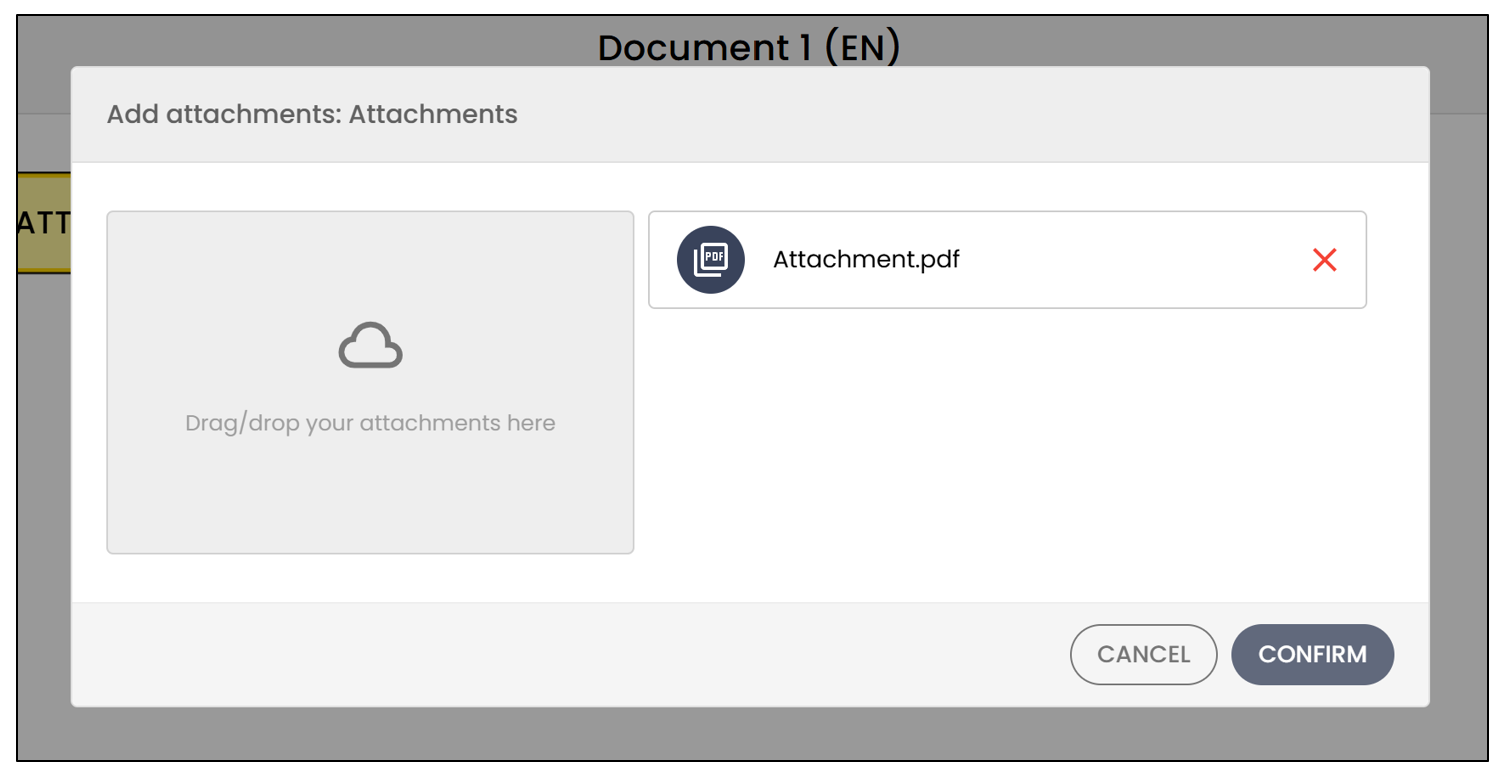
Here’s what the signatory will see when filling out the form field. They can then drag one or more attachments into the grey box below.
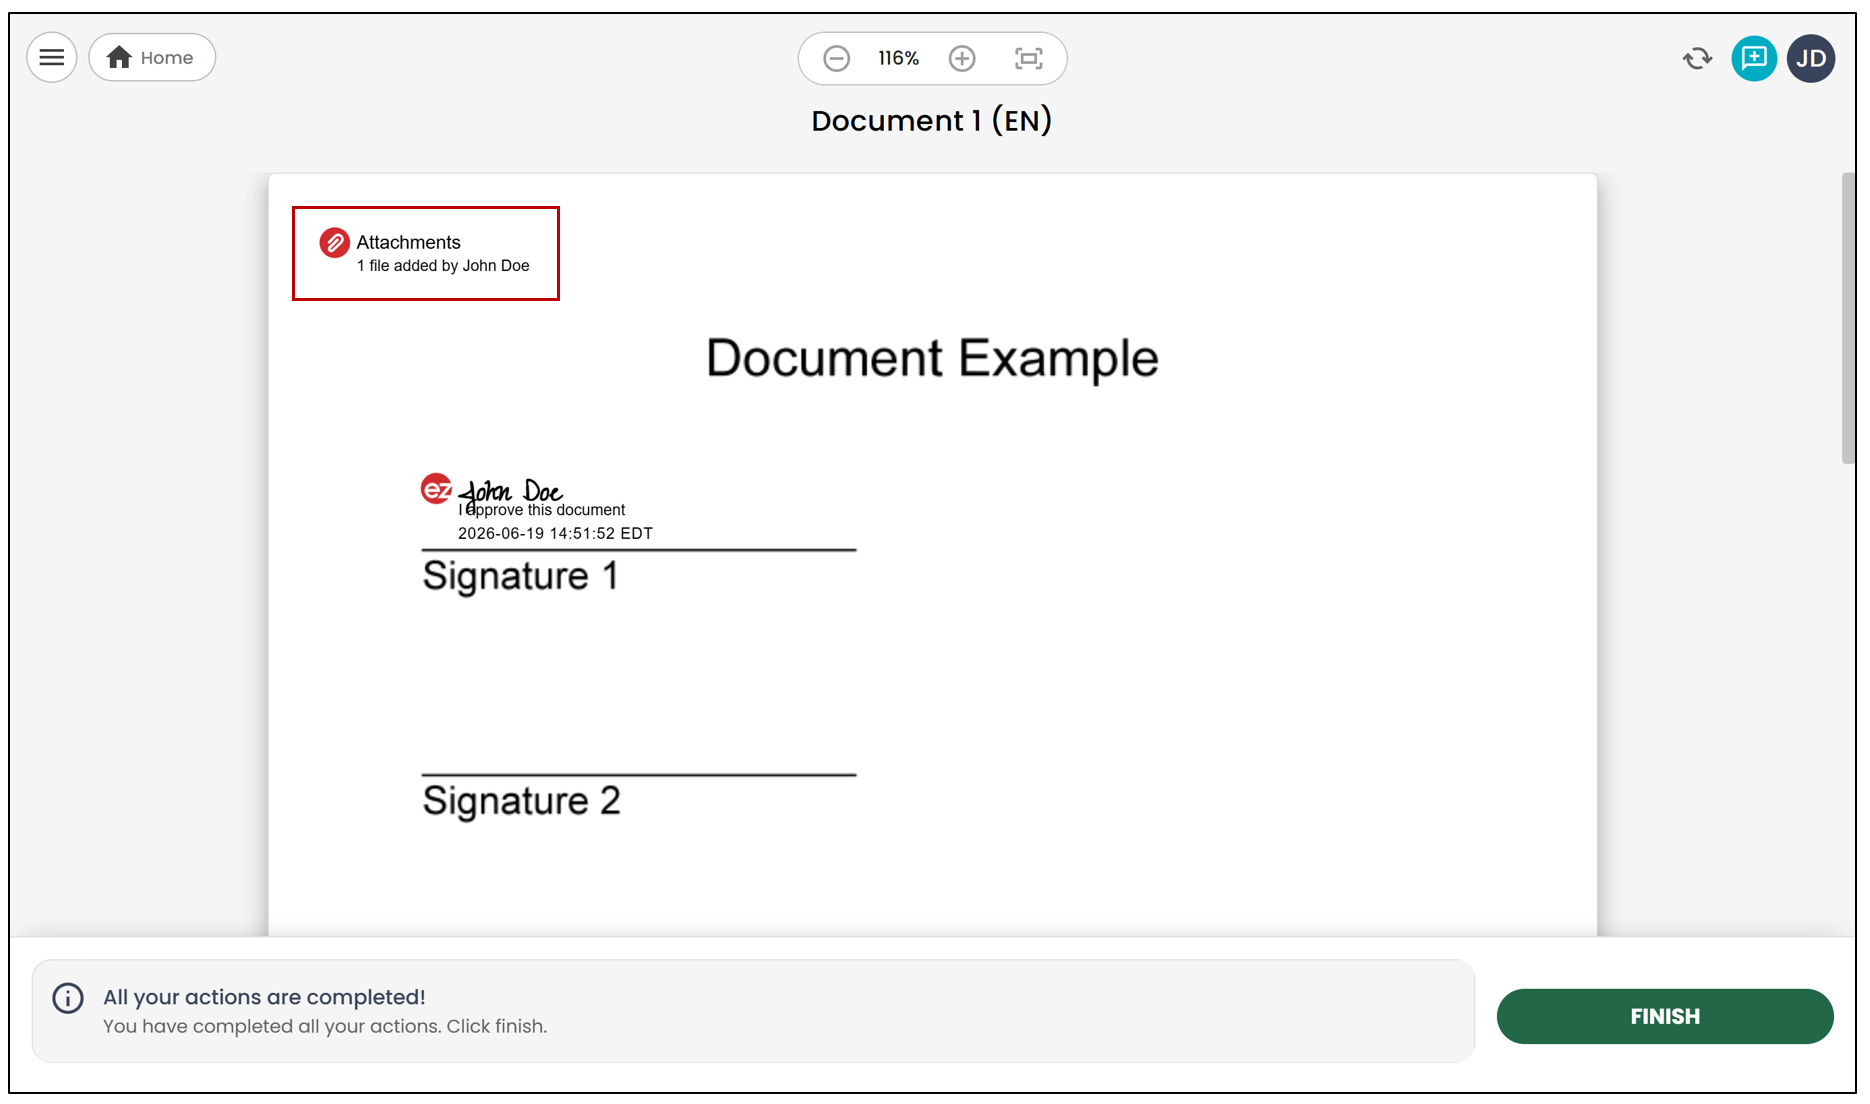
Here’s how the field will appear on the document once the attachment is added.
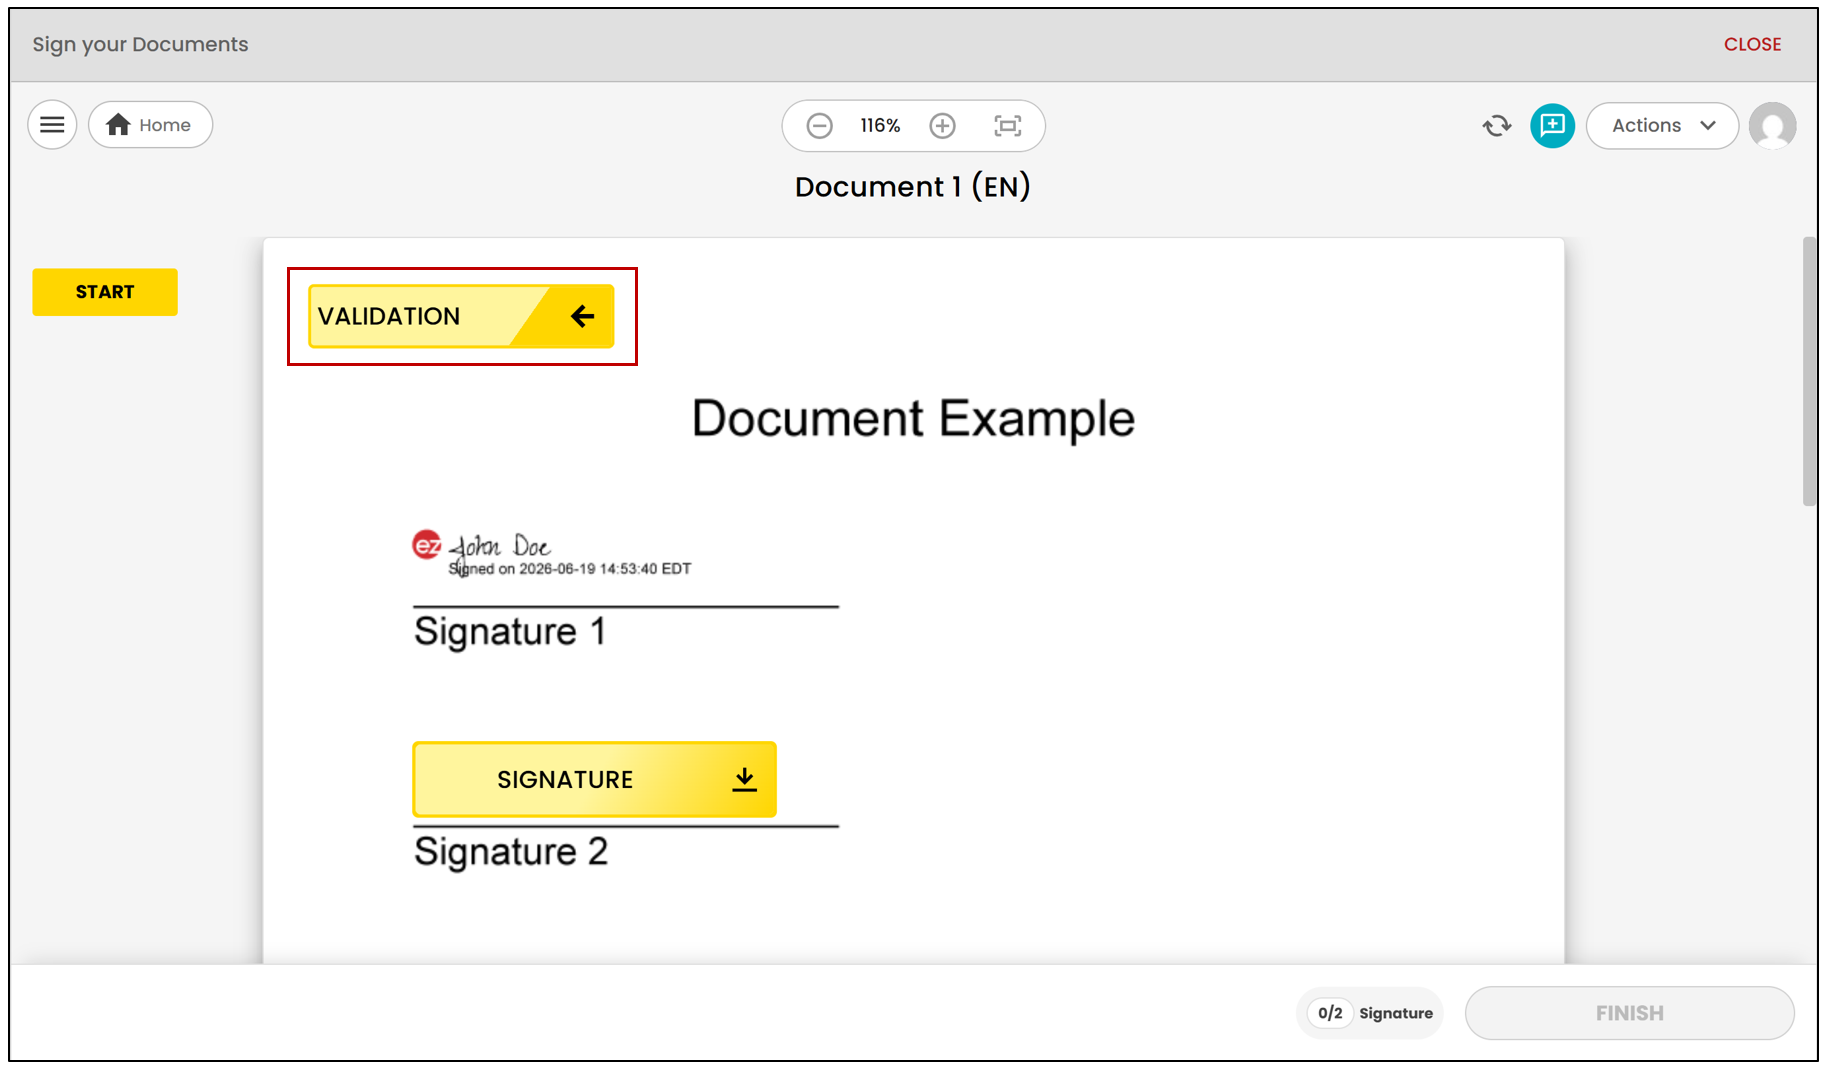
If the attachment needs to be validated by a system user, here’s what will appear during the validation process.
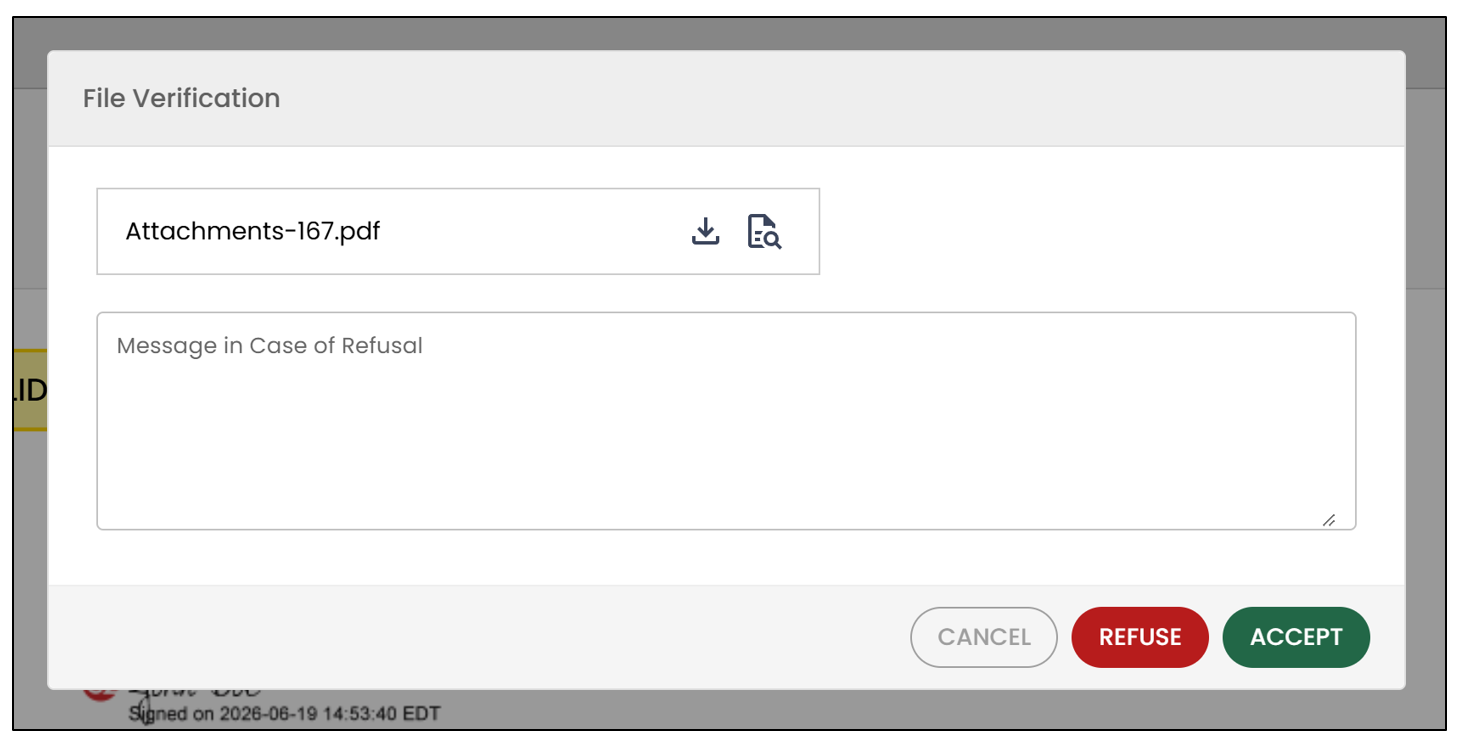
During the validation, the system user will be able to Accept or Reject the attachment. If it is rejected, the user will need to enter a message with an explanation. In the case of a rejection, the document will automatically return to the previous step.
Here’s how the field will appear on the document once the attachment is validated.
Text
- The signatory will be able to write text, but only on one line. By placing your cursor on the bottom right corner of the field, you can extend it to the maximum width of the document.
Field-Specific Settings
Validation
- Format : You can select a required format. For example, if you choose a specific date format, a calendar will appear during signing.
- Character Count : Enter the maximum number of characters that can be entered during the electronic signing of the document.
Dimensions
- Width : Allows you to modify the width of the field.
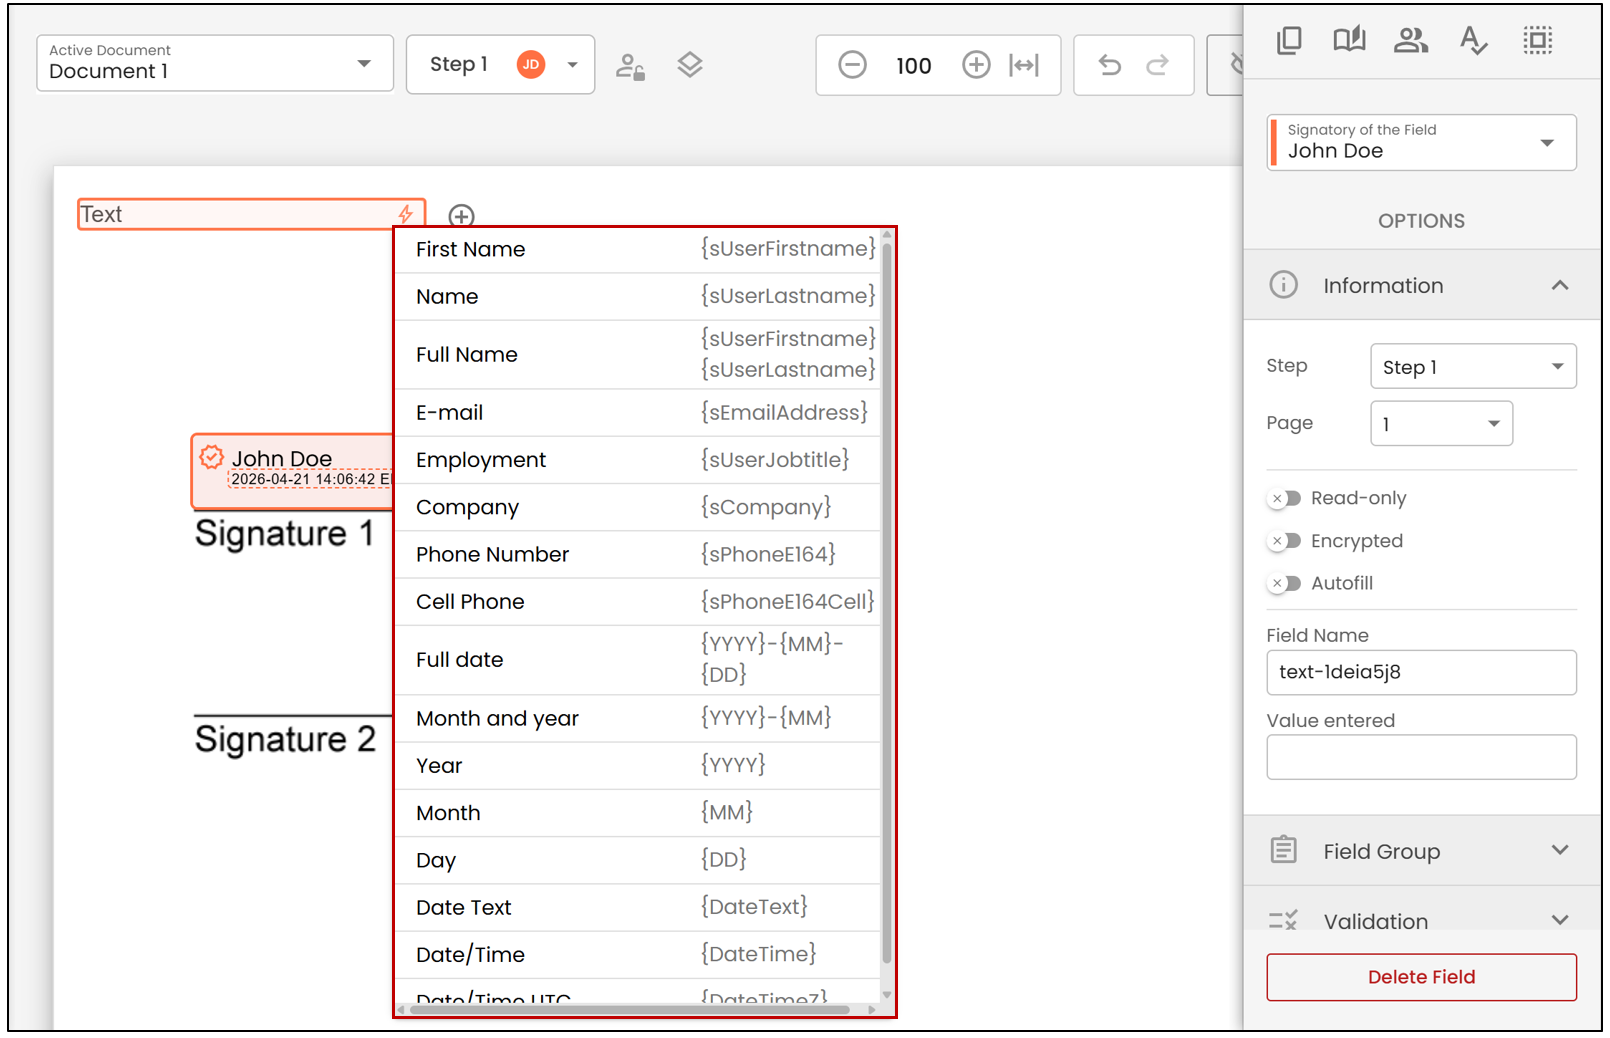
By clicking on the

icon, you will be able to directly modify what appears in this text field.
Multiline Text
- The signatory will be able to write text on multiple lines. By placing your cursor on the bottom right corner of the field, you can resize it to the maximum width and height of the document.
Field-Specific Settings
Validation
- Character Count : Enter the maximum number of characters that can be entered during the electronic signing of the document.
Dimensions
- Width : Allows you to modify the width of the field.
- Height : Allows you to modify the height of the field.
Annotation
- You will have the option to write text, but only on one line. By placing your cursor on the bottom right corner of the field, you can extend it to the maximum width of the document. The entered text cannot be modified by the signatory.
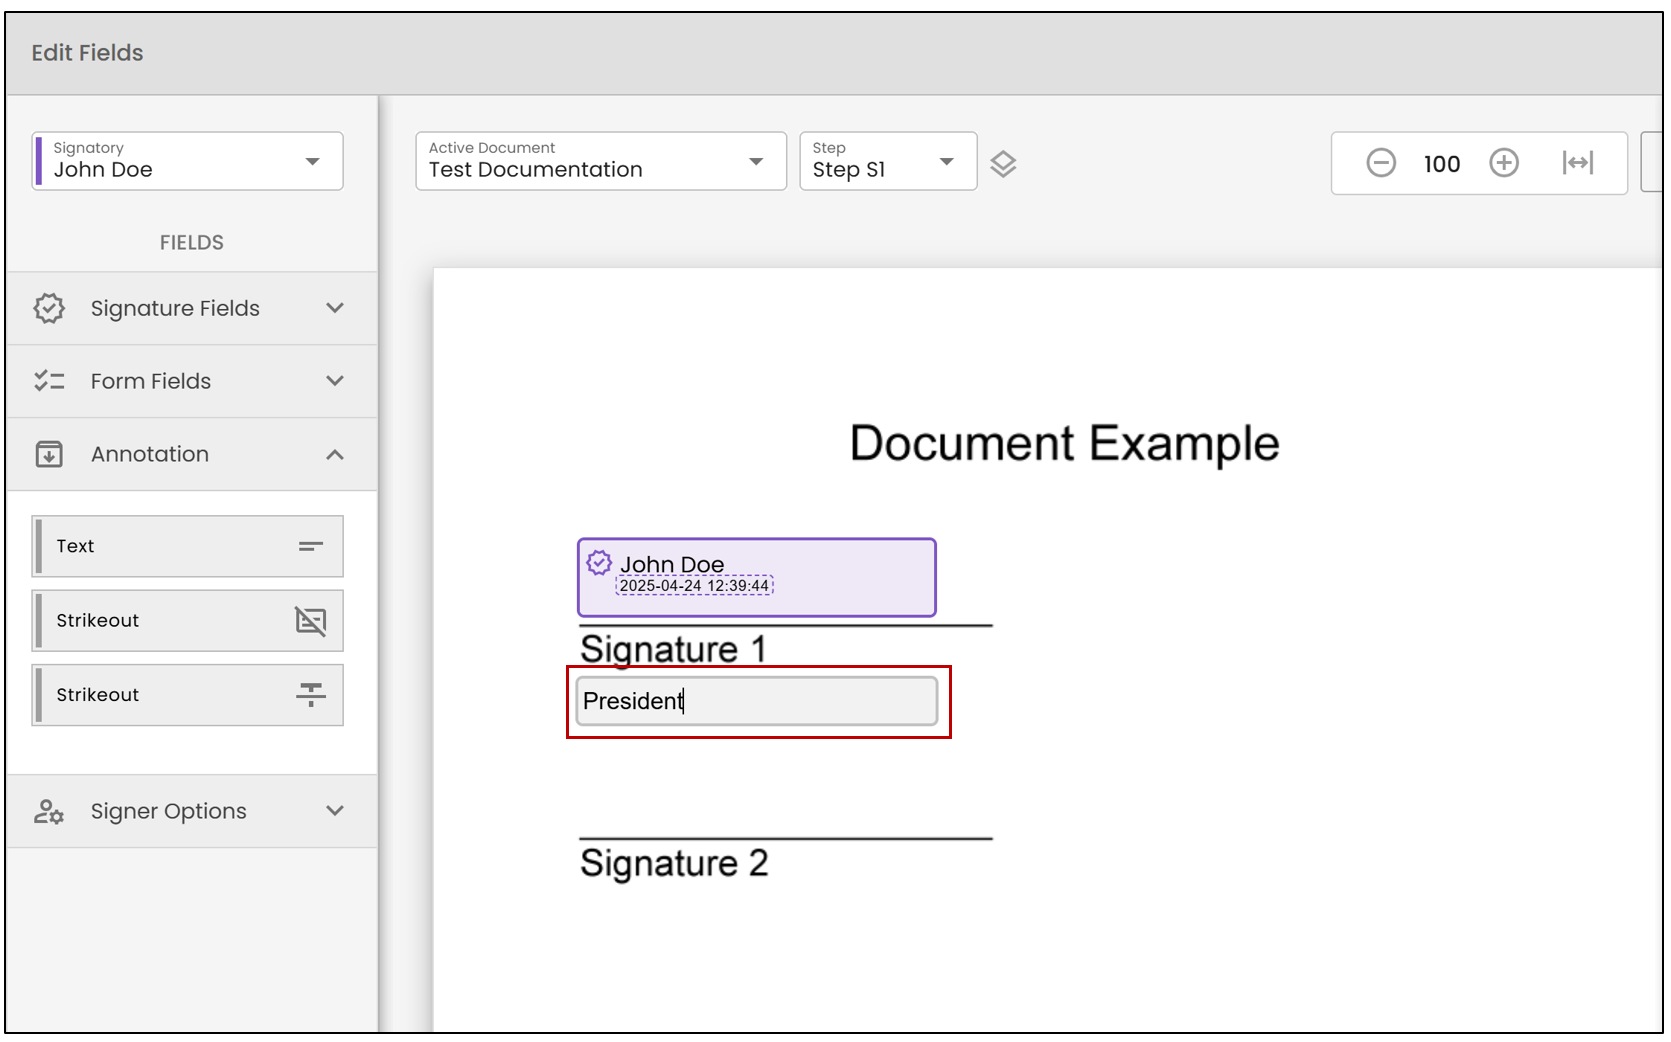
Here’s how the field will appear on the document once it is signed.