
English
Synchronization and Automatic Step Association
Step Synchronization
Step synchronization prevents a step from progressing until all documents associated with that step are fully signed. For example, step 1 will not move on to step 2 until all documents related to step 1 have been completed.
This synchronization must be enabled by Folder Type.
NOTE: The Step Synchronization feature is only available for Pro and Enterprise accounts.
Automatic Step Association
The automatic step association feature allows the signing order to be synchronized across multiple documents within the same folder.
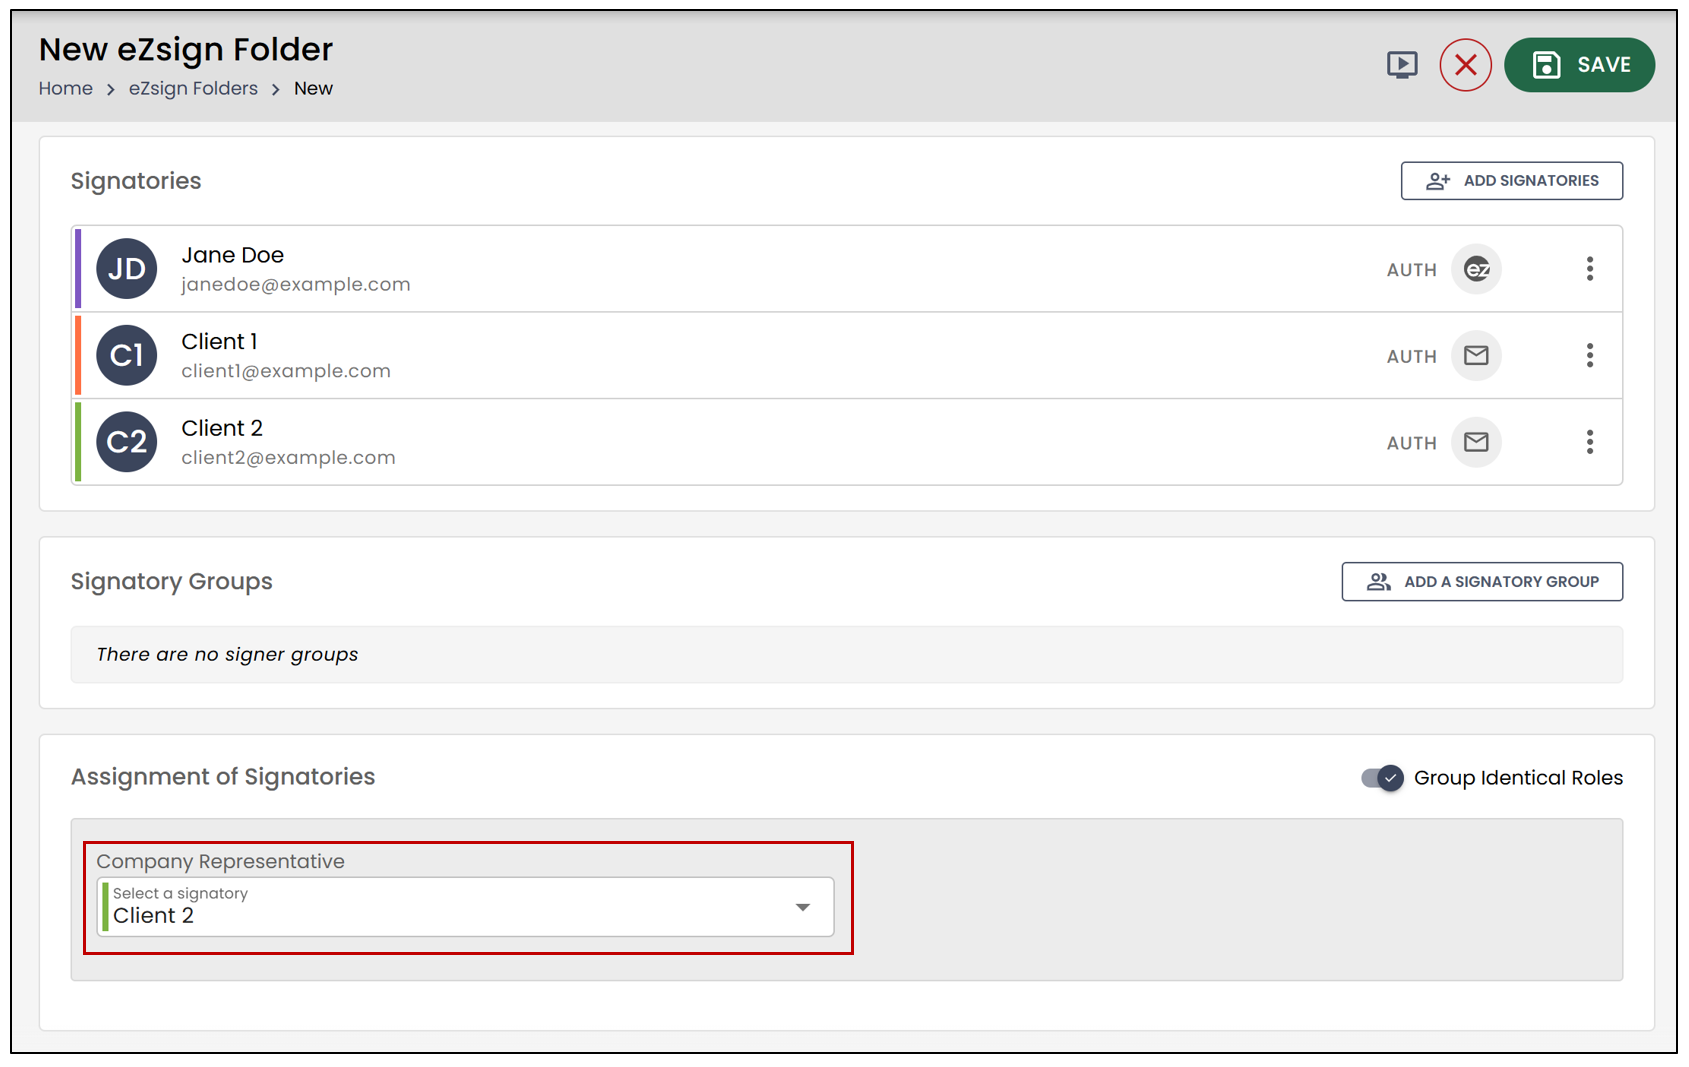
After creating the documents, add the signatories to the folder. In this example, three signatories are added: two external signatories and the account user. Client 2 is assigned the “Company Representative” role on one of the documents.
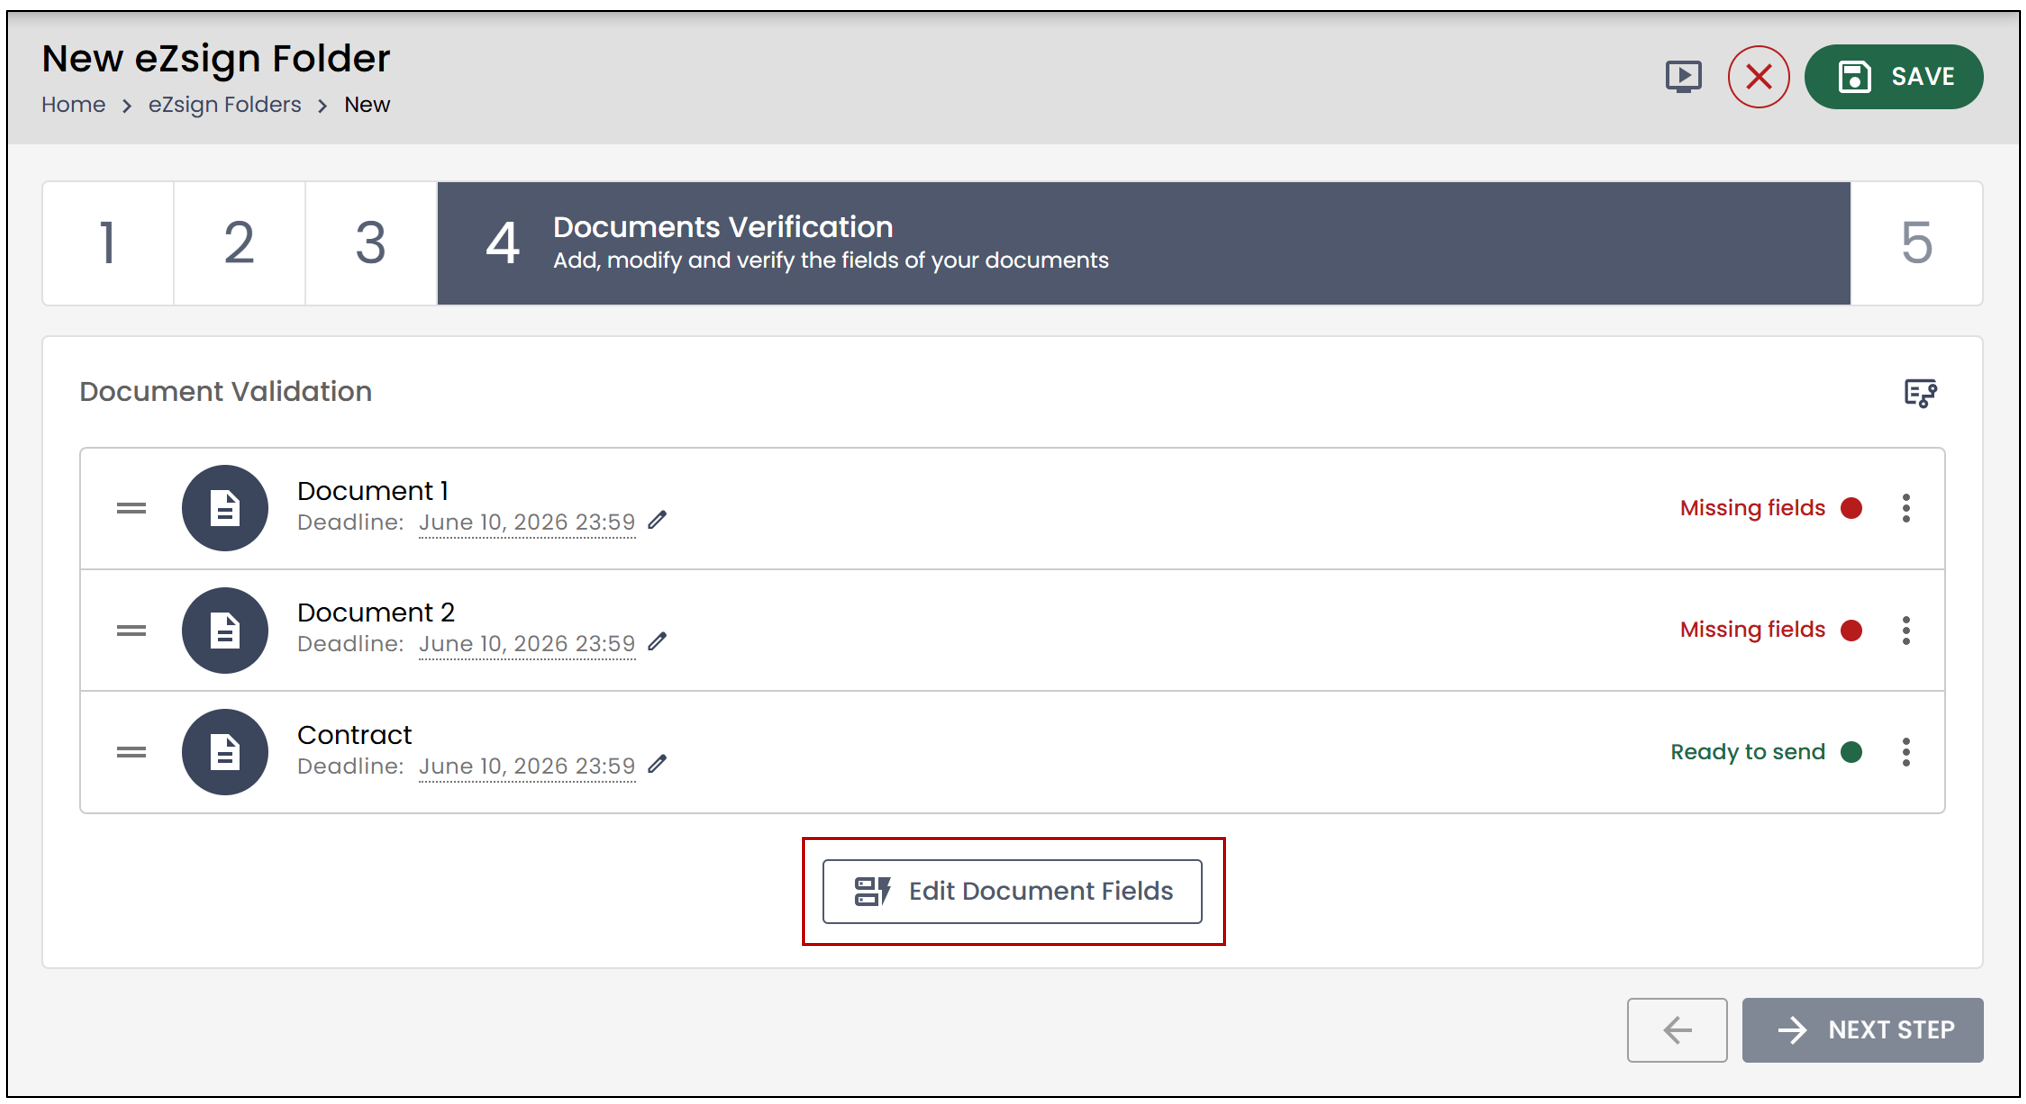
- Click Next step , then click the corresponding button to edit the fields of all documents.
Before adding fields to the documents, you will have the option to enable Automatic Step Association. When Automatic Step Association is enabled, each signatory is assigned to a specific step.
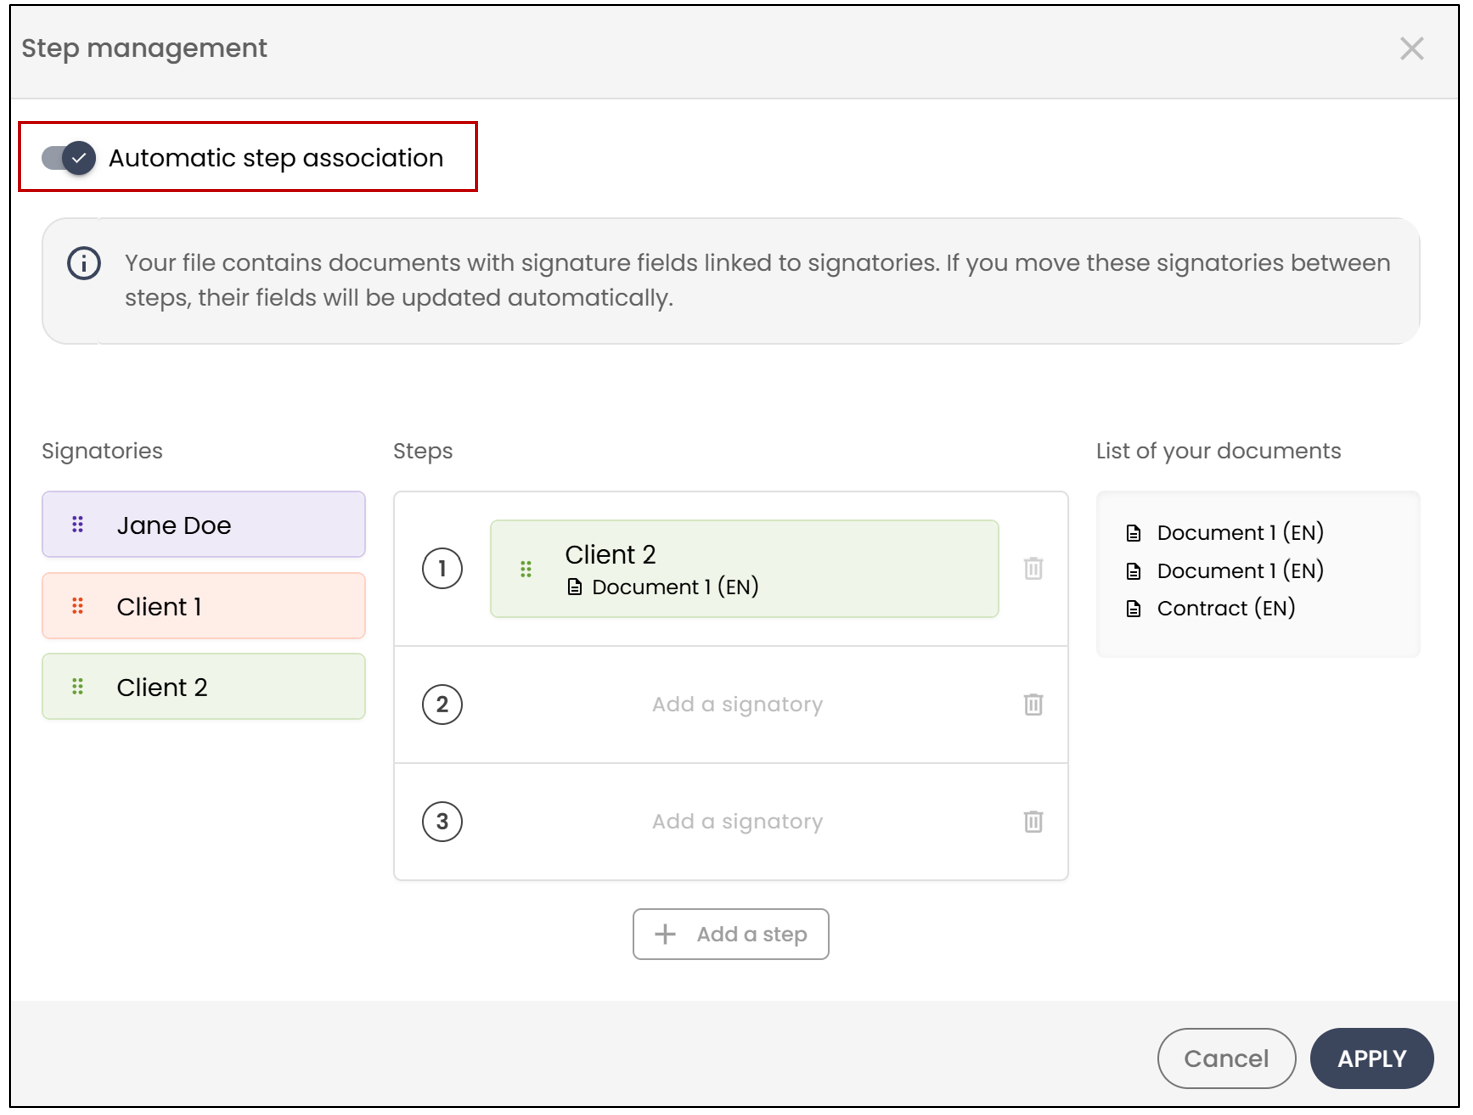
- On the right, you can view the List of your documents.
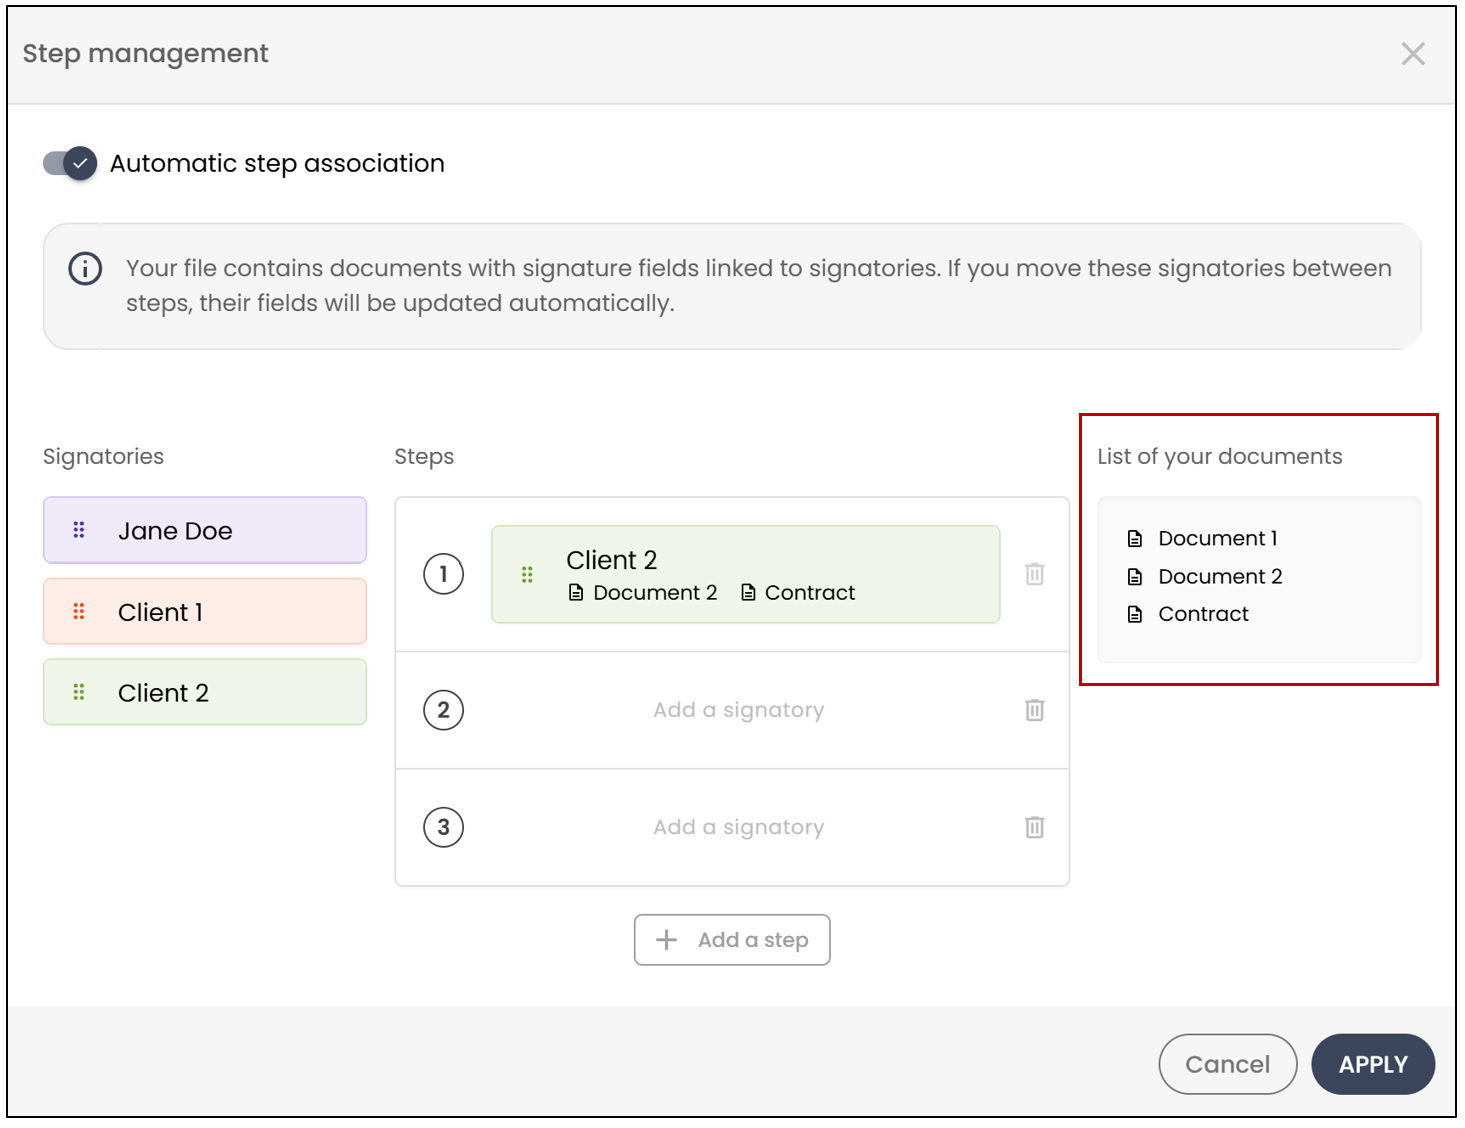
NOTE: In this example, Client 2 is already assigned to step 1 because they are associated with the existing template. In the current folder, they are required to sign at step 3.
- Drag the signatories to each desired step, then click Apply.
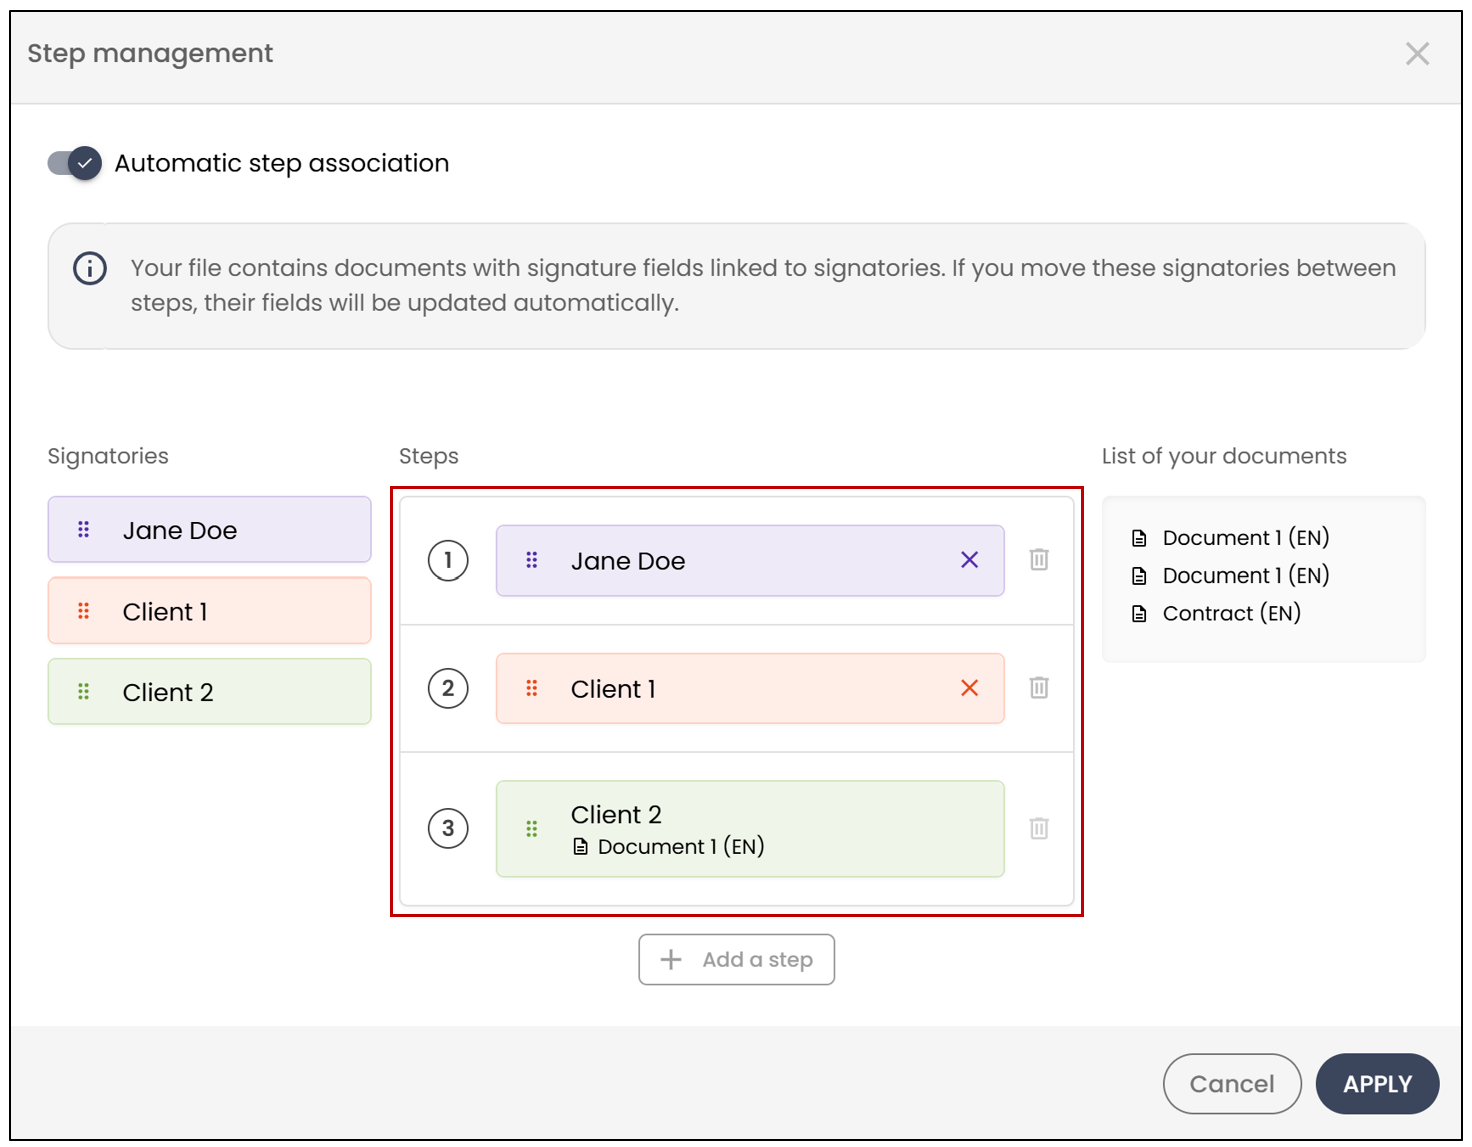
Each signature field will be automatically placed in the correct step based on the signatory (Jane Doe: step 1, Client 1: step 2, Client 2: step 3).
If a field is added to another document, the signatory keeps their assigned step. For example, if only Client 2 is added to document 1, they will still sign at step 3.
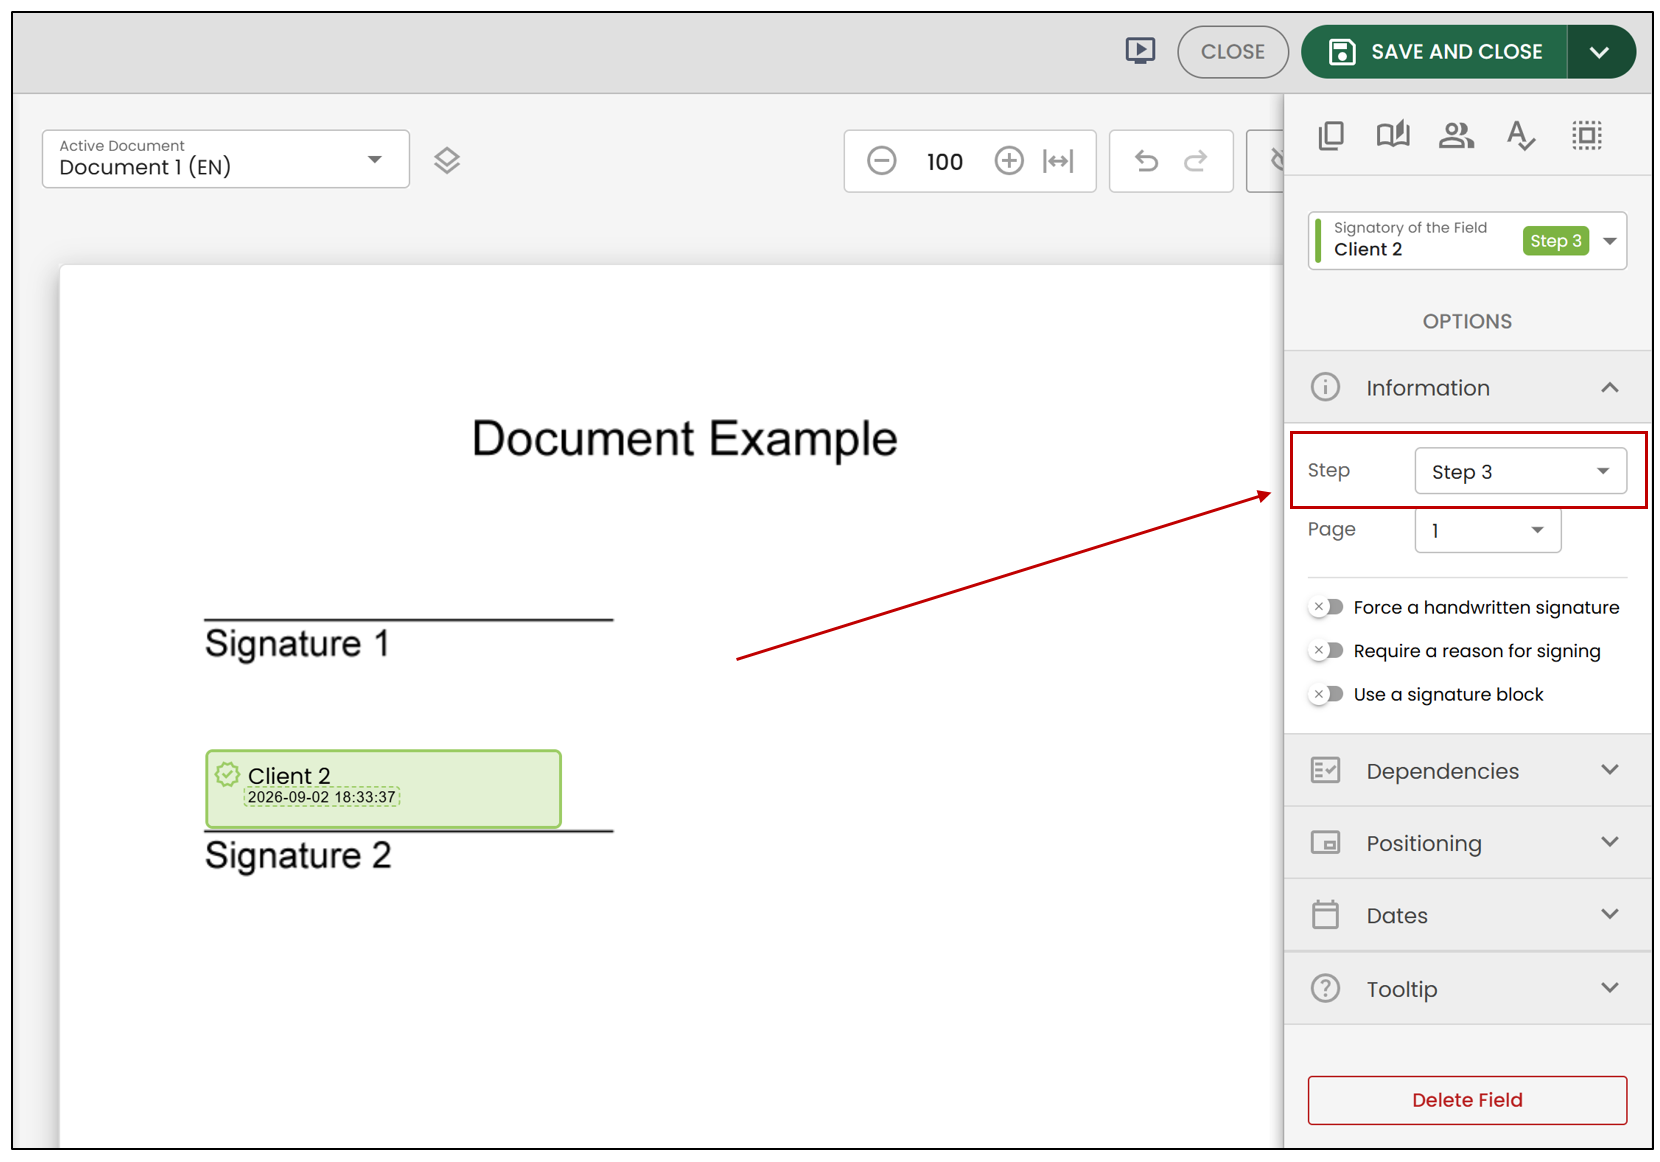
NOTE: When an eZsign template is used during folder creation and roles are assigned, the template fields retain their configuration.
A Signatory Must Sign in Two Separate Steps
It is possible to assign the same signatory to two different steps within the same document.
- To add a step, click Step Settings , then click Add a Step.
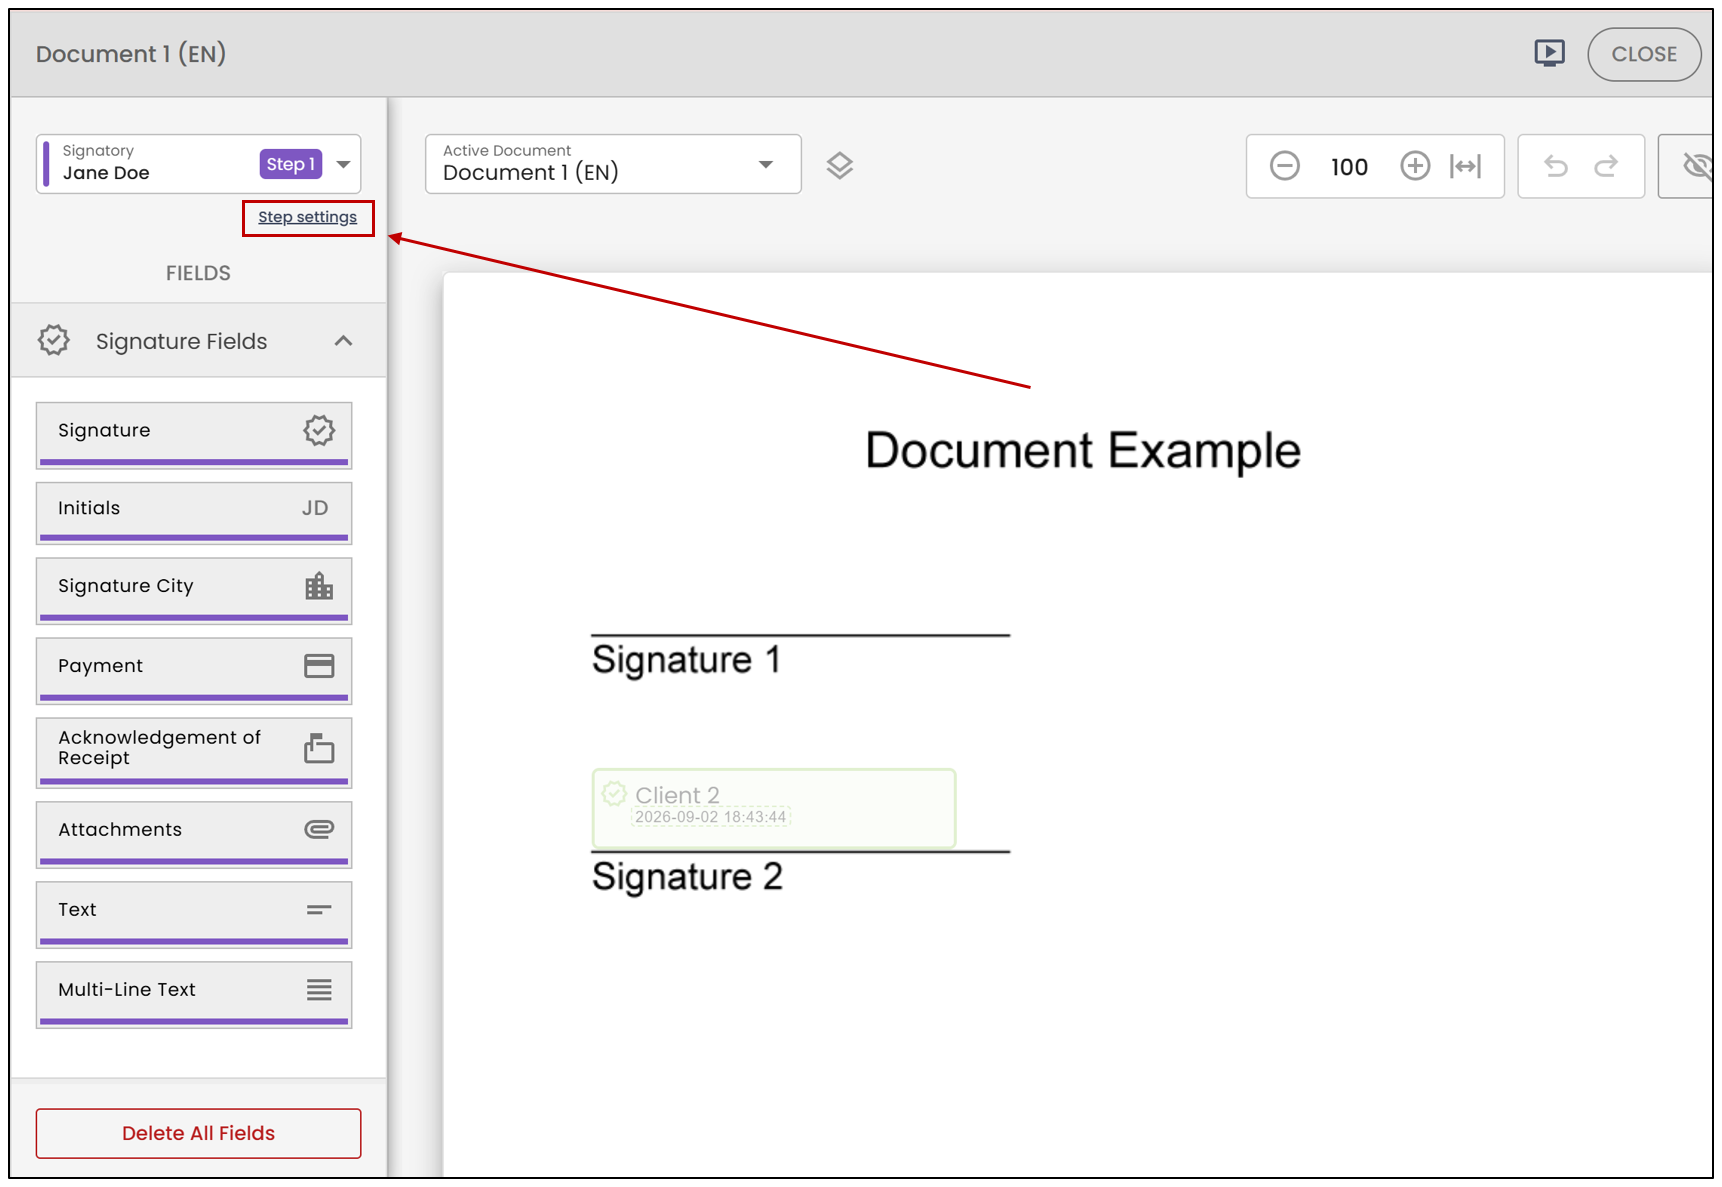
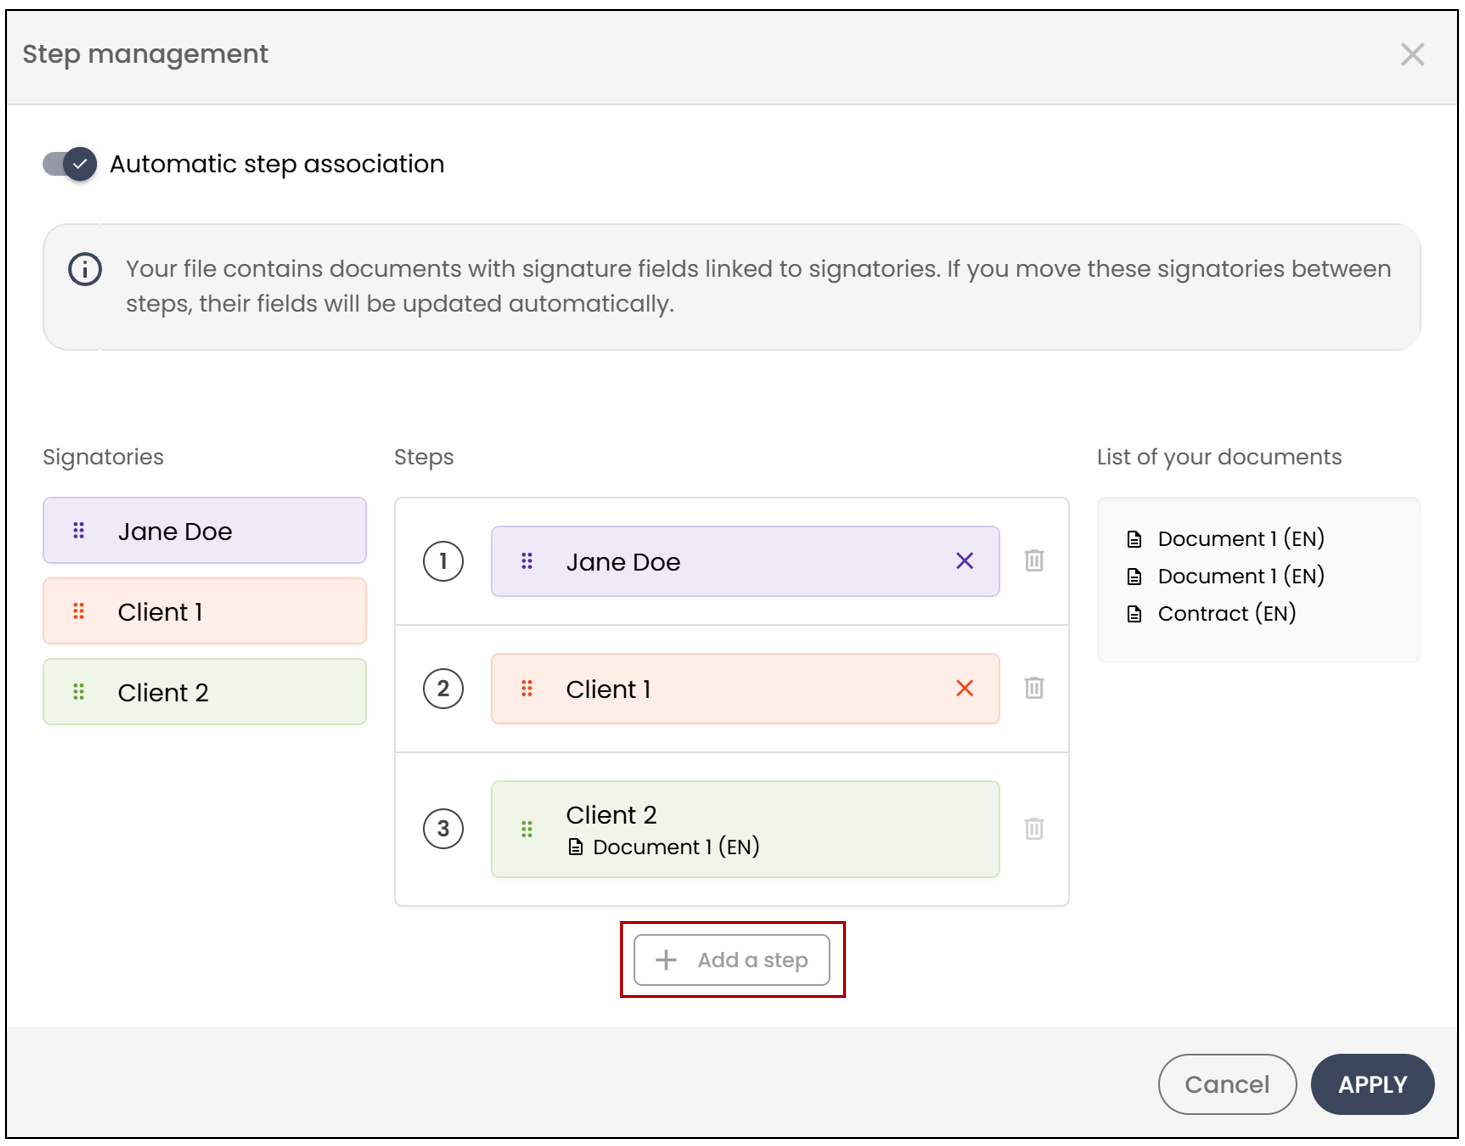
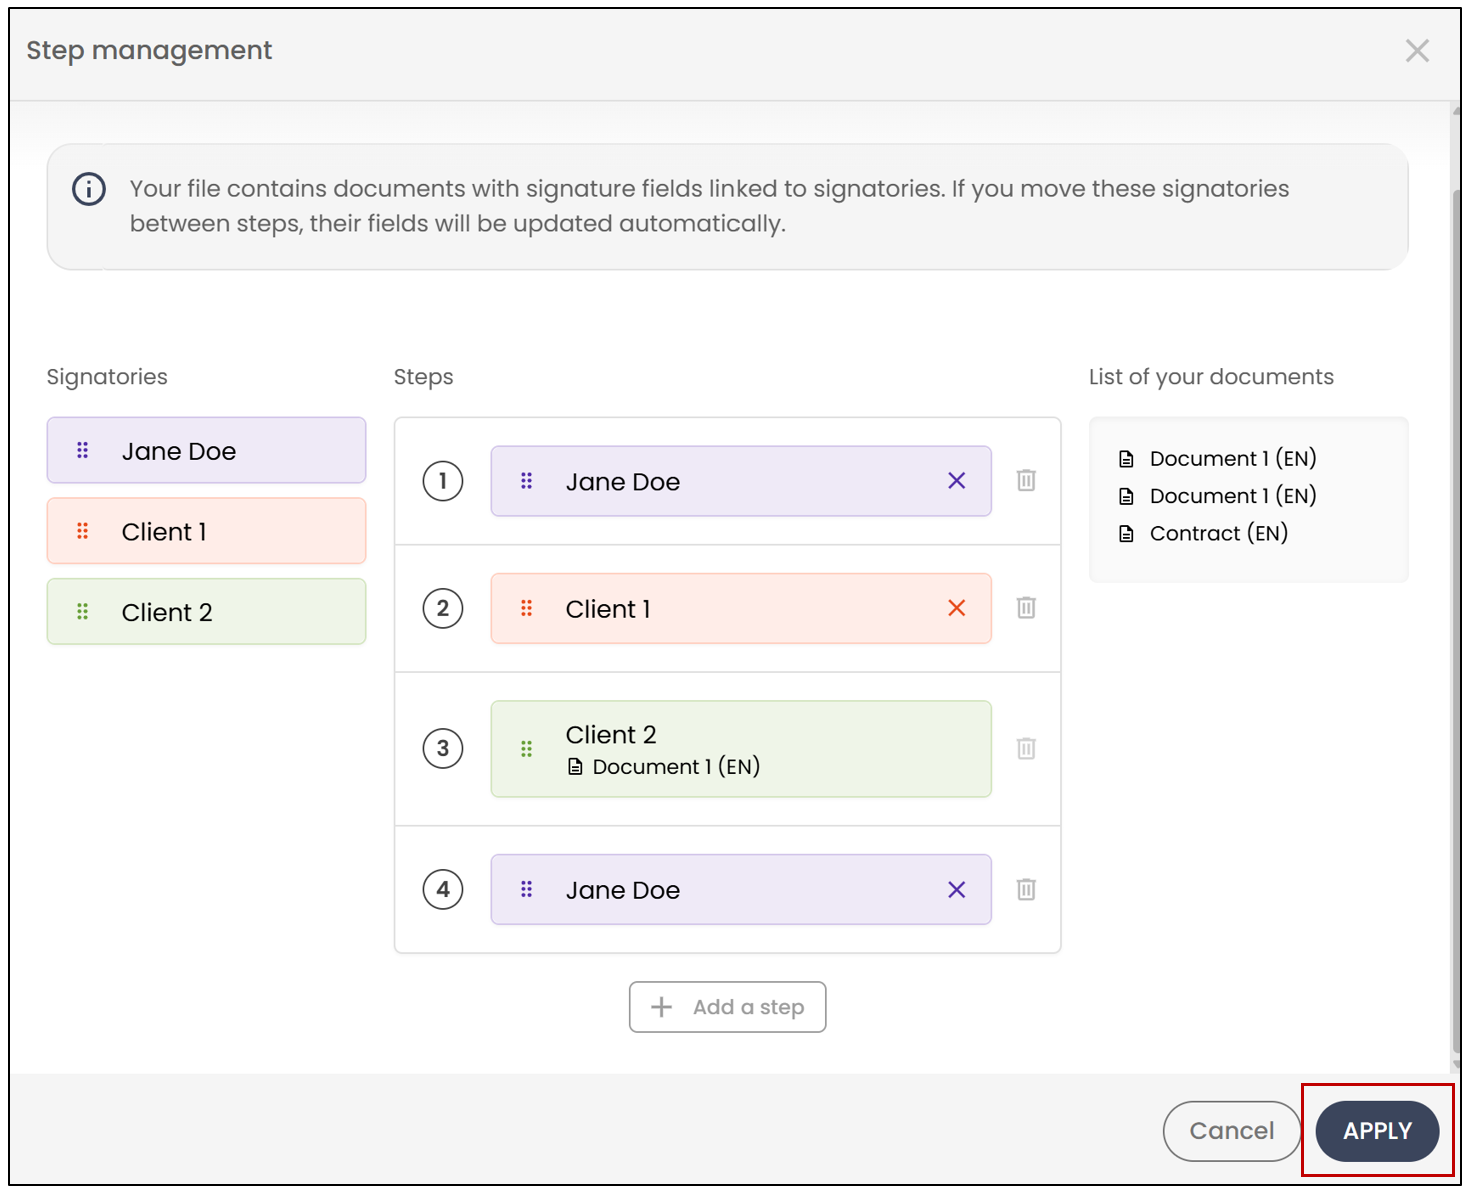
- Drag the desired signatory, then click Apply.
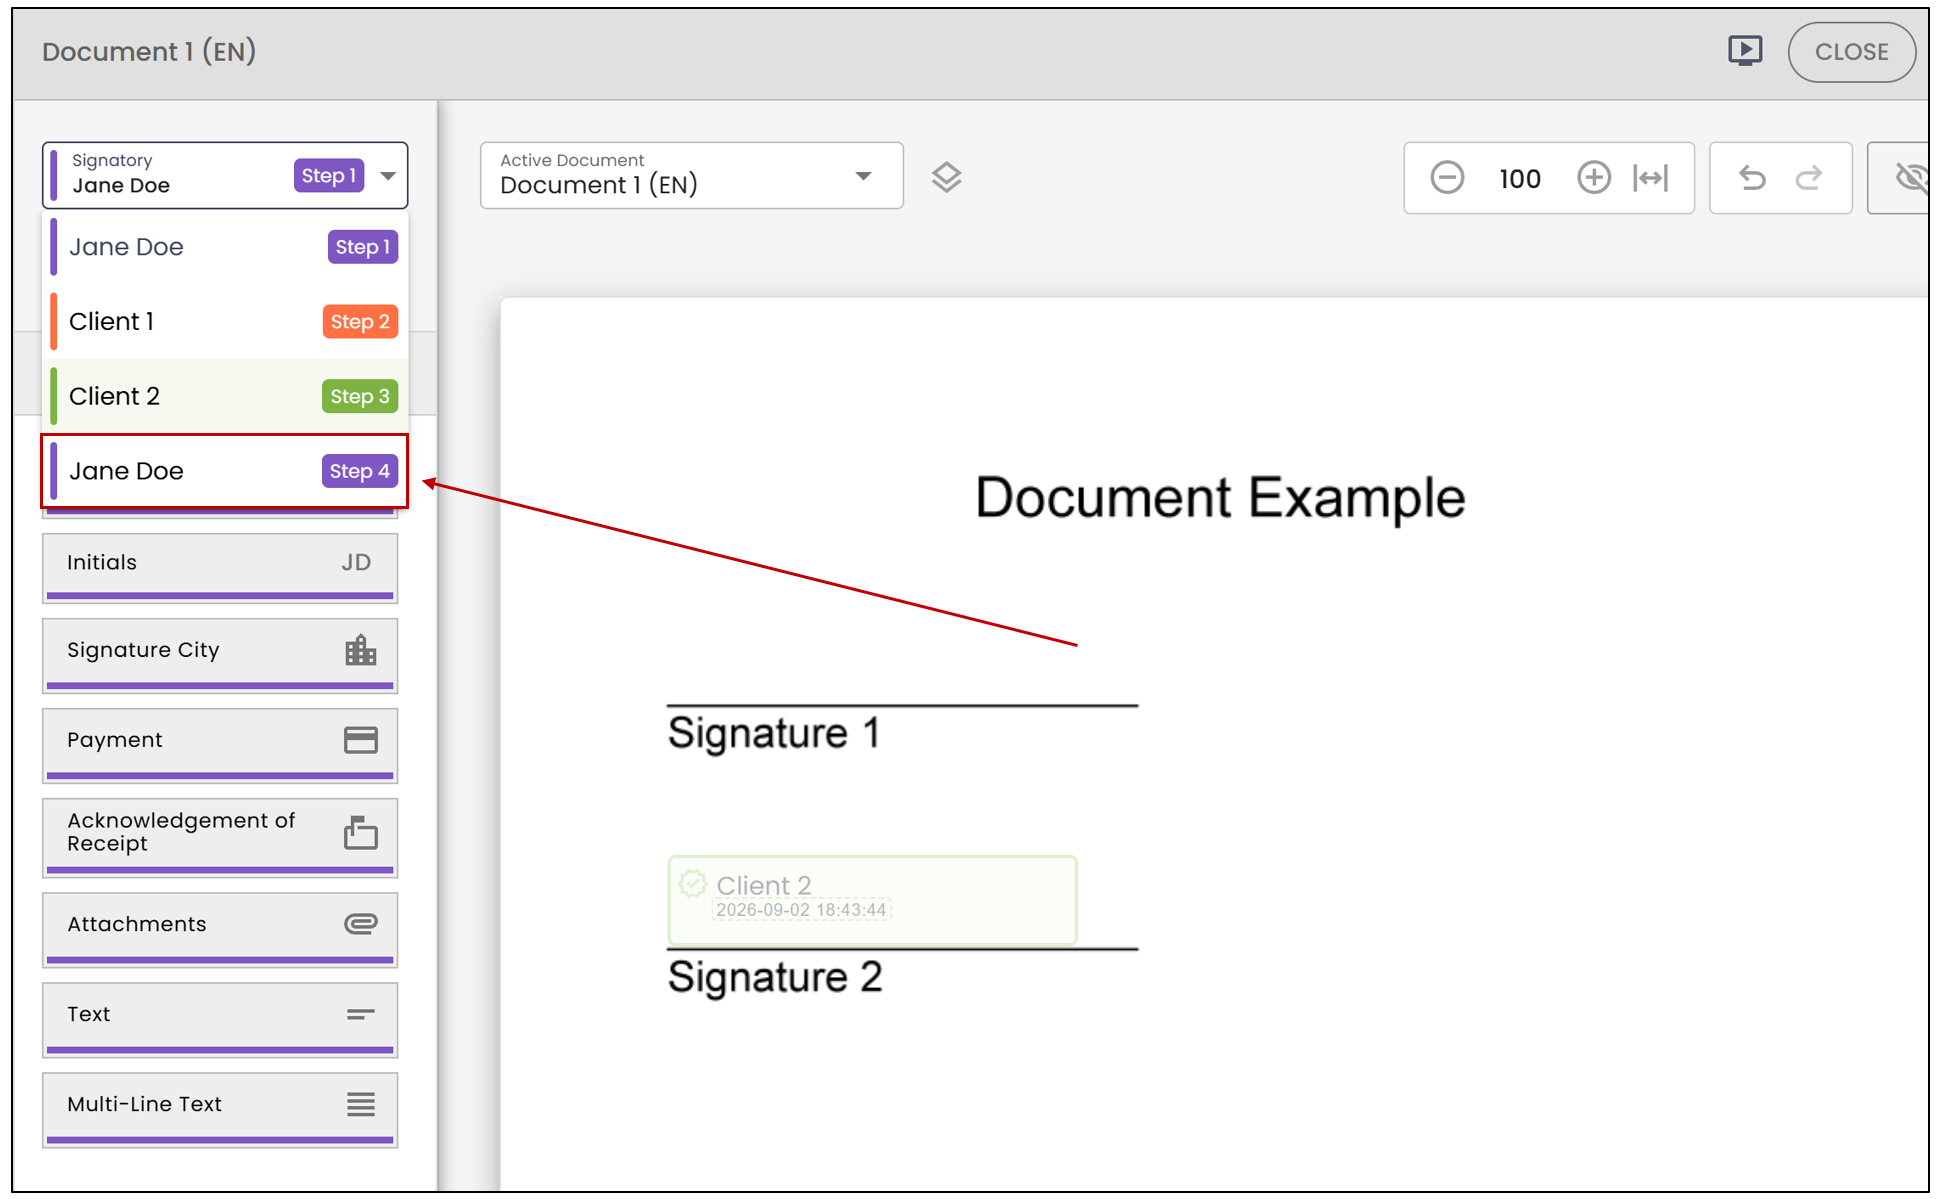
- Since the signatory can sign at Step 1 or Step 4, you will need to select the desired step before adding a signature field.
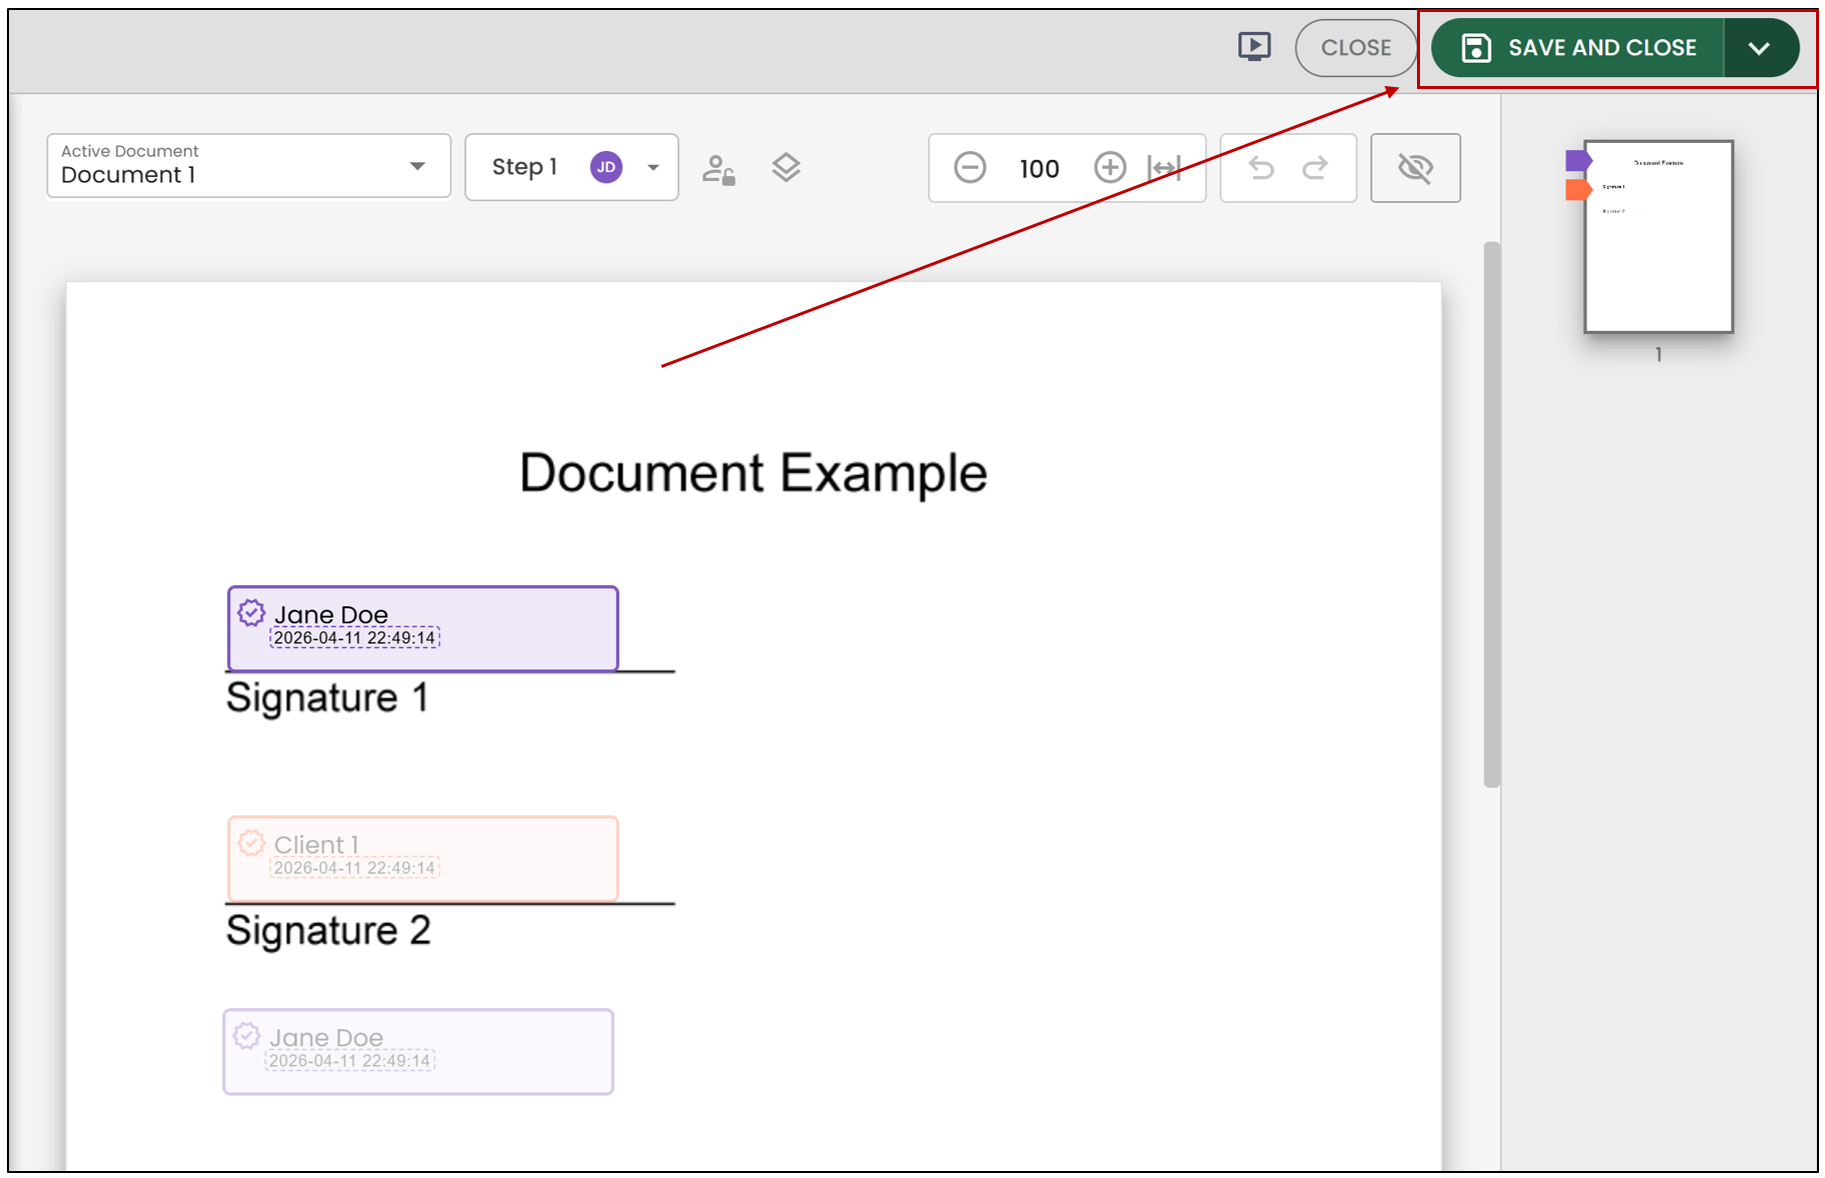
- Once the configuration is complete, you will be able to Save and close the document.
Validate Configuration – Signature Workflow
- To view the step configuration, select the signature workflow icon

.
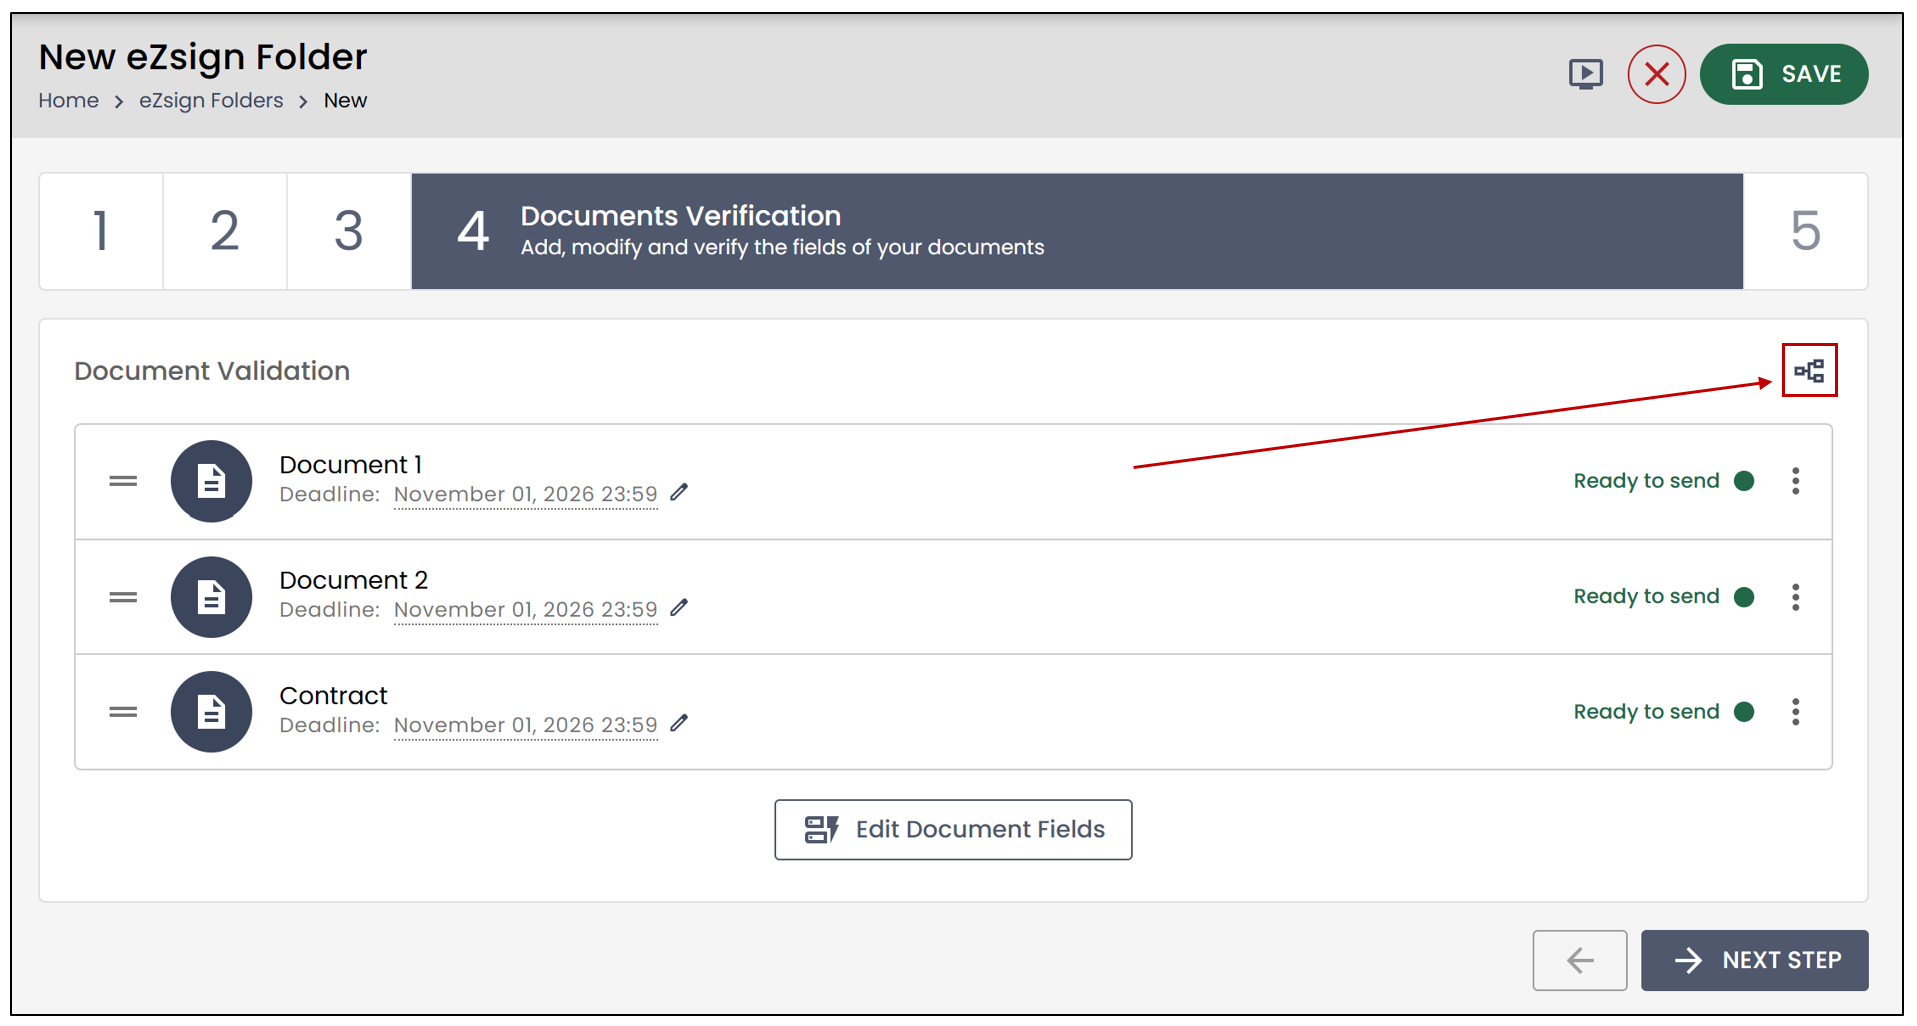
This view allows you to see all documents in the folder as well as the signatories assigned to each step.
With step synchronization enabled, a step must be completed across all documents before moving on to the next one.
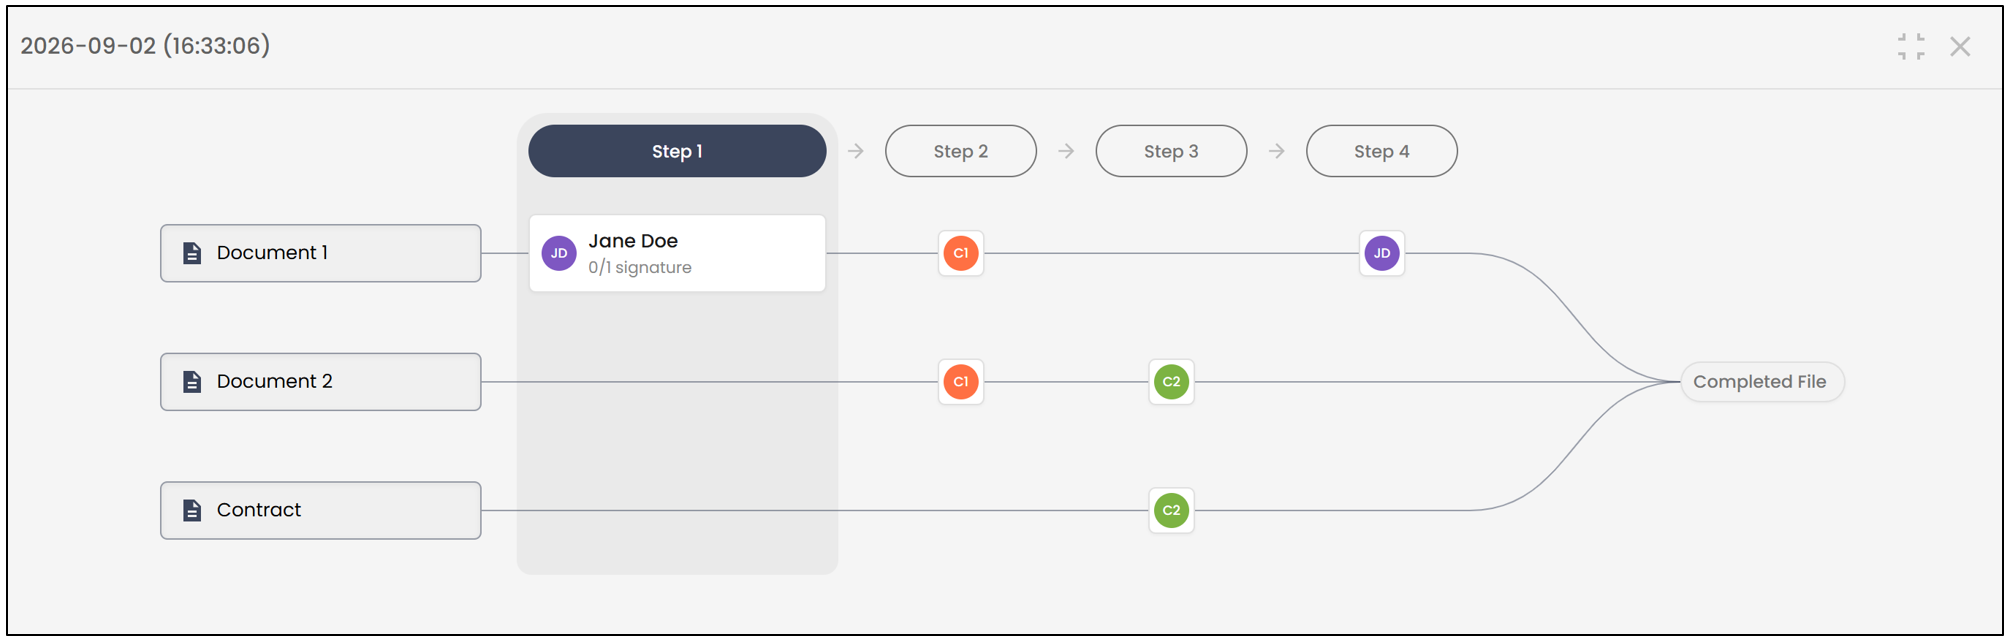
NOTE: In case of an error, you can modify the steps in** Edit document fields**. It is possible to add or adjust a step even when automatic assignment is enabled. Updates are visible in the signature workflow.
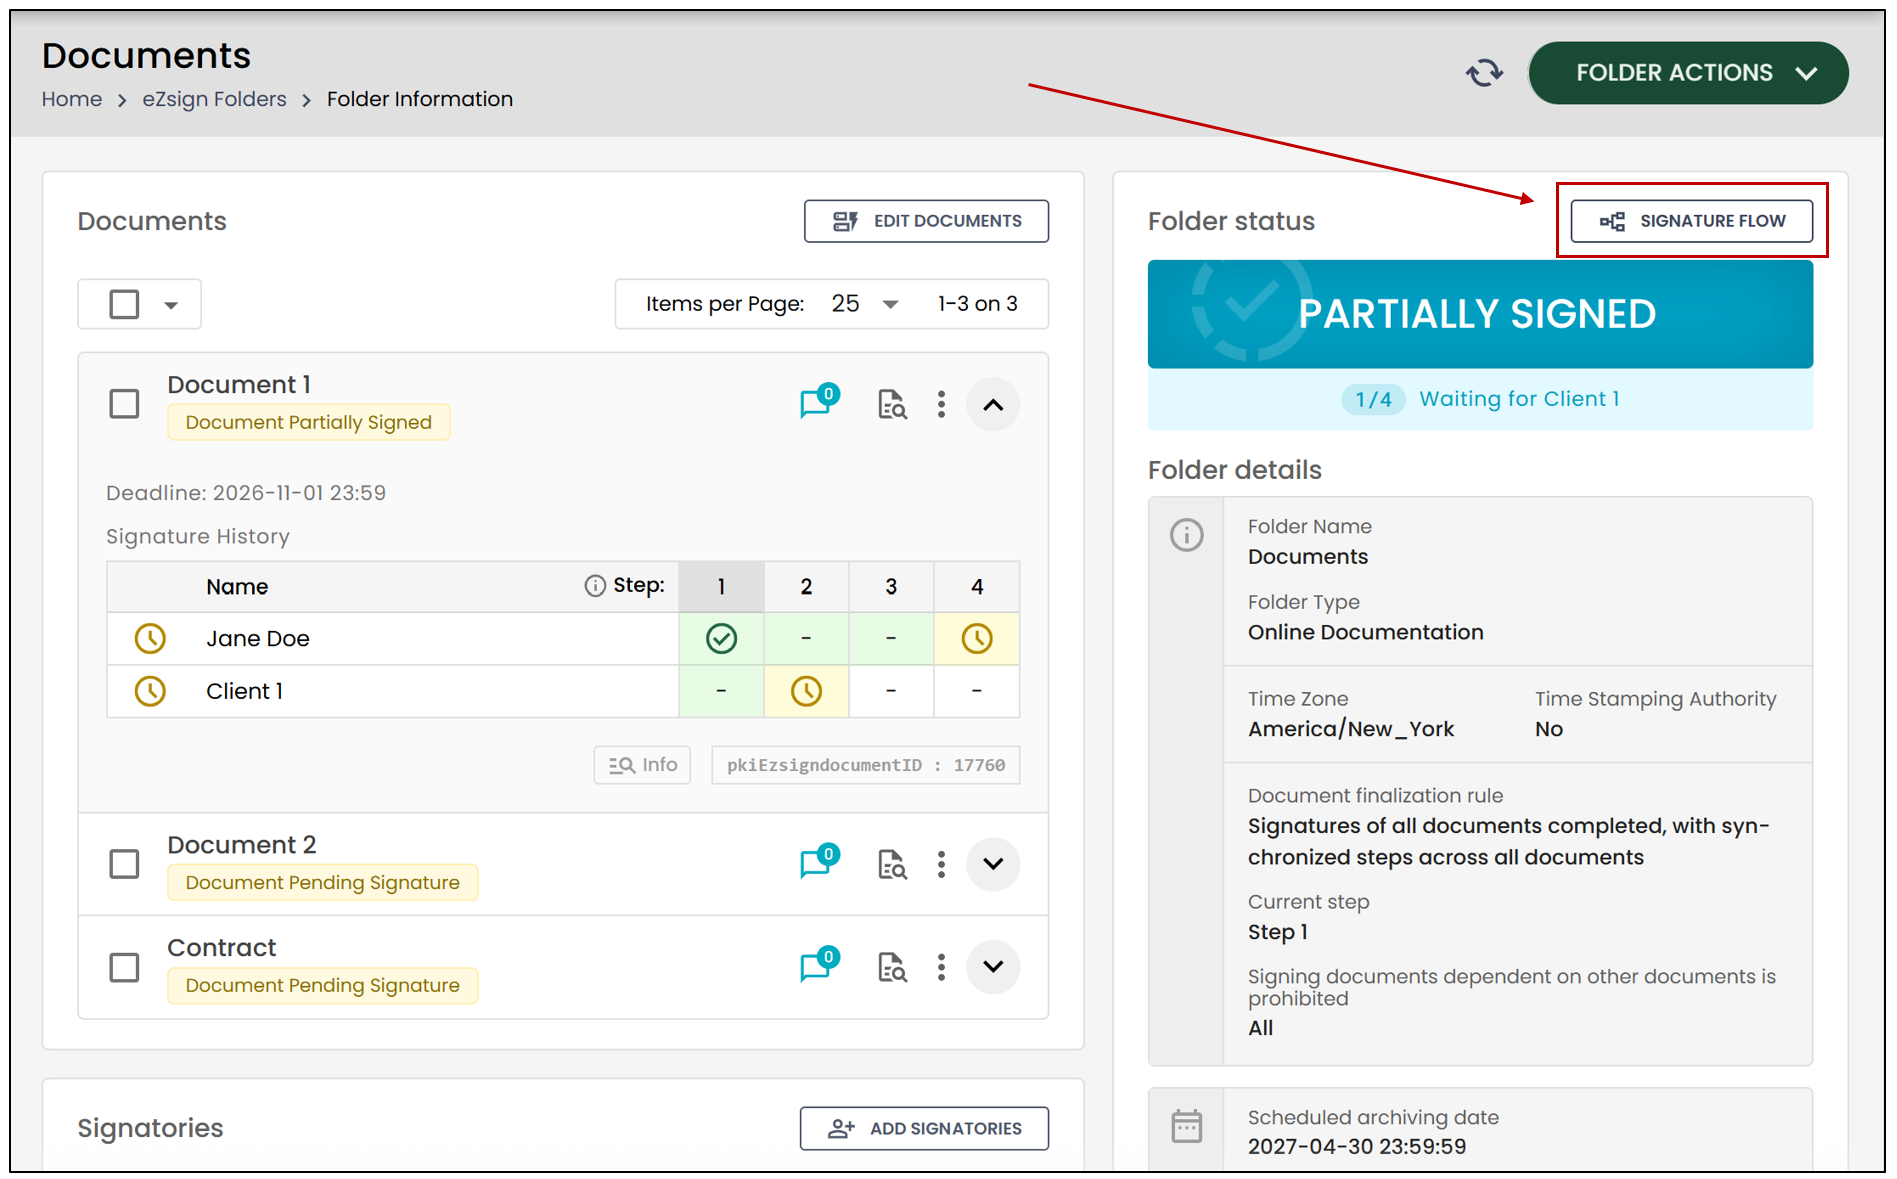
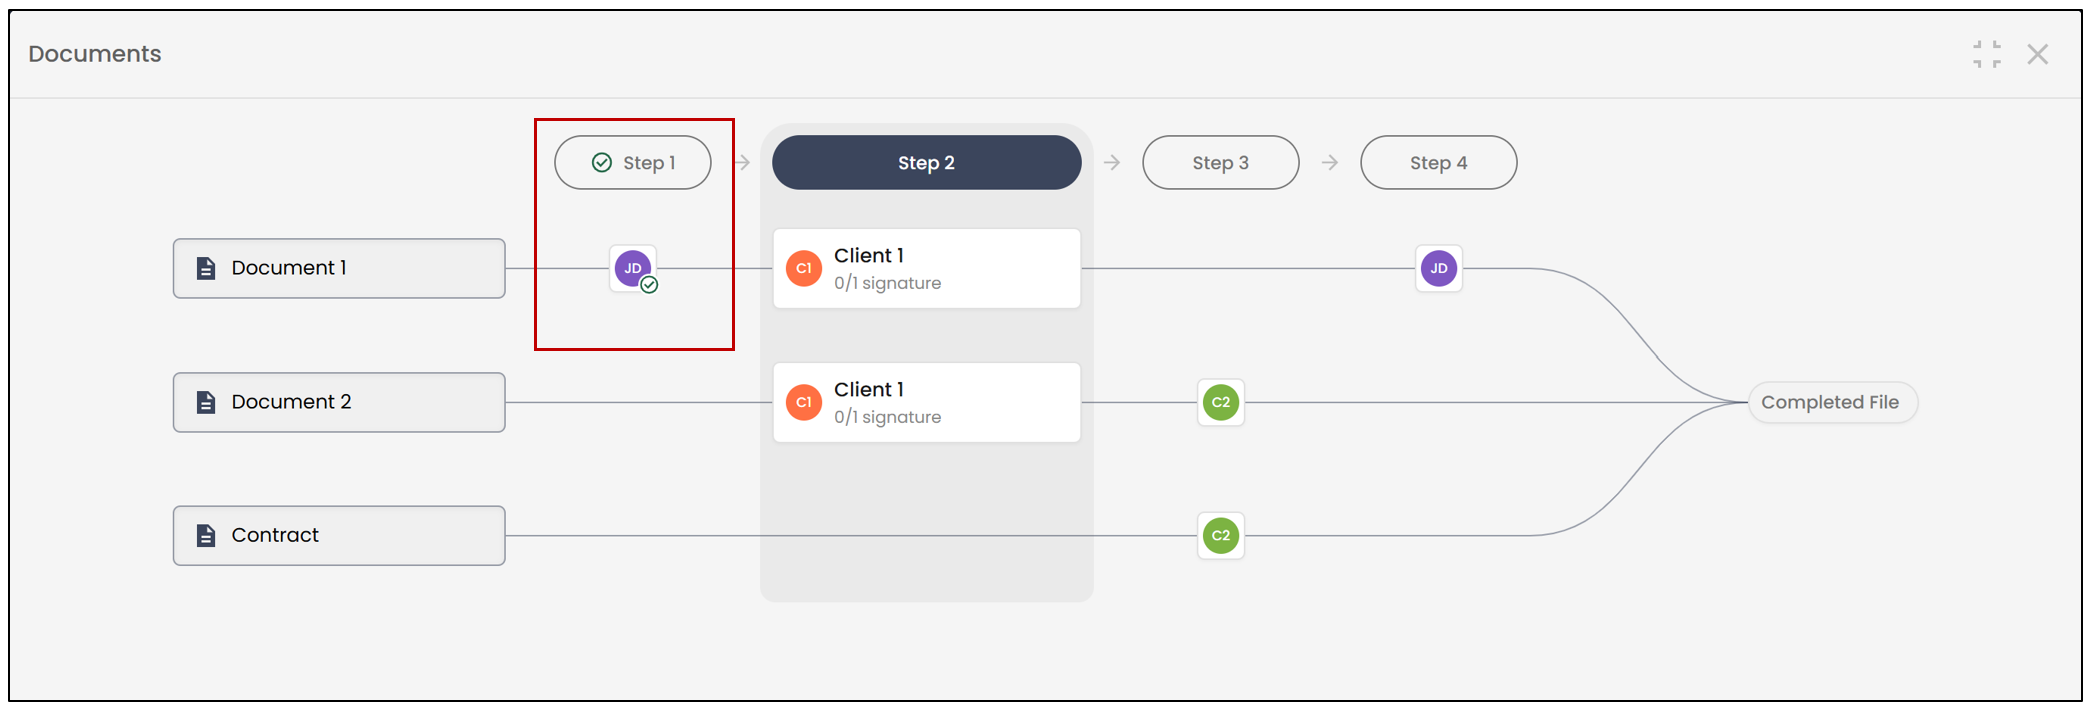
After the folder is sent, the signature workflow remains accessible via the corresponding icon, allowing you to clearly track the progress of signatures.
A green checkmark will appear when a signatory has signed.
Enable Step Synchronization via Folder Type
Warning
When step synchronization is enabled in a folder type, it is no longer possible to use dependencies between documents.
From the main menu >> Administration >> Folder Types.
- Select the desired folder type, then click on Edit Folder Type.
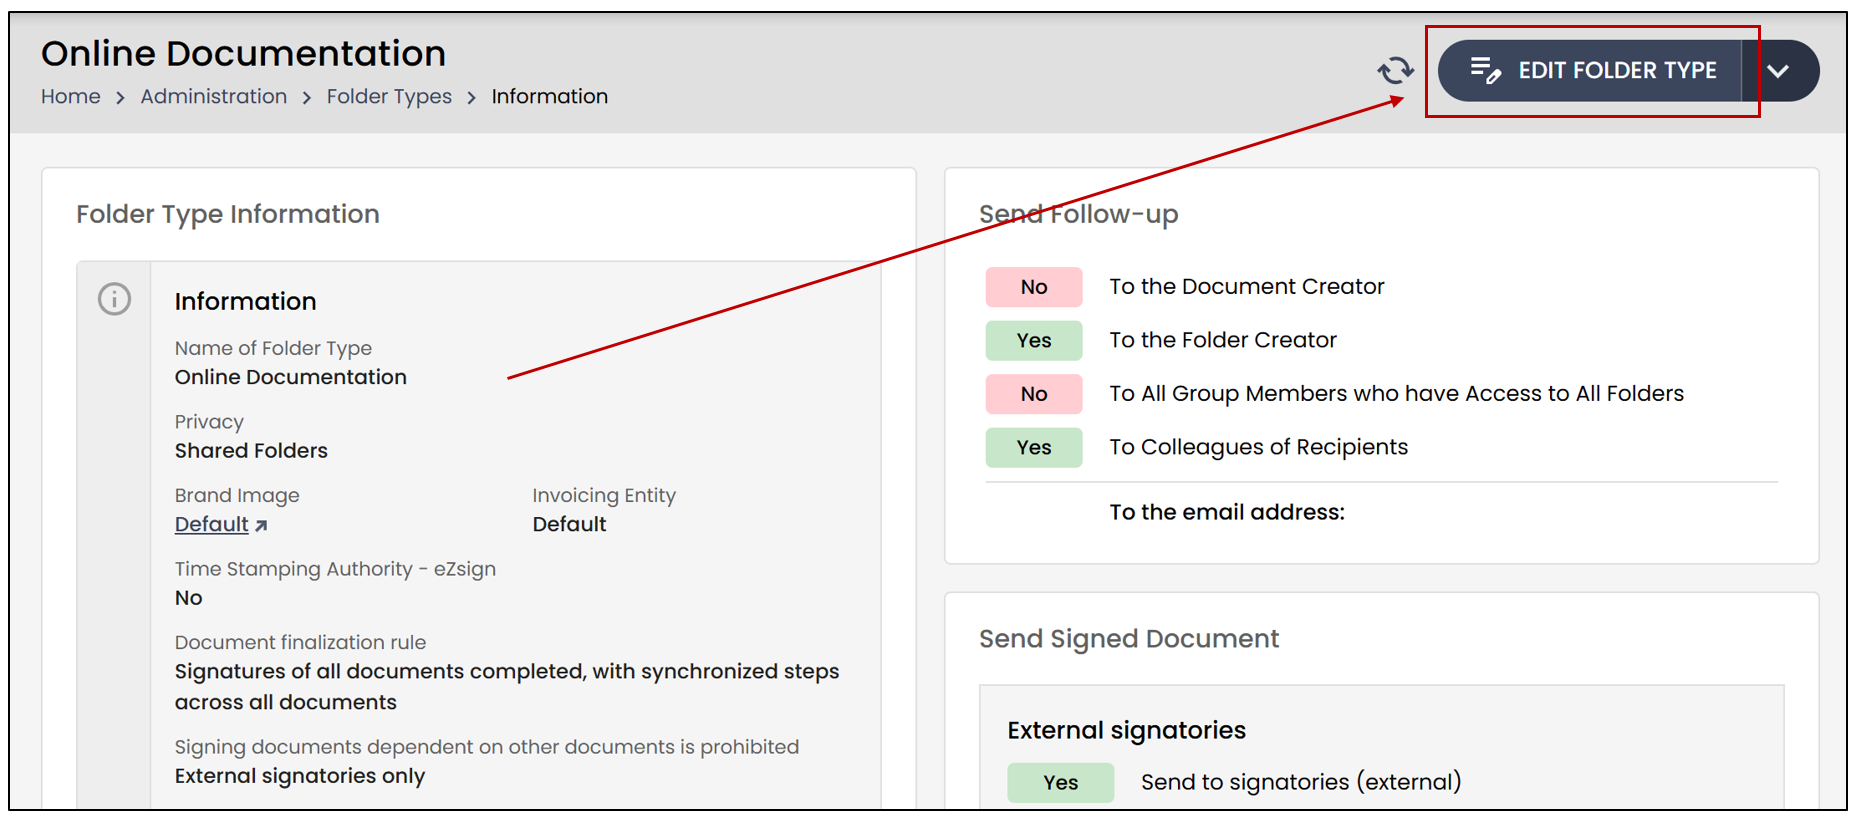
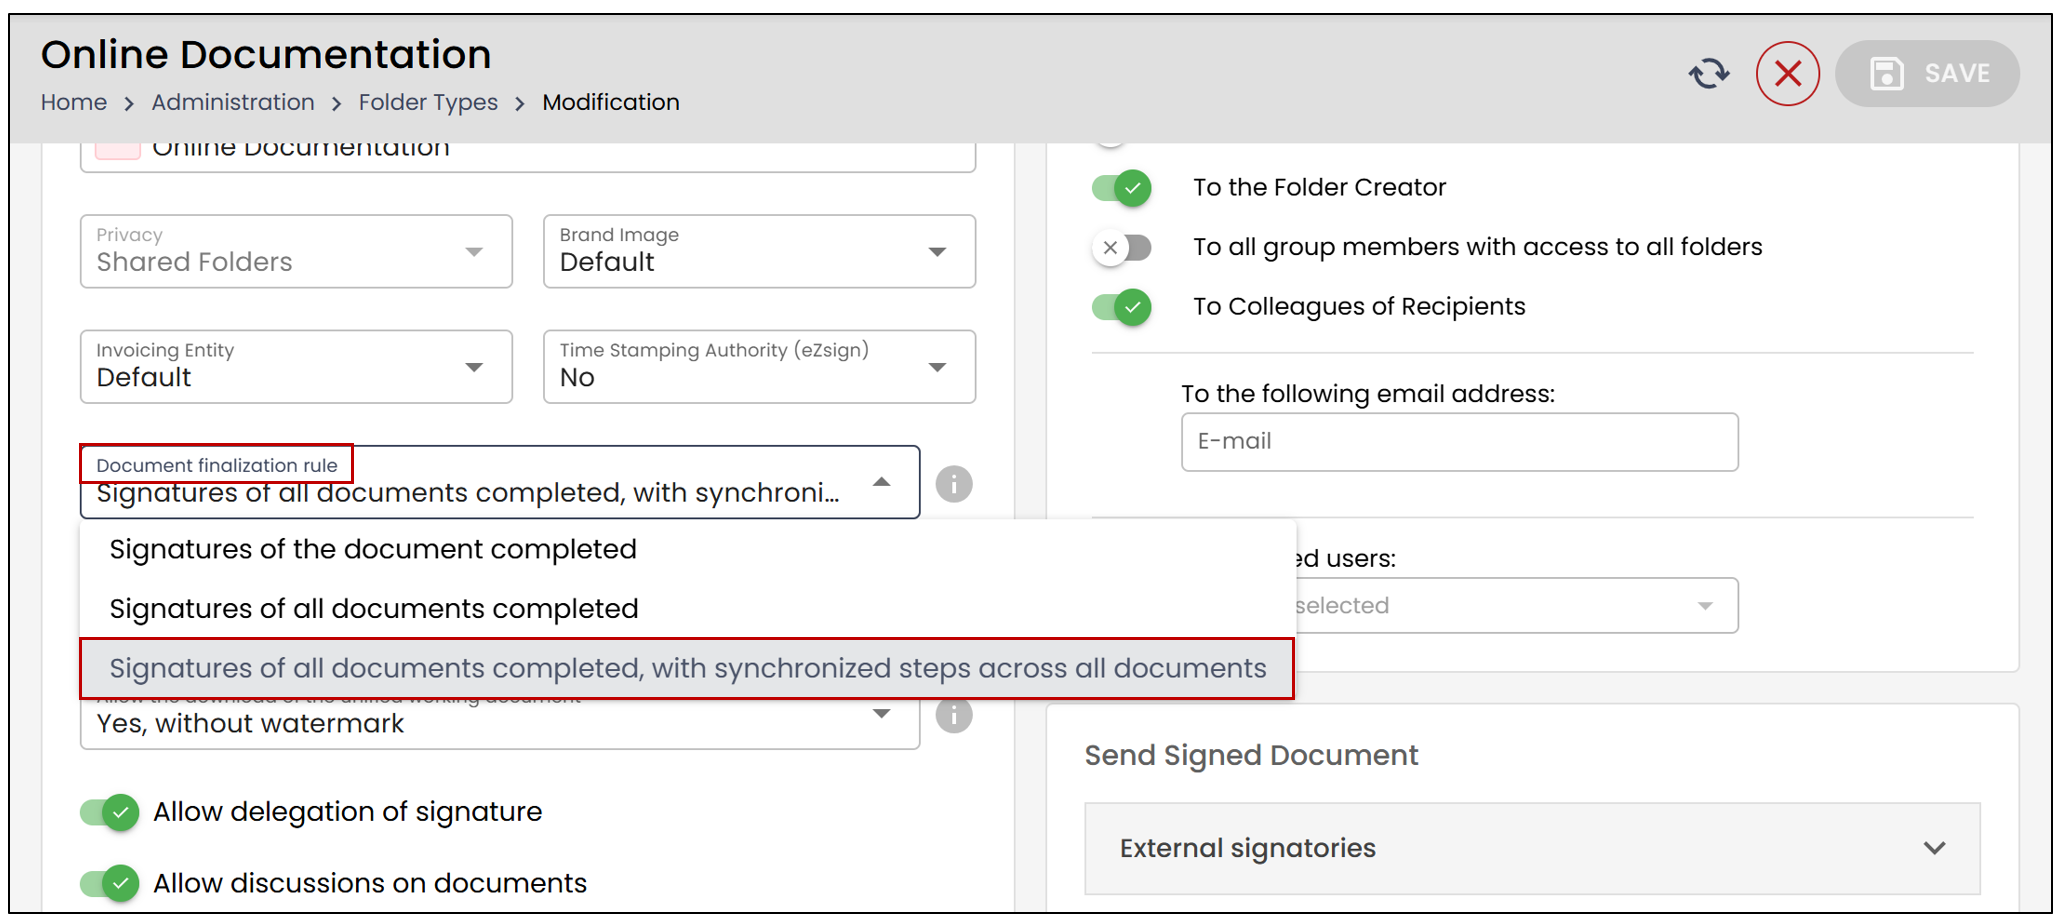
- In the Information section, enable the option "Signatures of all documents completed, with synchronized steps across all documents" located under Document Finalization Rule.
NOTE: When this option is enabled, the progression of steps is synchronized across all documents in the folder. This means that a step will only move to the next one once all documents related to that step have been fully signed.