

English
"Sent/Partially Signed" File: Available Actions (eZsign Web Version)
"Sent/Partially Signed" File: Available Actions
Here is how to do it in eZsign:
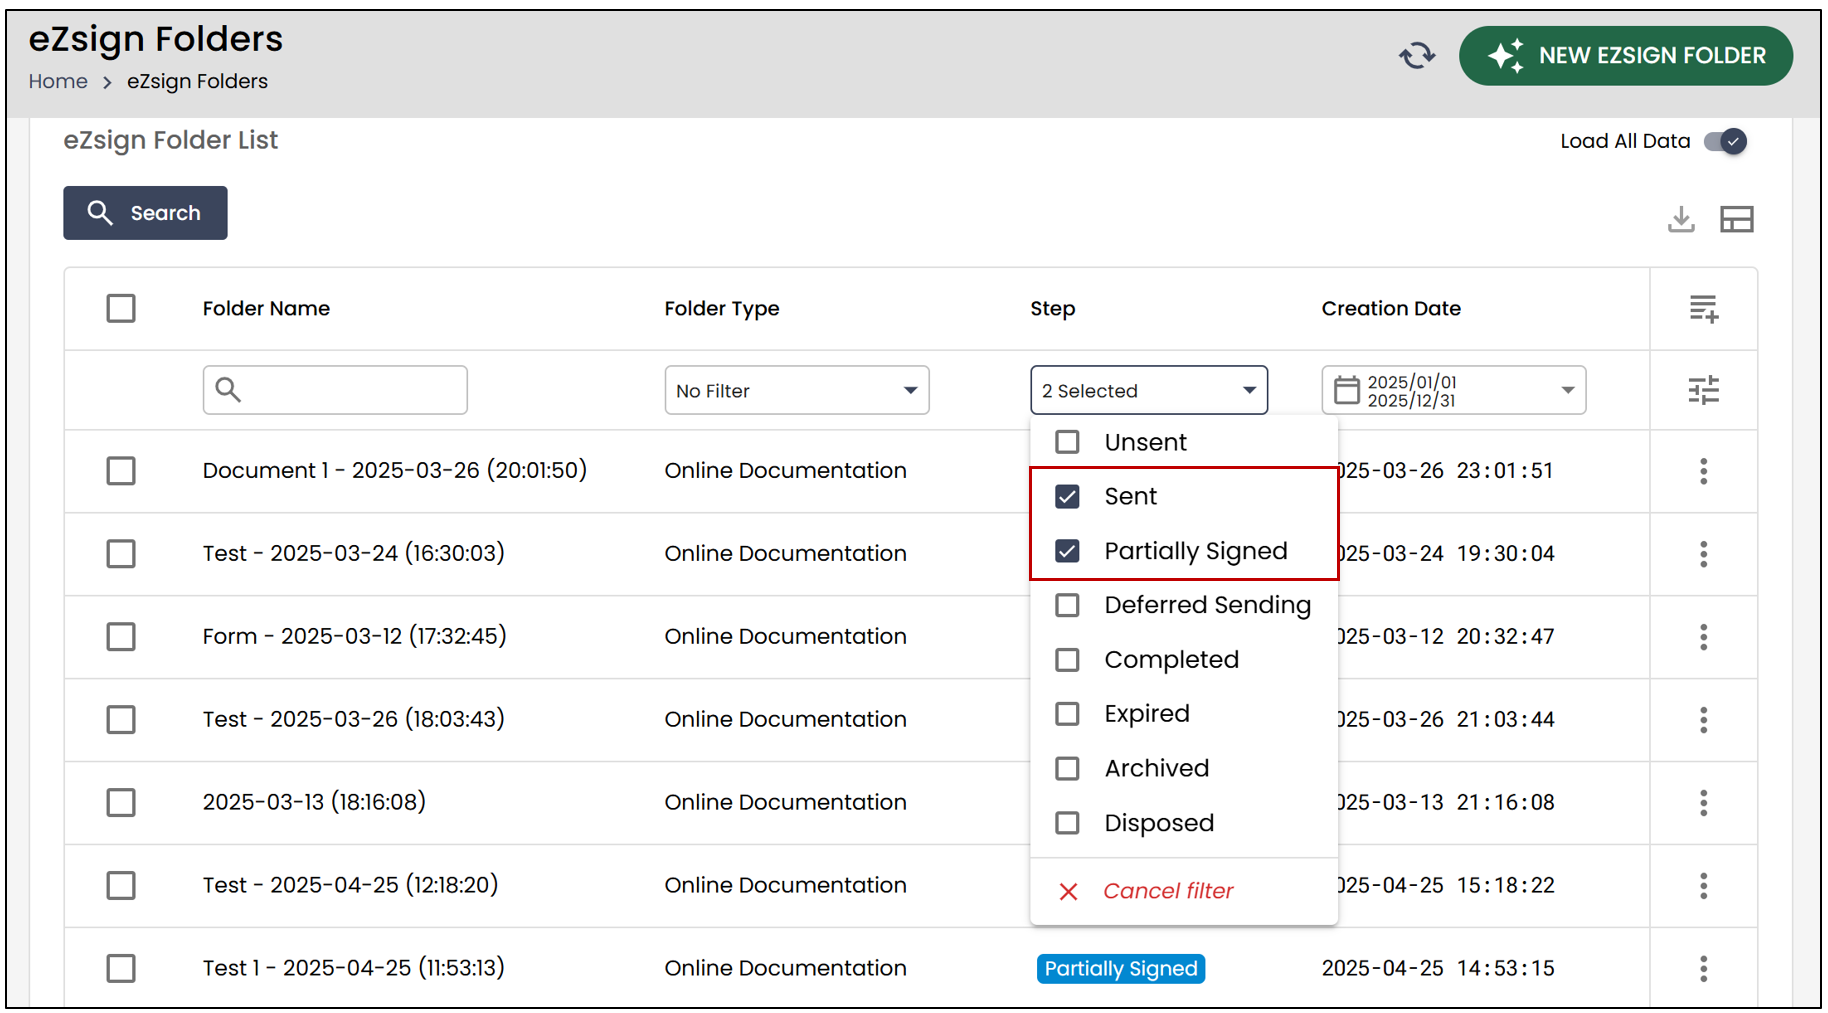
- From the eZsign Folder List , apply the Sent or Partially Signed filter in the Step section.
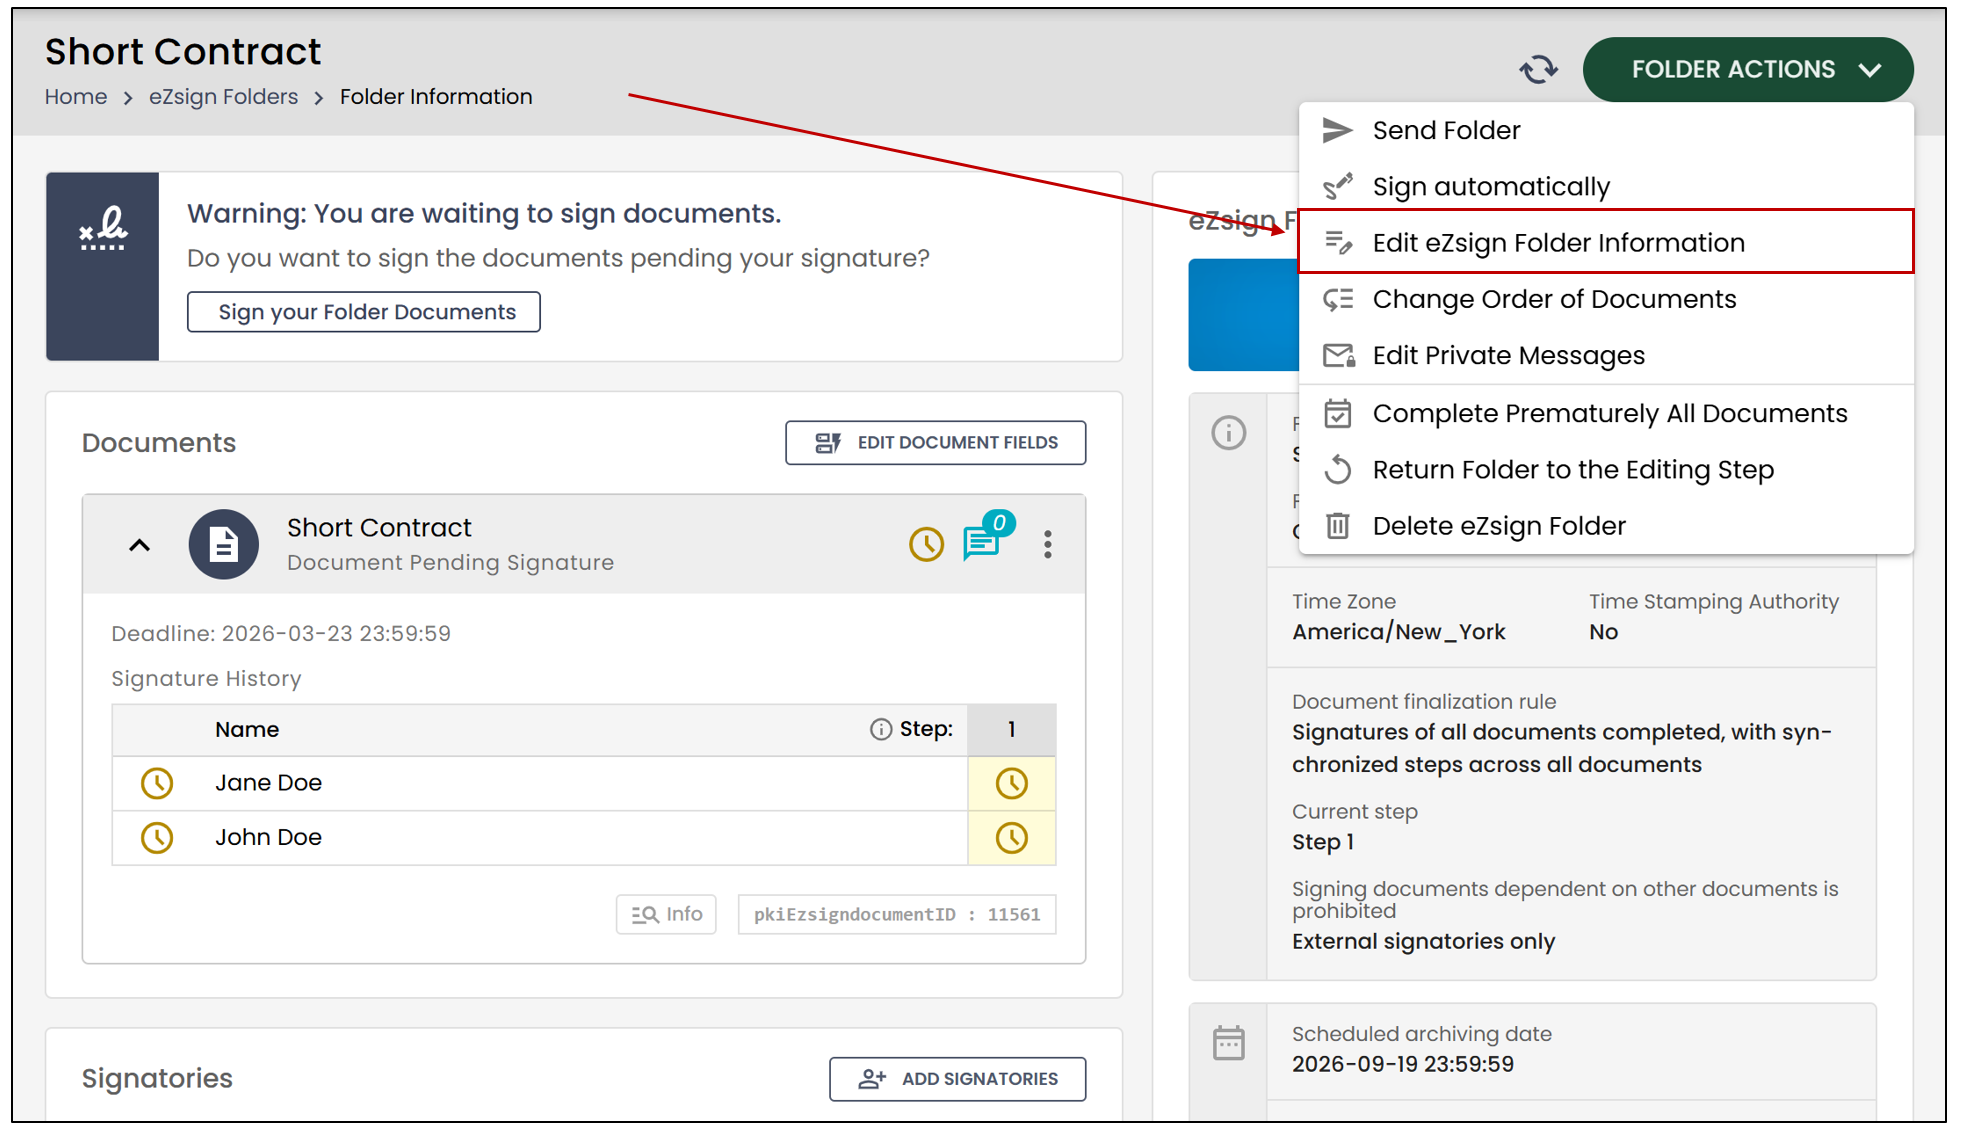
Folder Actions
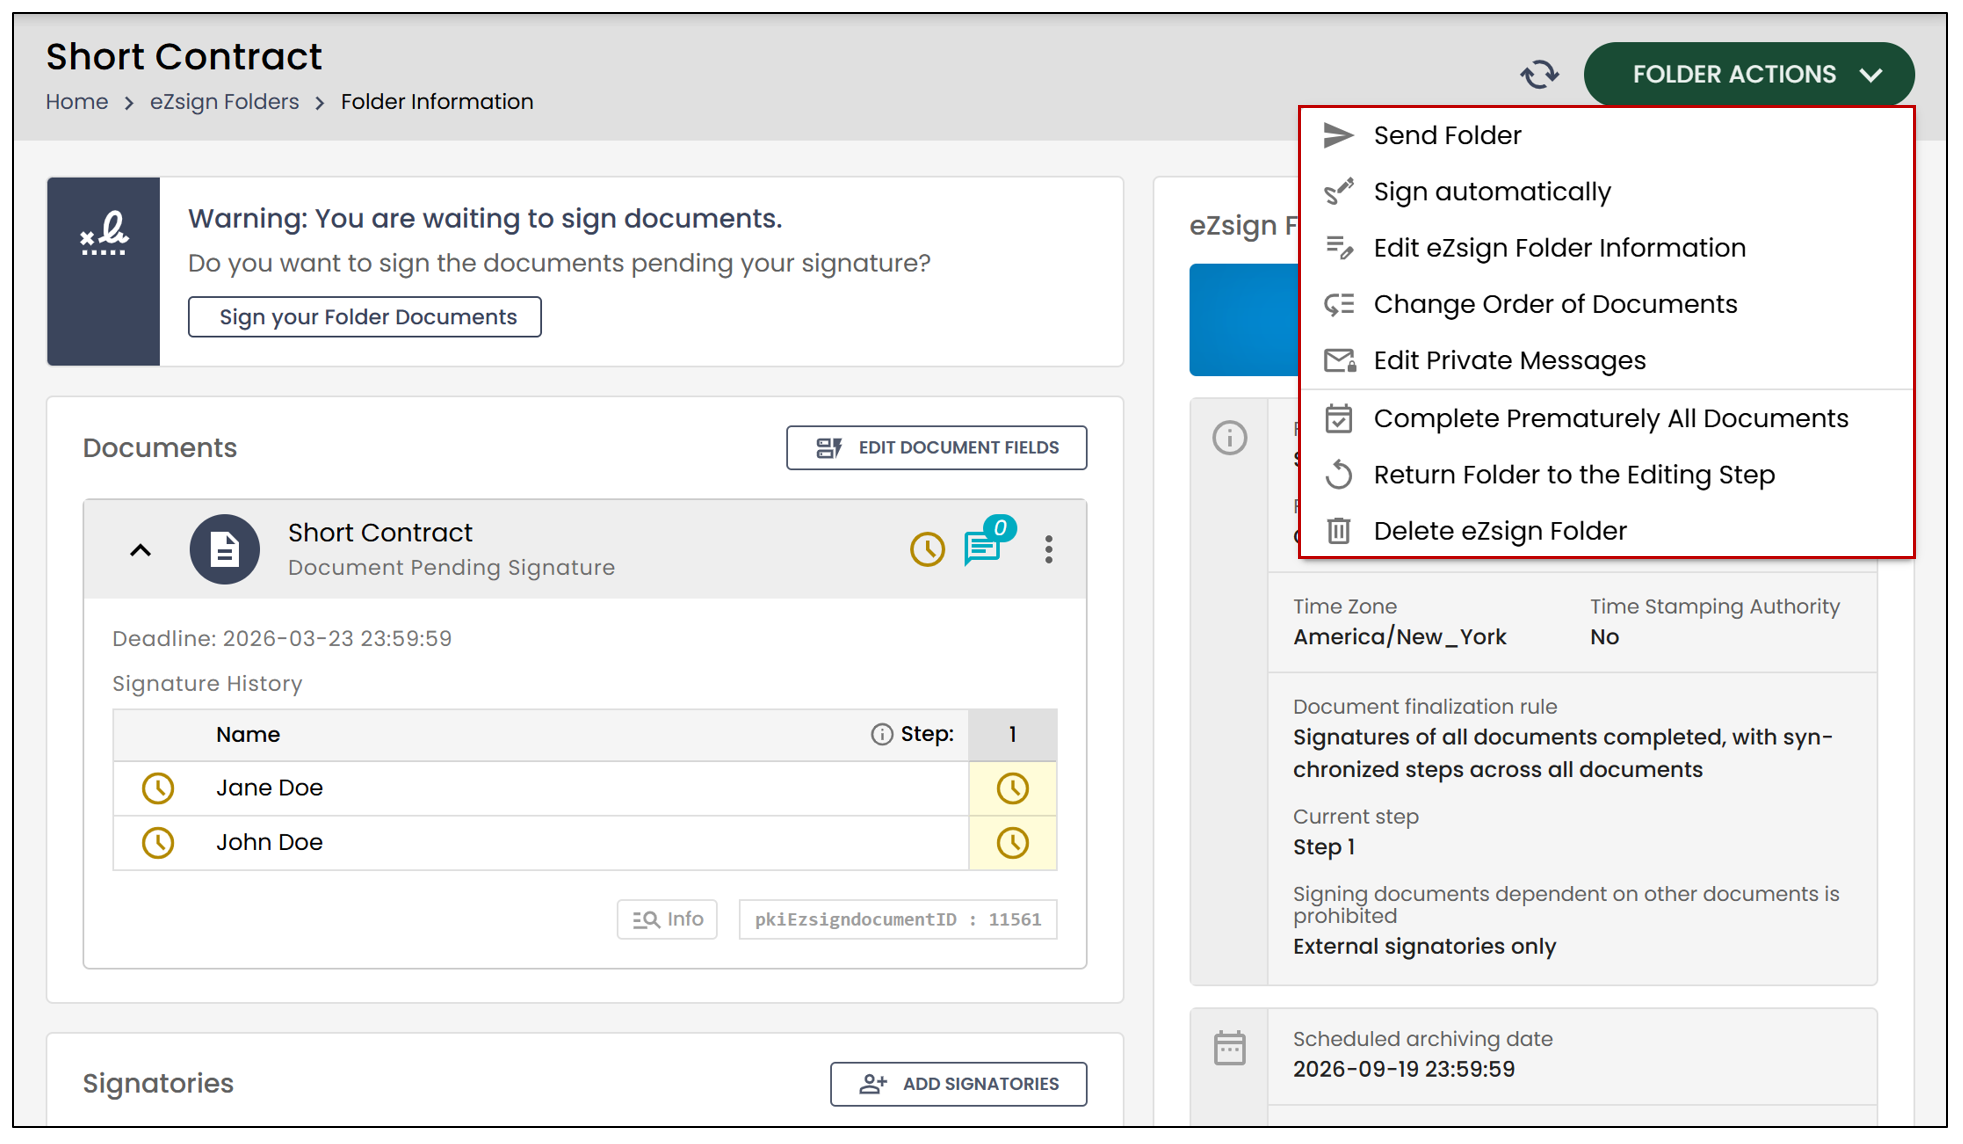
- To see the available actions, click on Folder Actions.
Send Folder
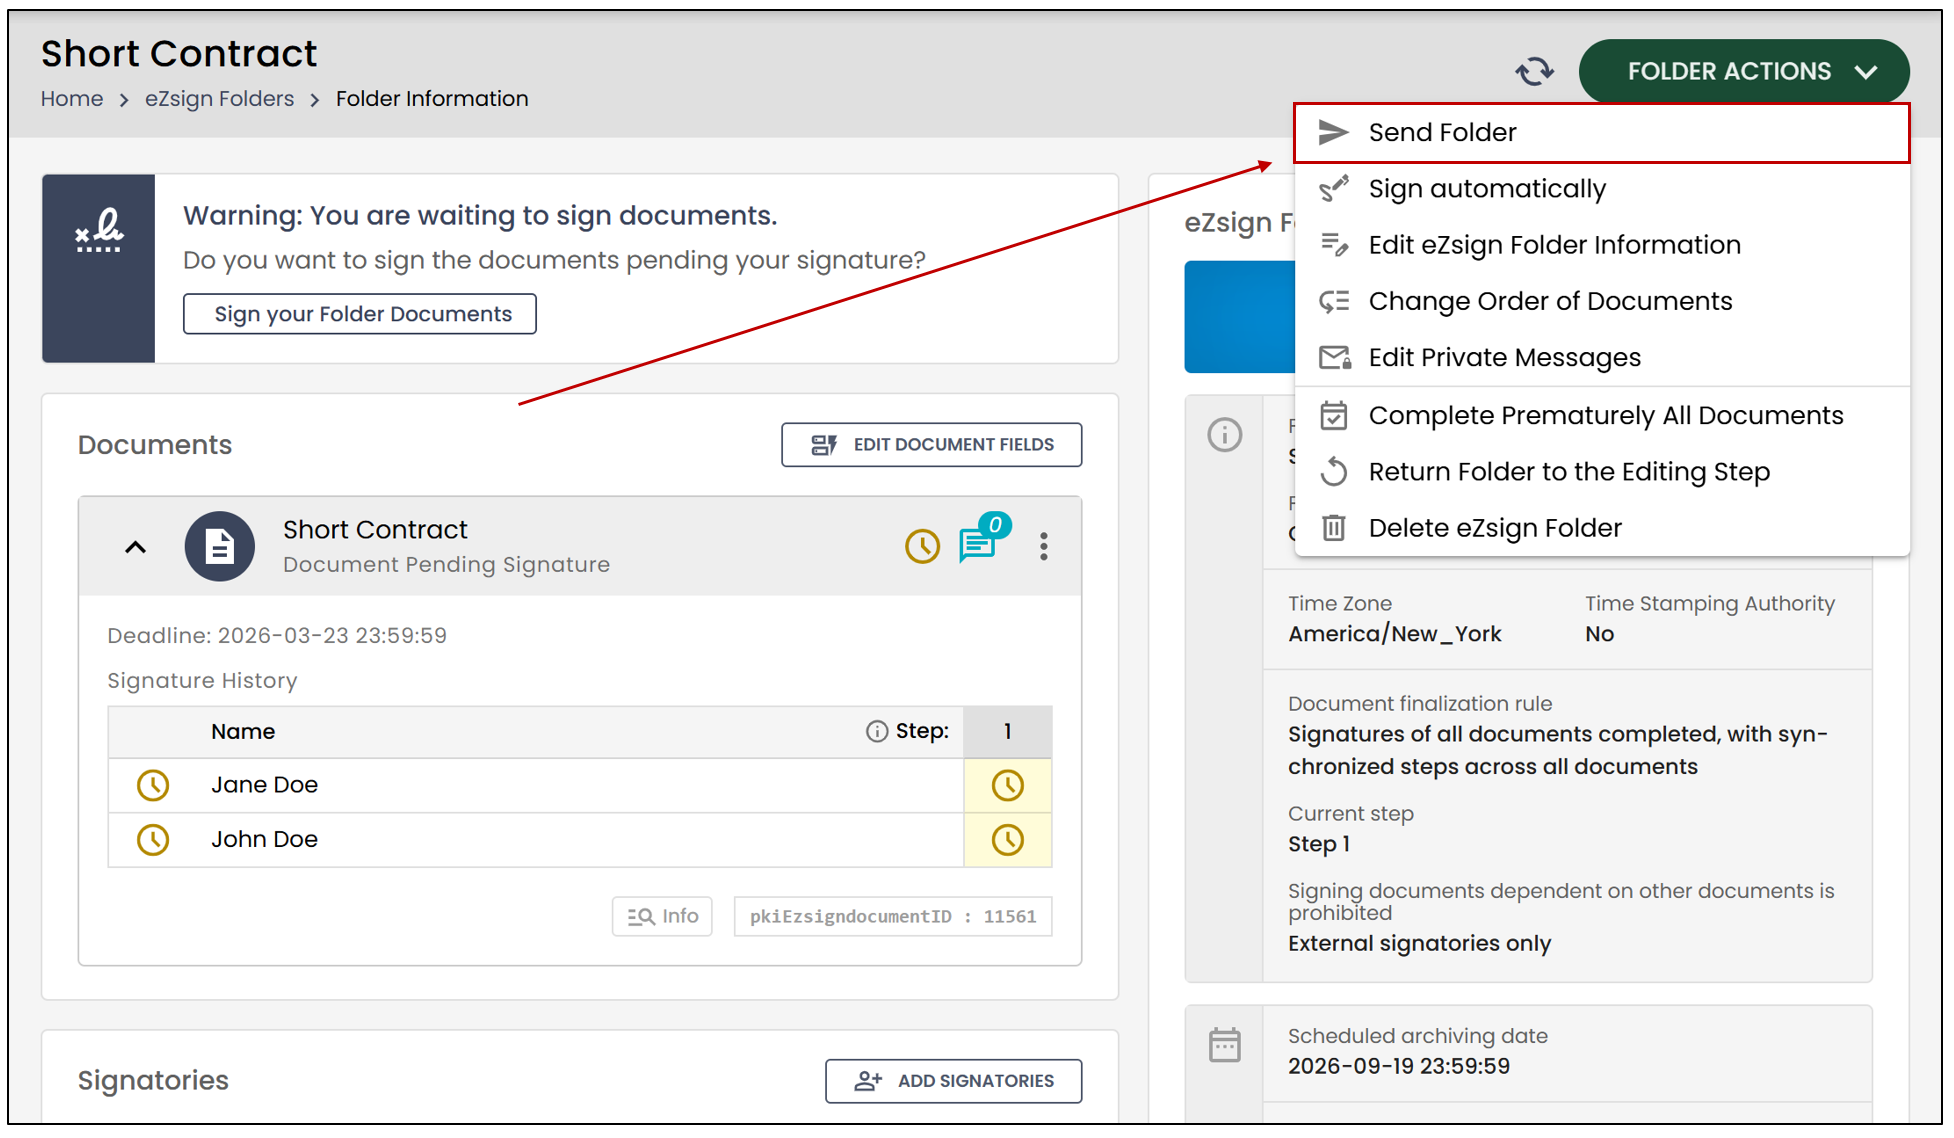
- If you want to resend the folder to some of the document’s signers, for example if you have updated one of their email addresses, simply click on the Send Folder option.
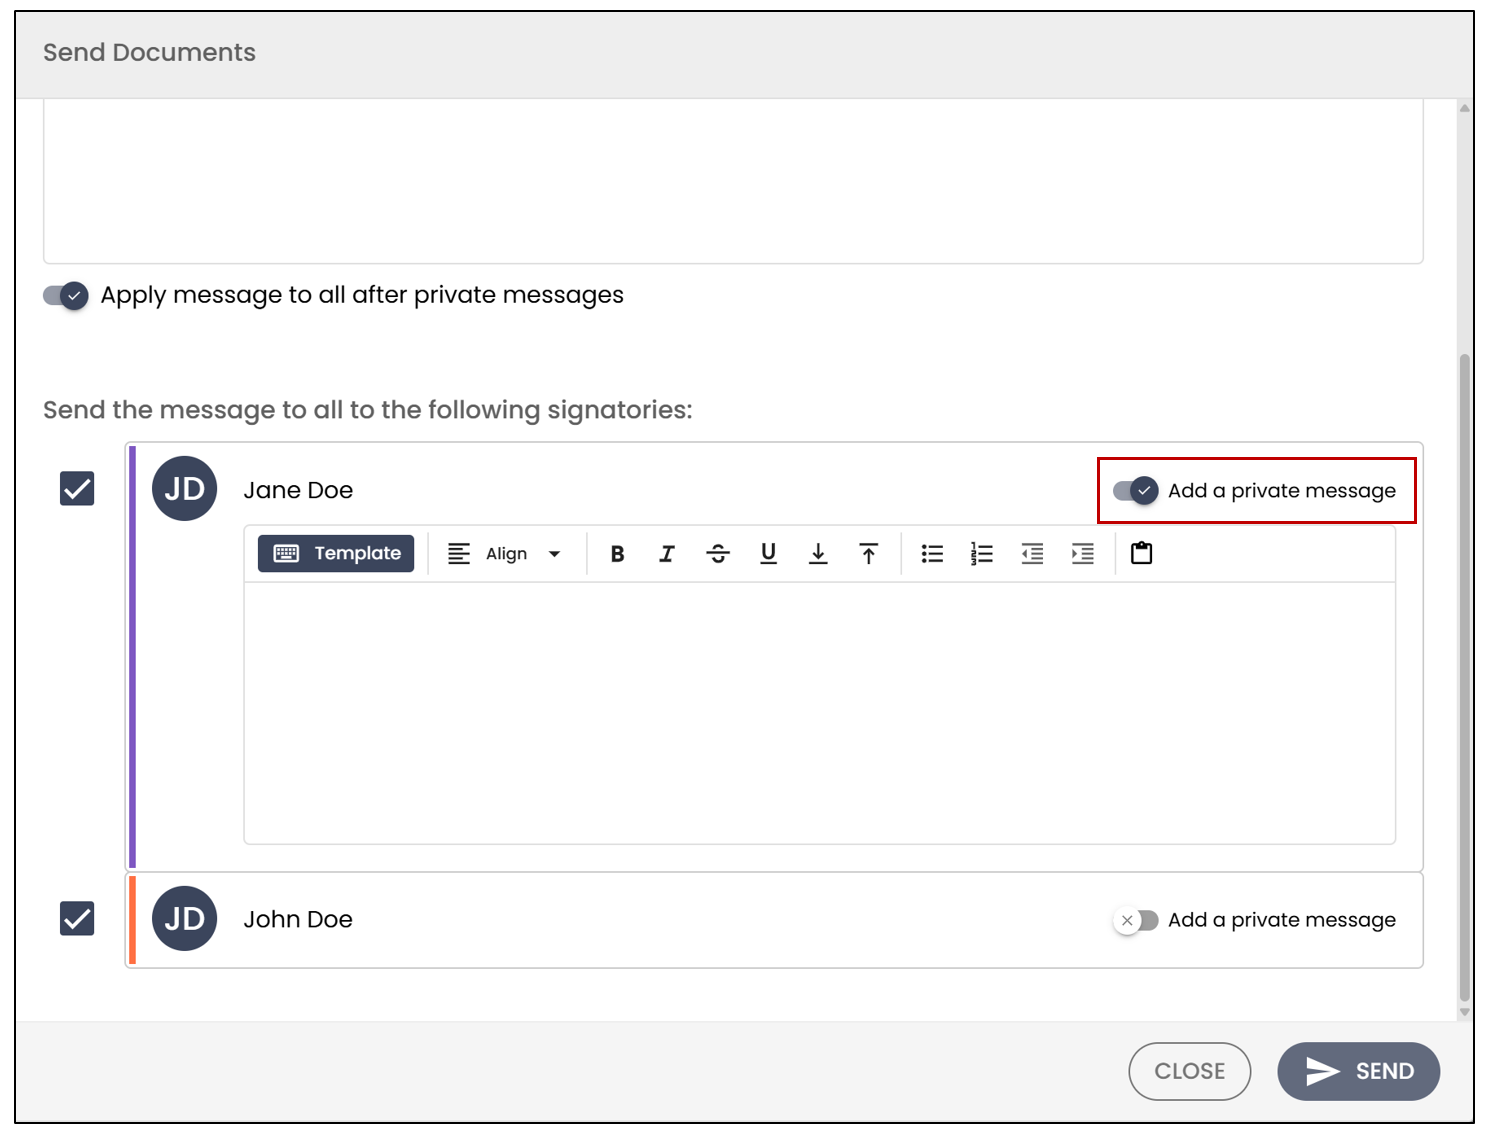
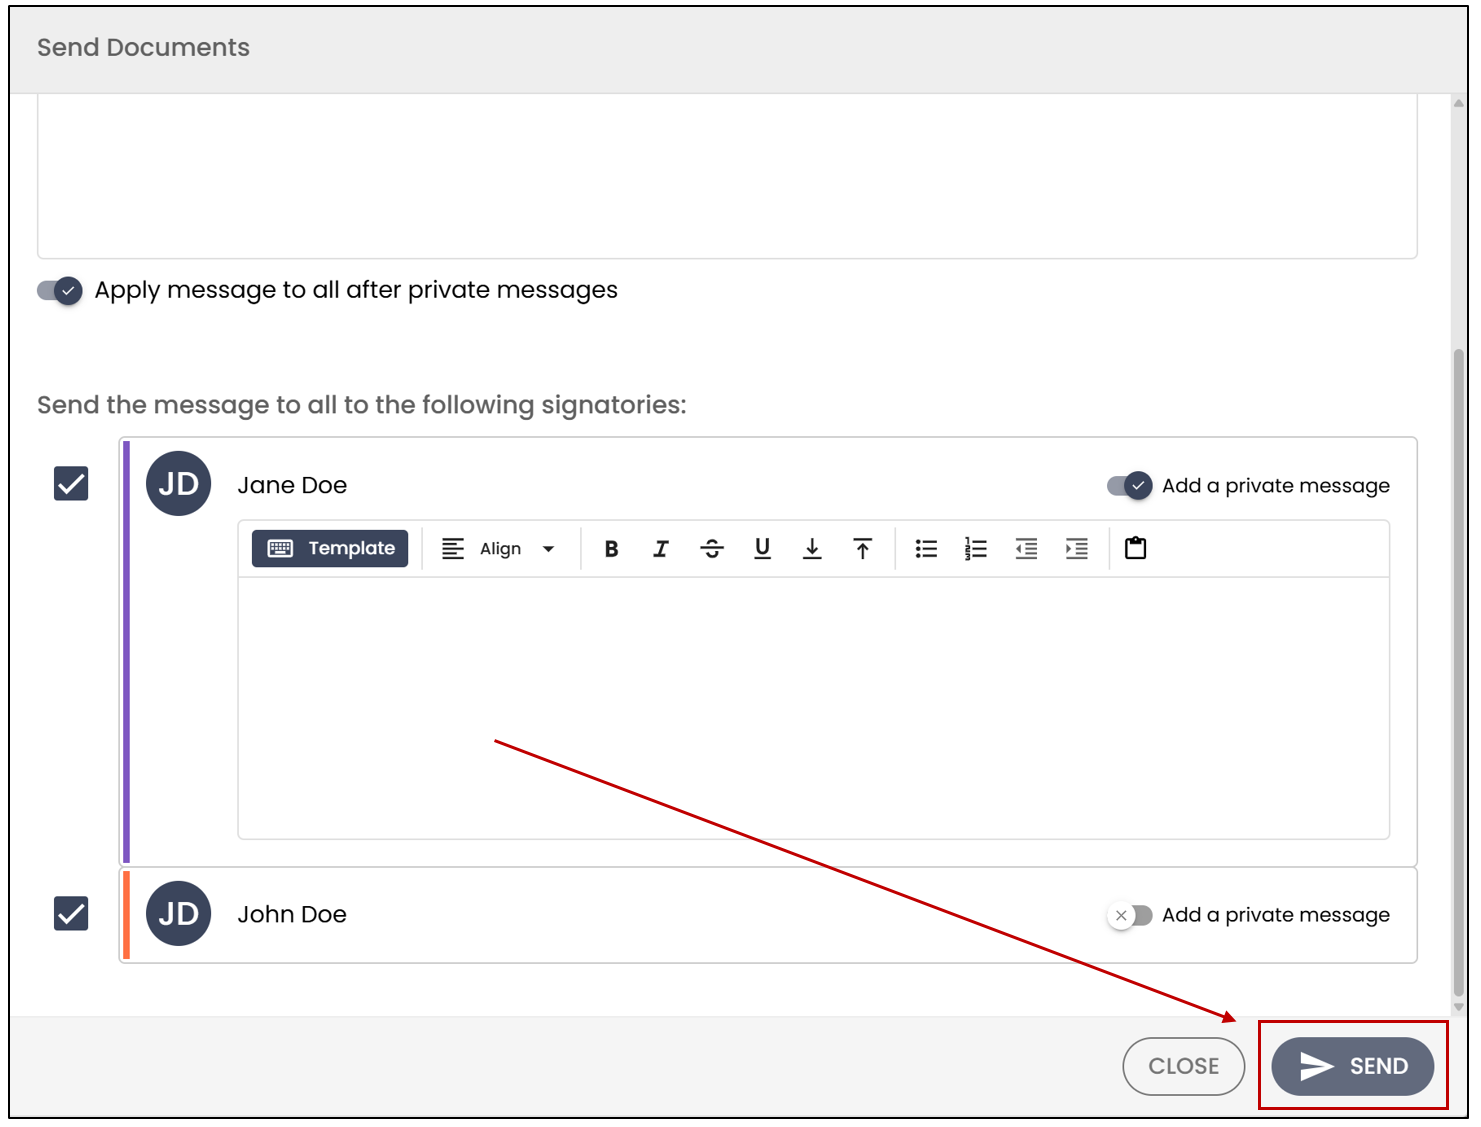
- You will then have the option to add a Message to All. Simply enter a message in the box below. This message will appear in the email that the document signers receive.
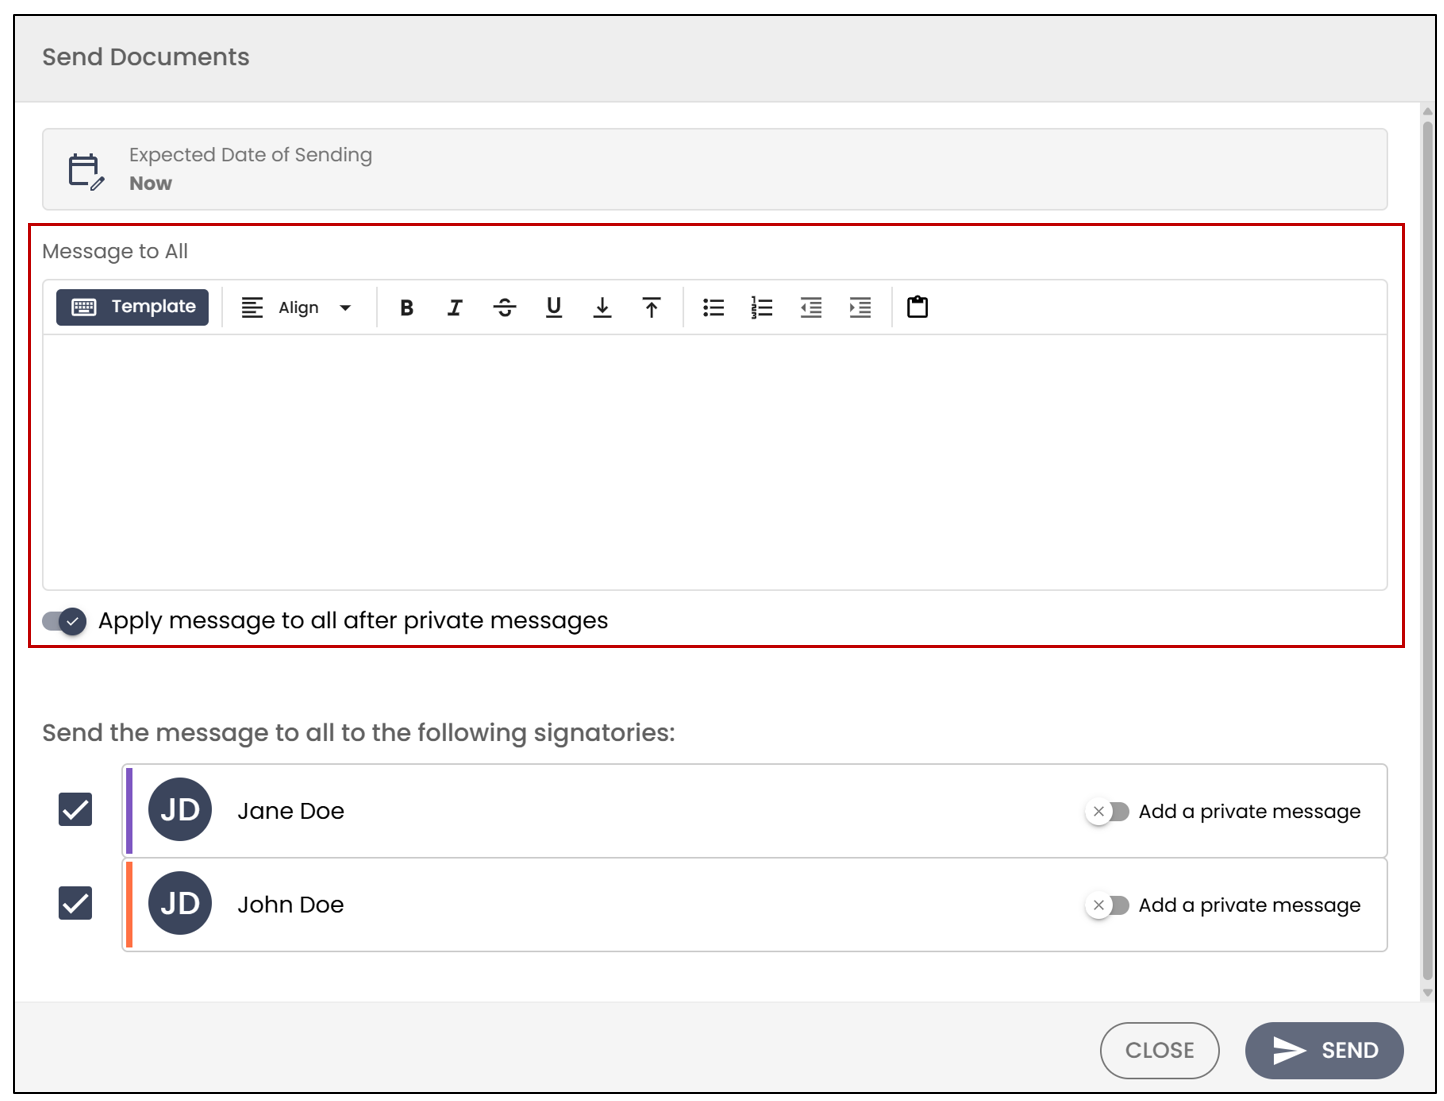
- To send a private message to only one of the signers, you will need to enable this option to the right of the desired signer.
Content Templates
NOTE: This option is only available to users with a Pro account.
You can pre-save content templates to use when sending a Message to All or a private message.
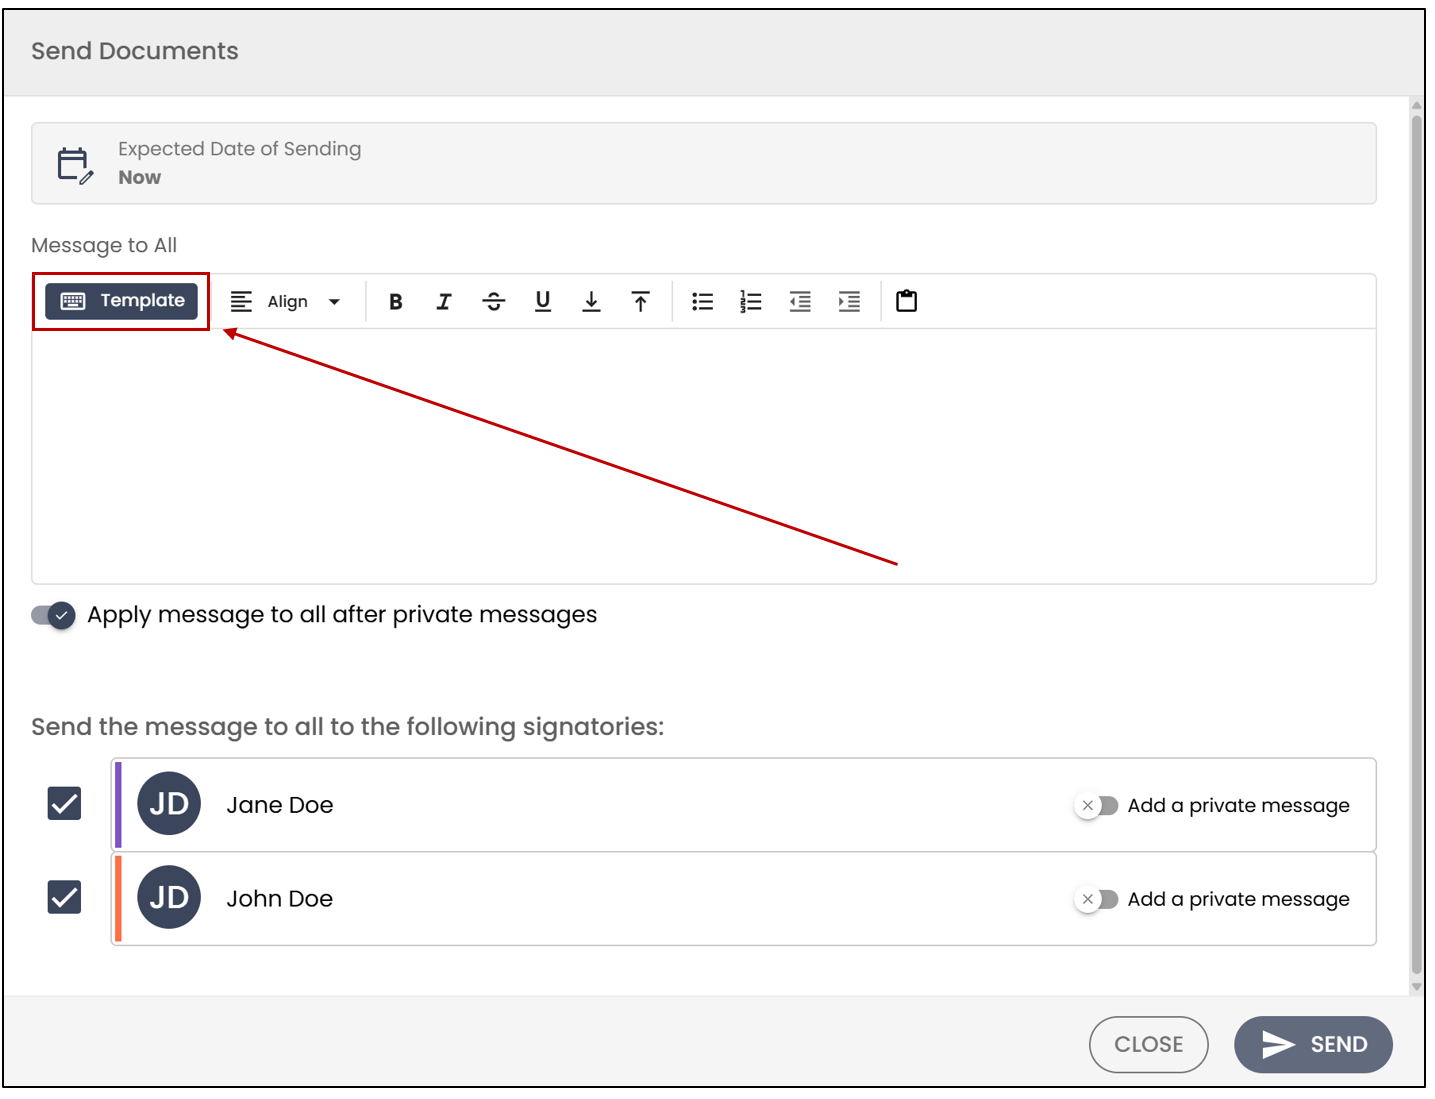
- Click on Template to add a content template.
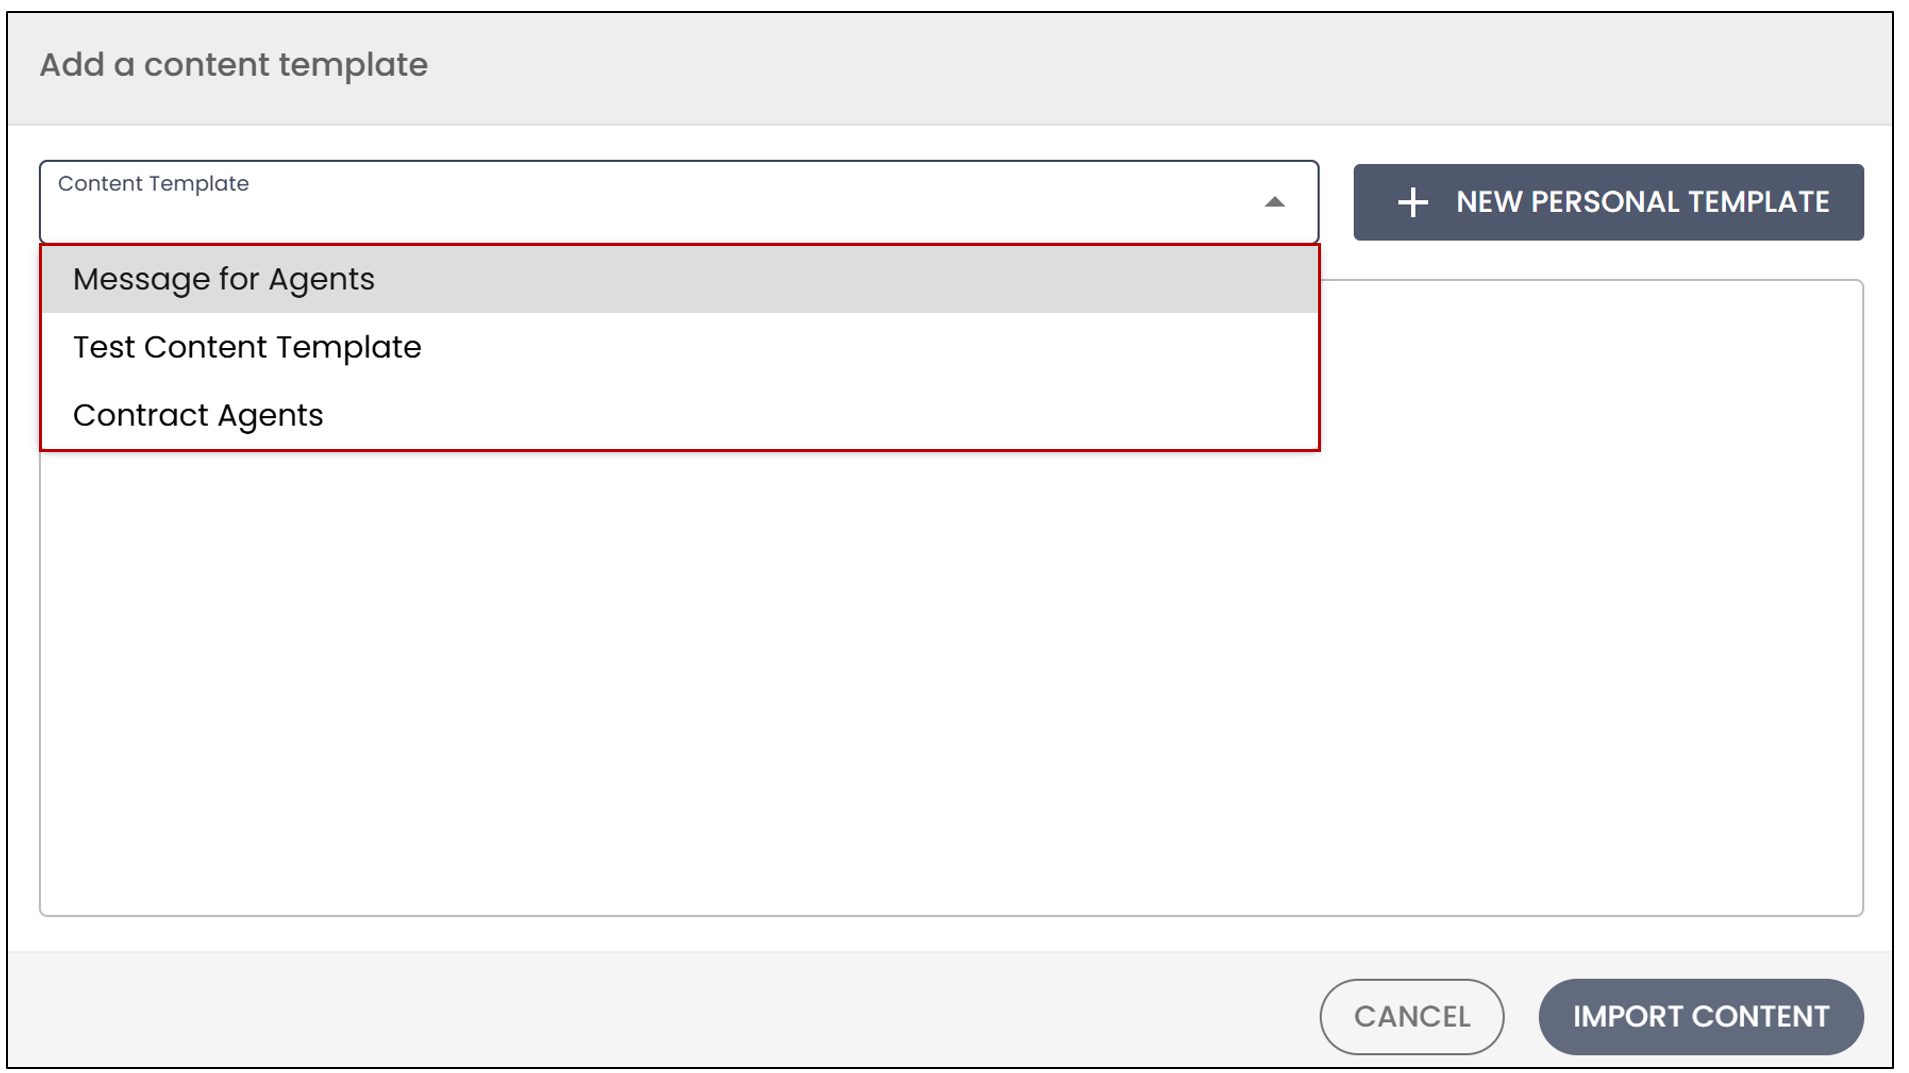
- You can select a Content Template from the drop-down list.
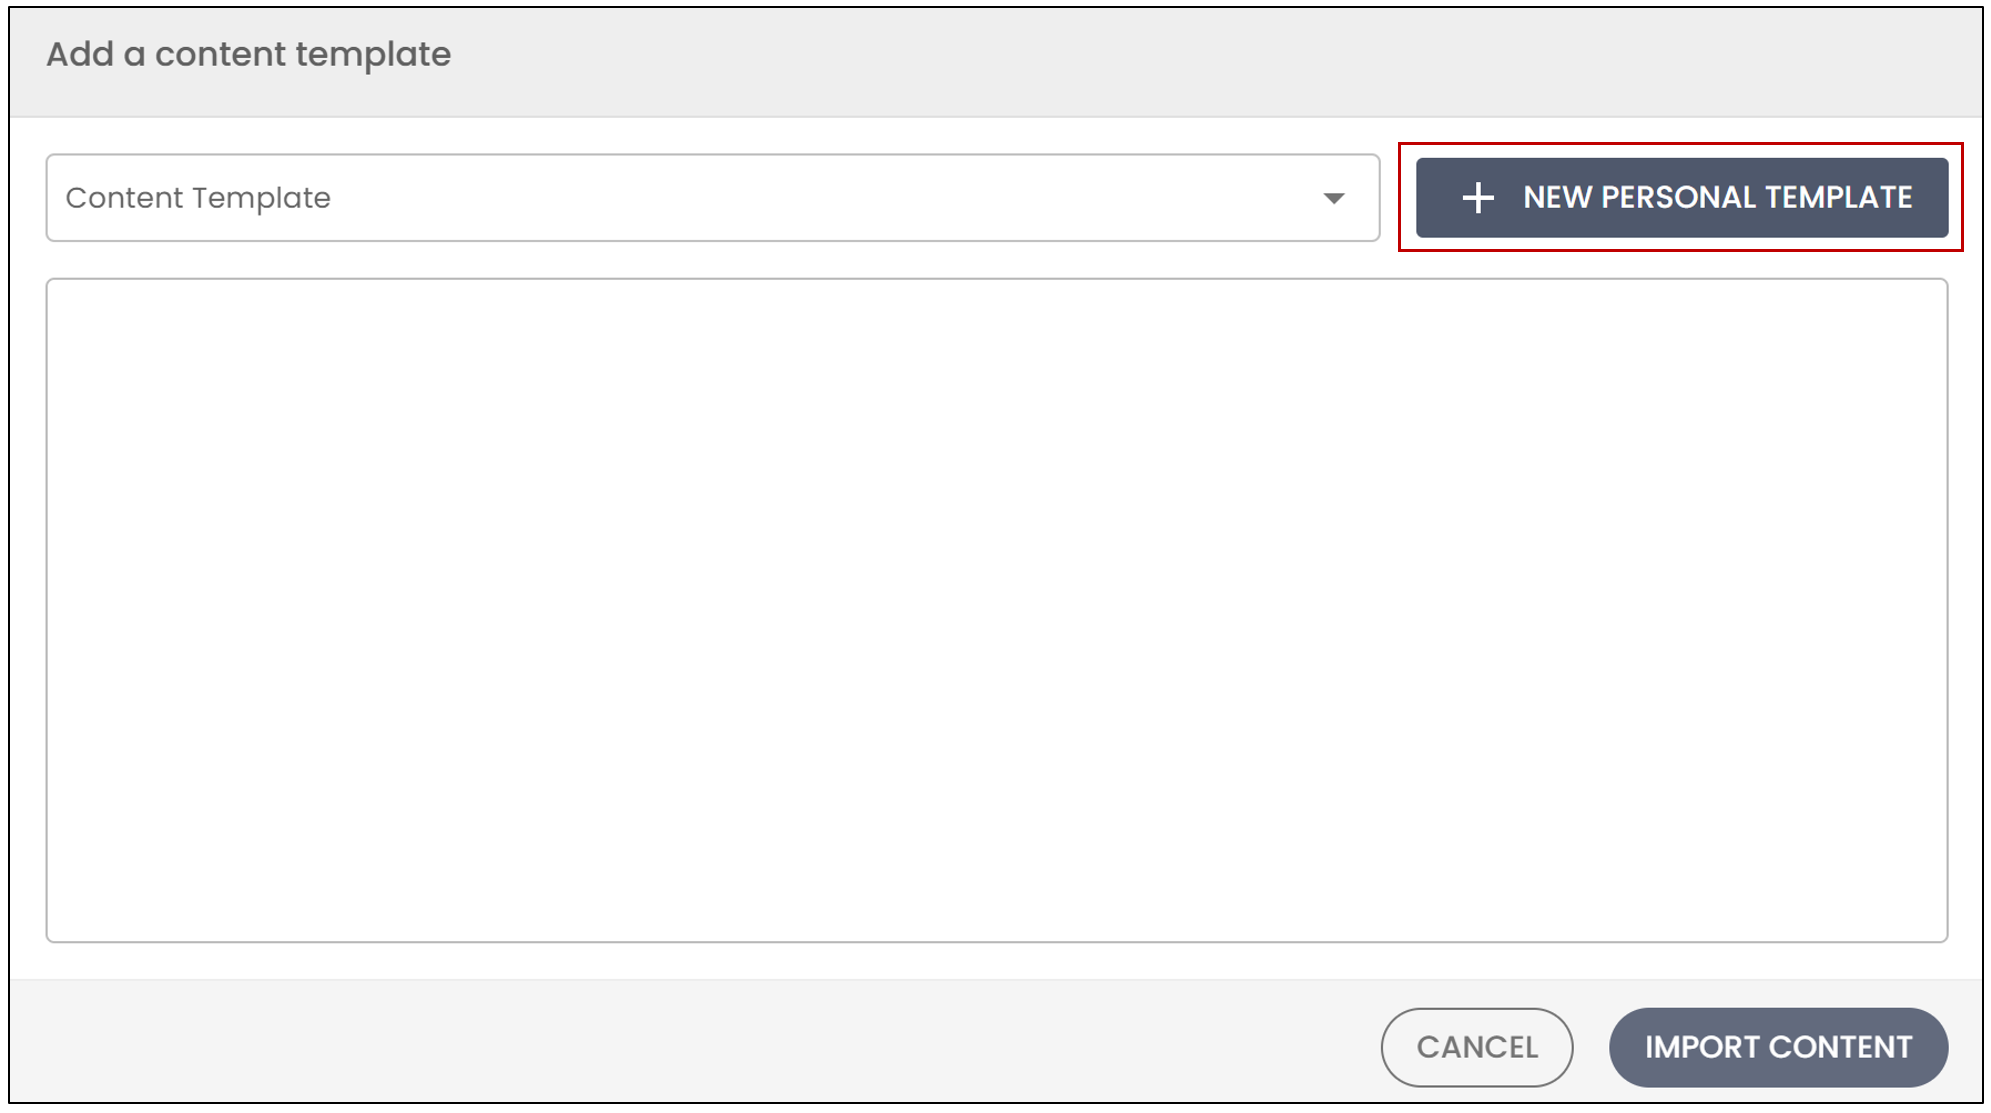
- To create a new one, click on New Personal Template.
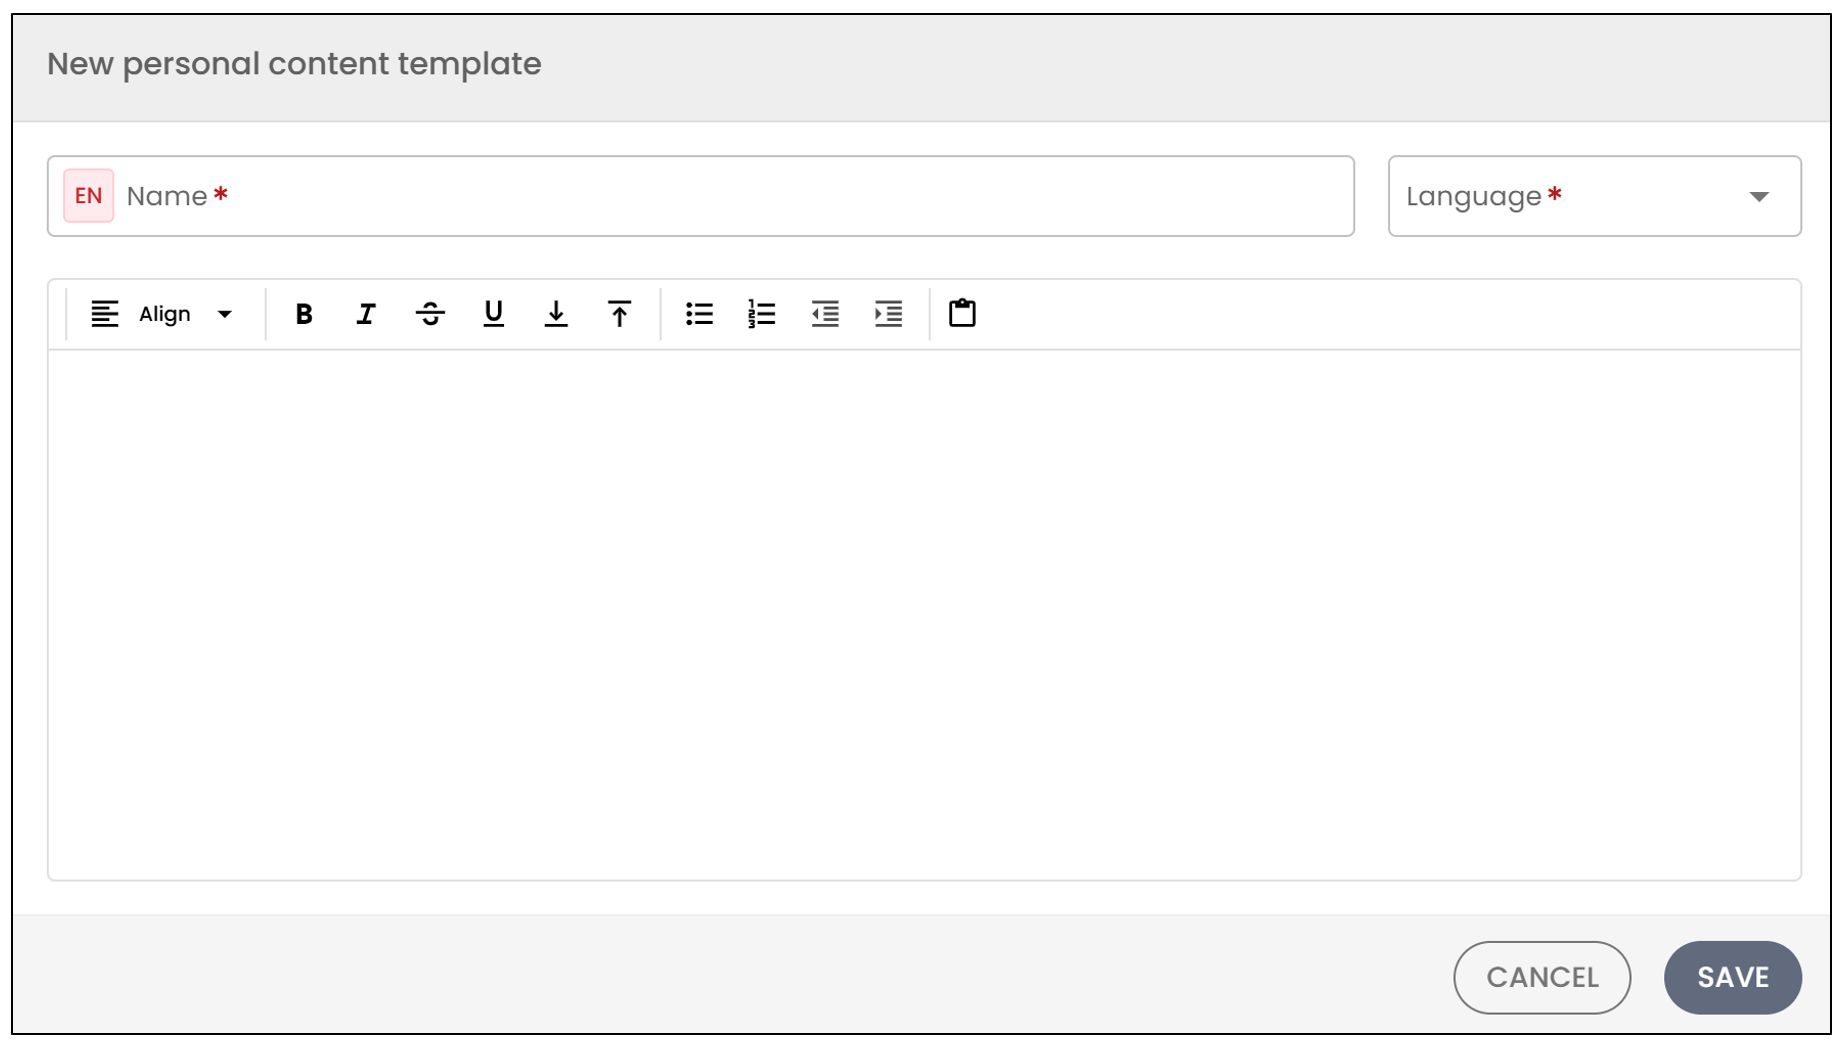
Enter the template Name and Language.
You can then enter the message content and click on Save.
When you’re ready to send, click Send.
Edit eZsign Folder Information
- If you want to edit the eZsign folder information, select this option.
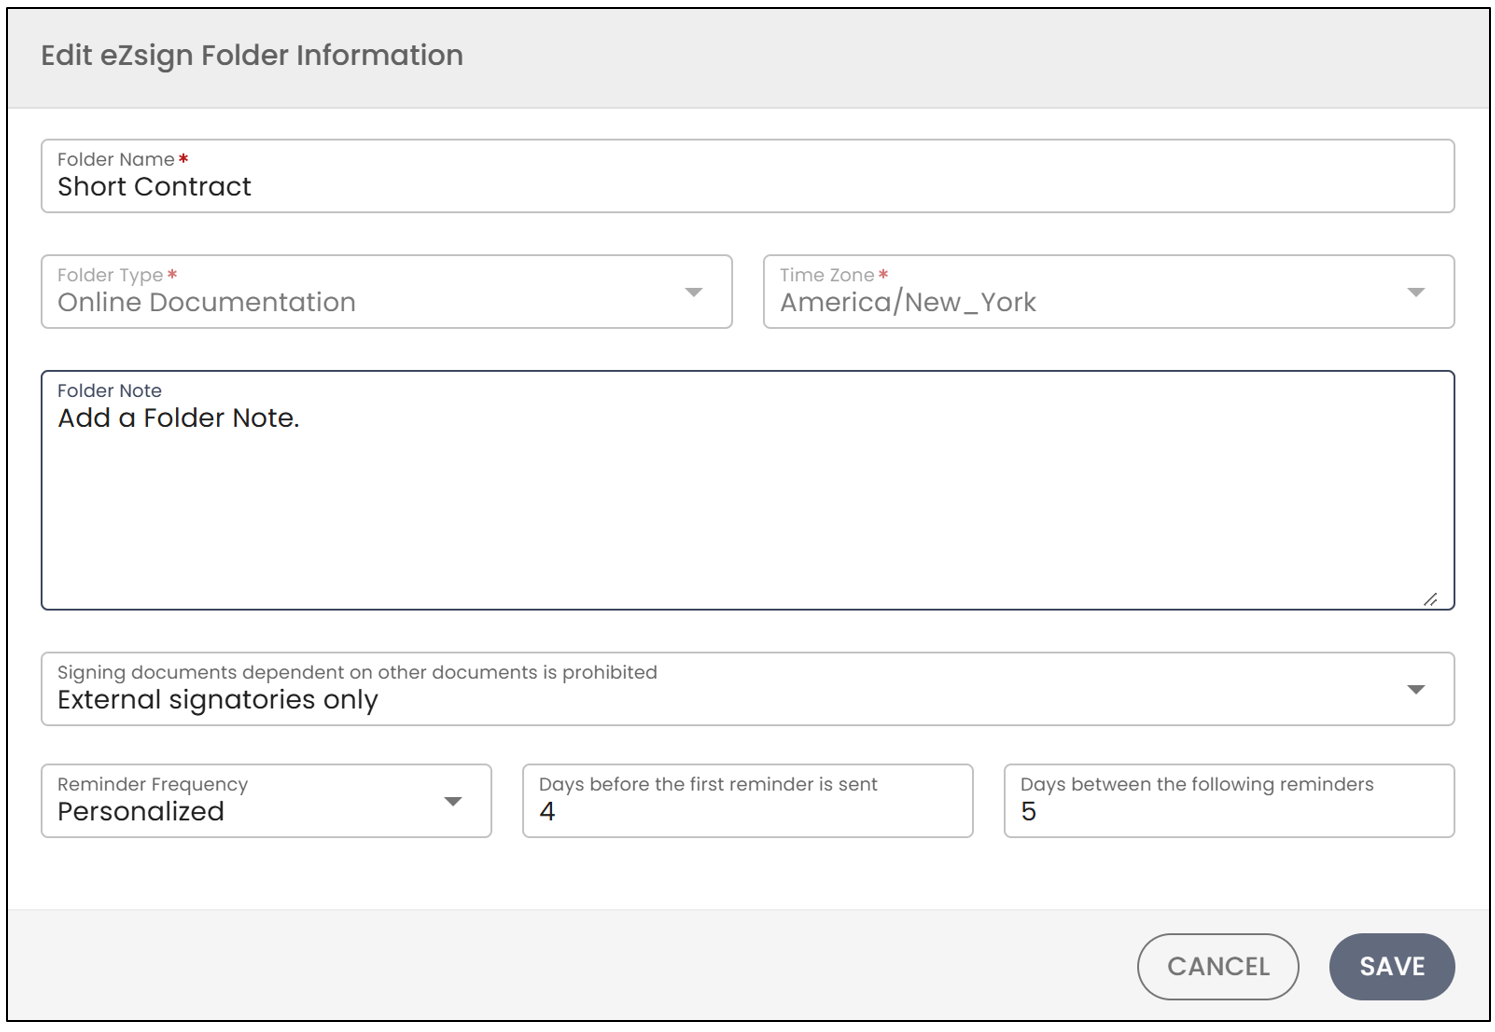
You will be able to:
* Edit the **Folder Name**Add a Folder Note
Configure the restriction on signing documents that depend on other documents
Modify the Reminder Frequency , if you add new documents to be signed in this eZsign folder. For more information on customizing reminder settings sent to clients, please refer to the article Configuration of personalized reminders in folders.
When you’re done making changes, click Save.
Change Order of Documents
- If you want to rearrange the display order of the documents, click on Change the Order of Documents.
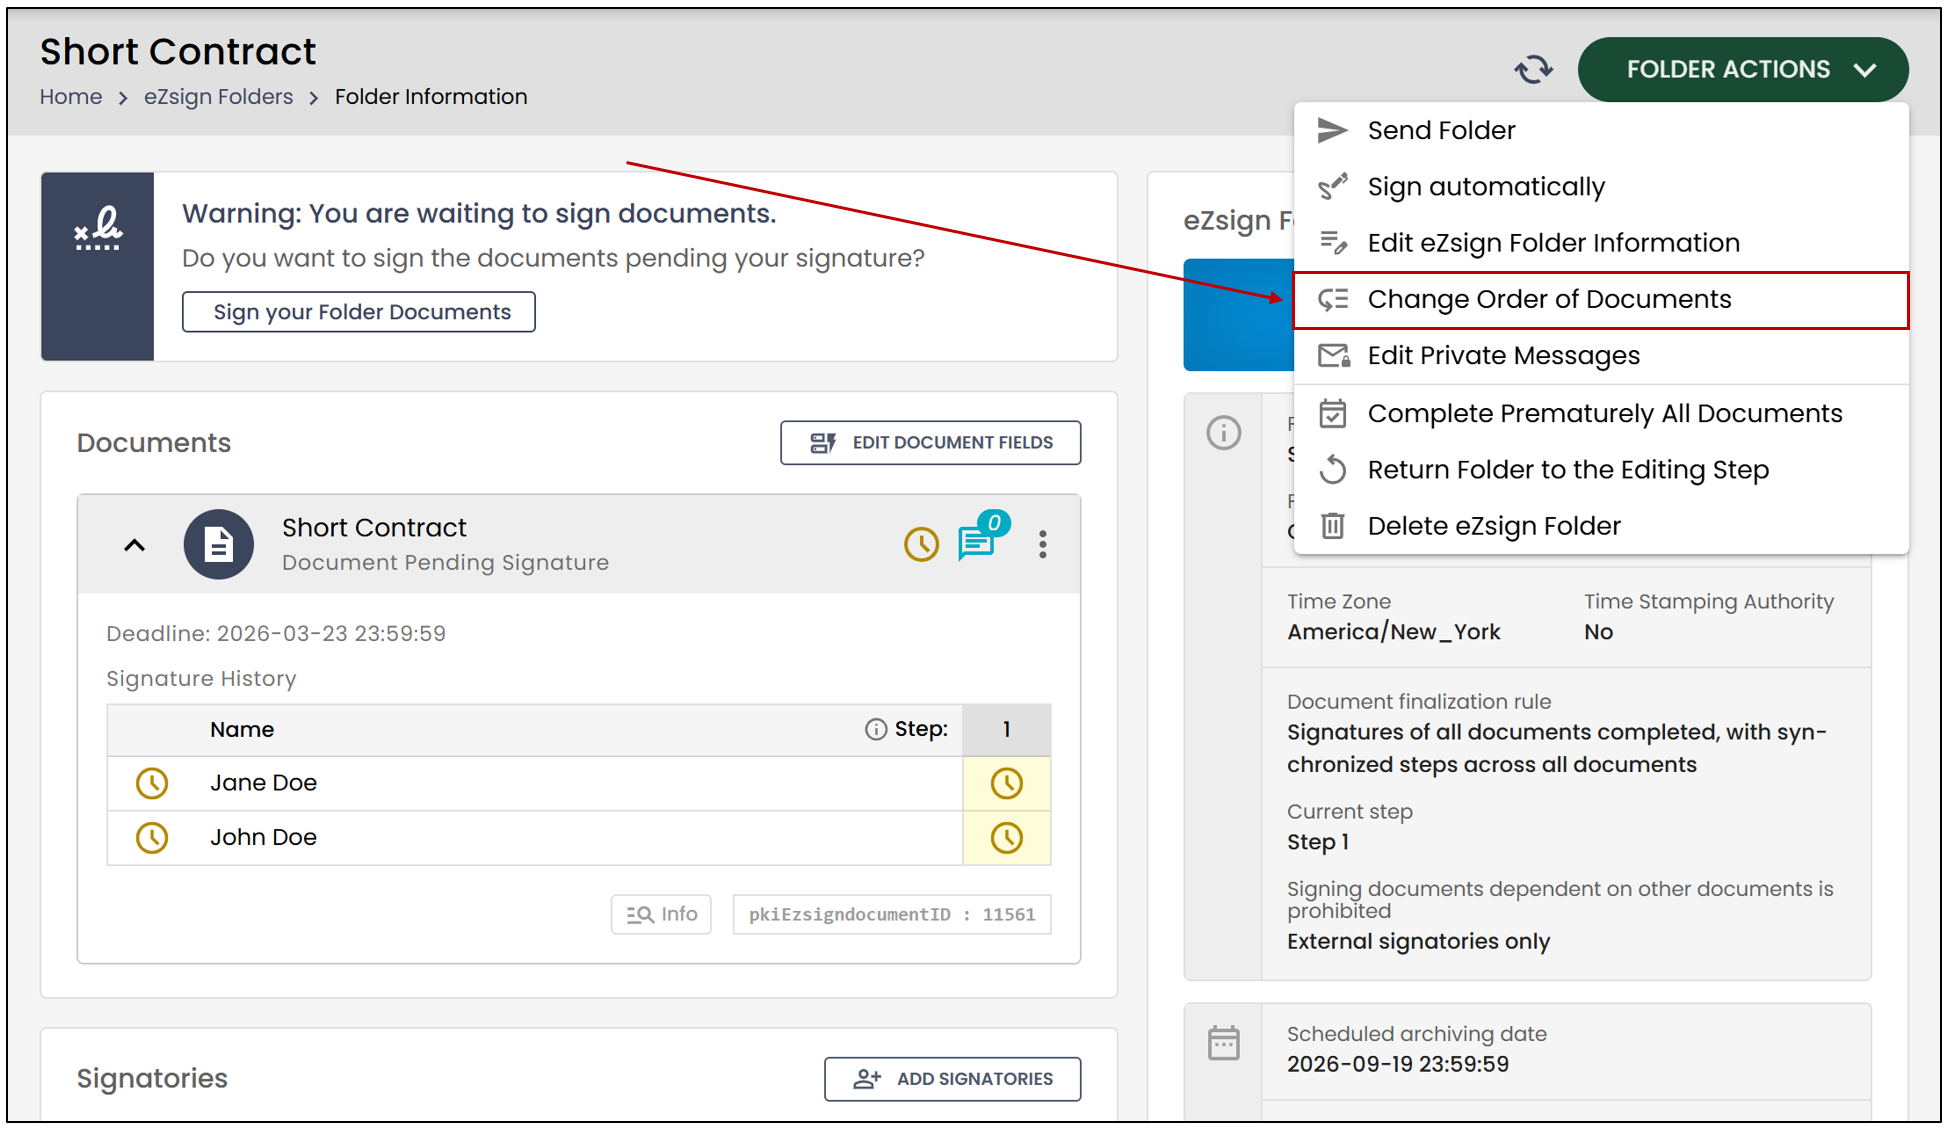
- You can move the documents in the folder with your mouse (on computer) or with your fingers (on mobile) to change the display order.
Edit Private Messages
- If you want to modify the private messages in the folder, click on Edit Private Messages.
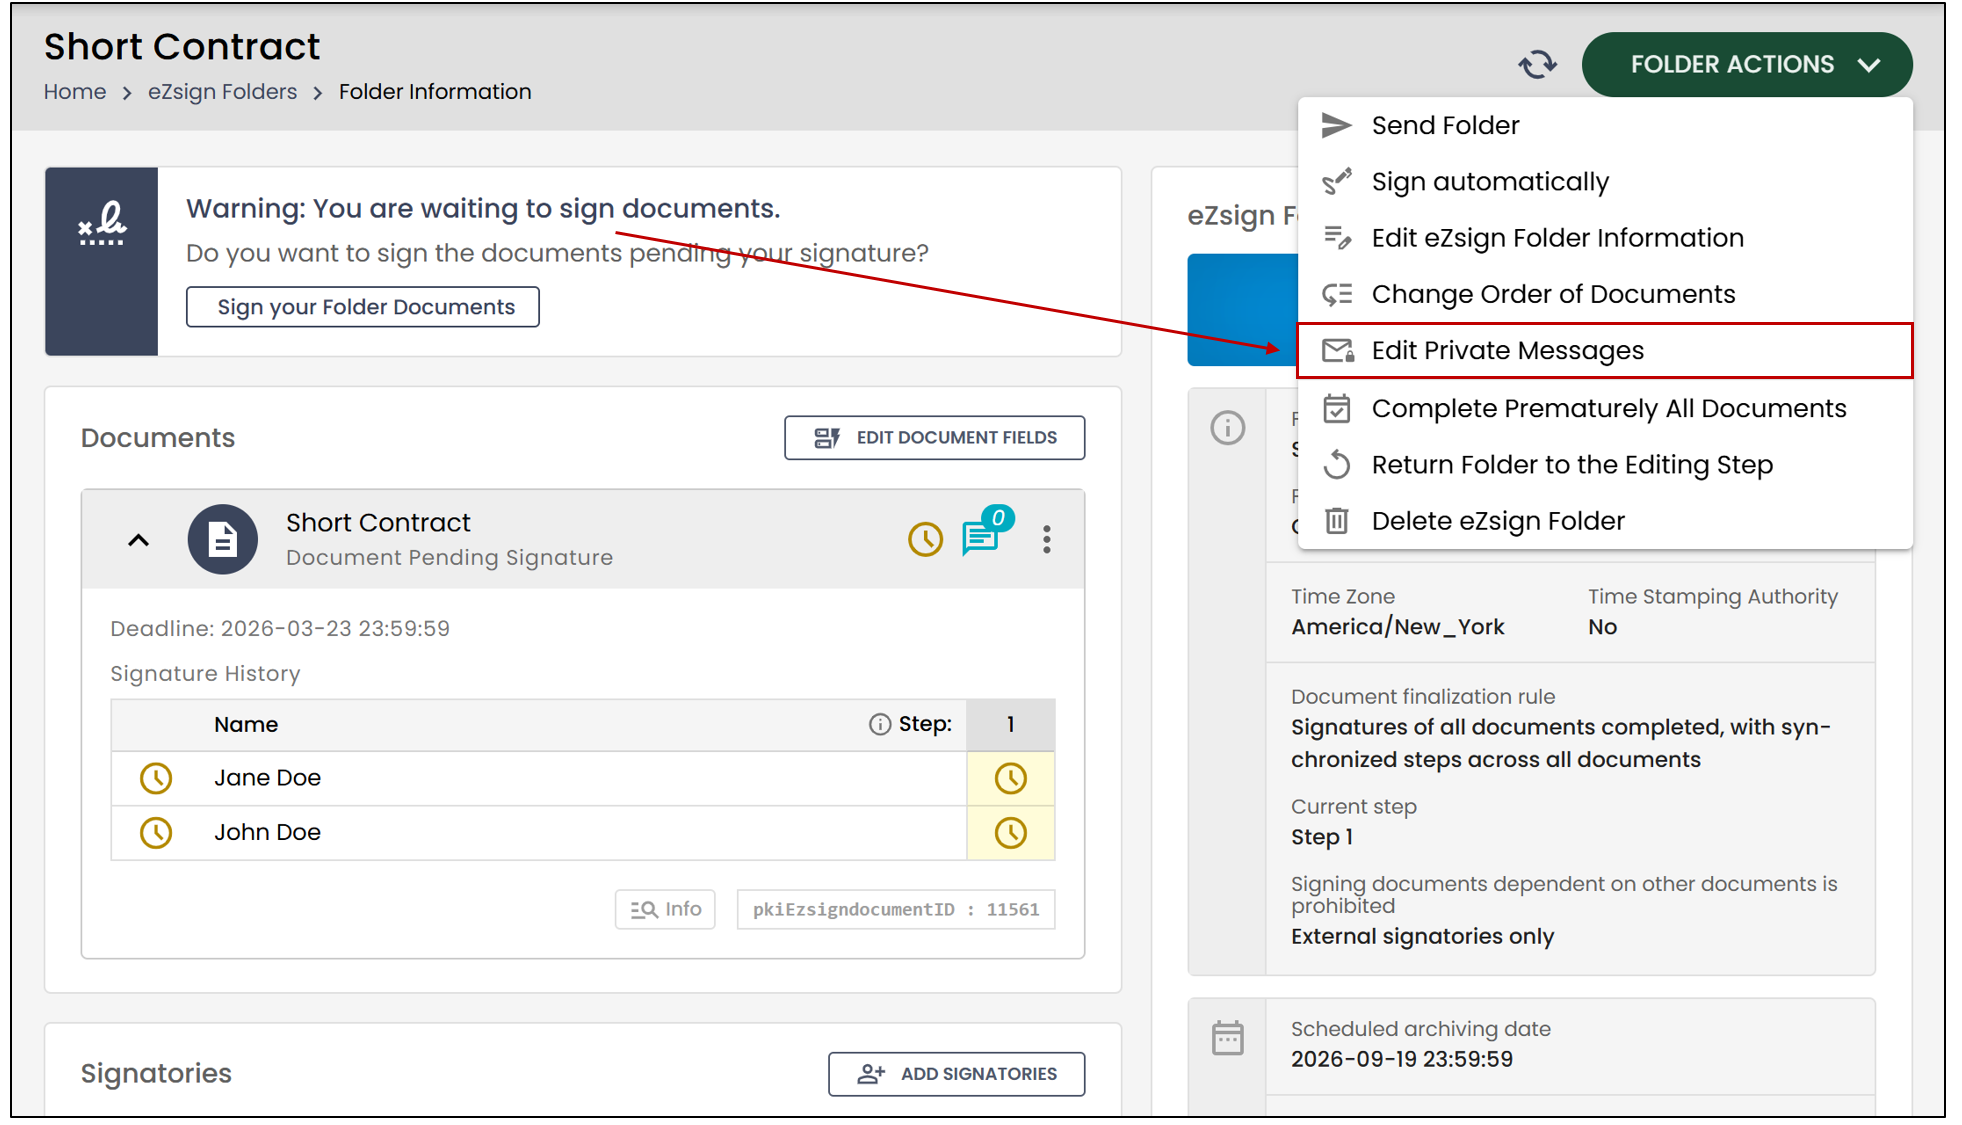
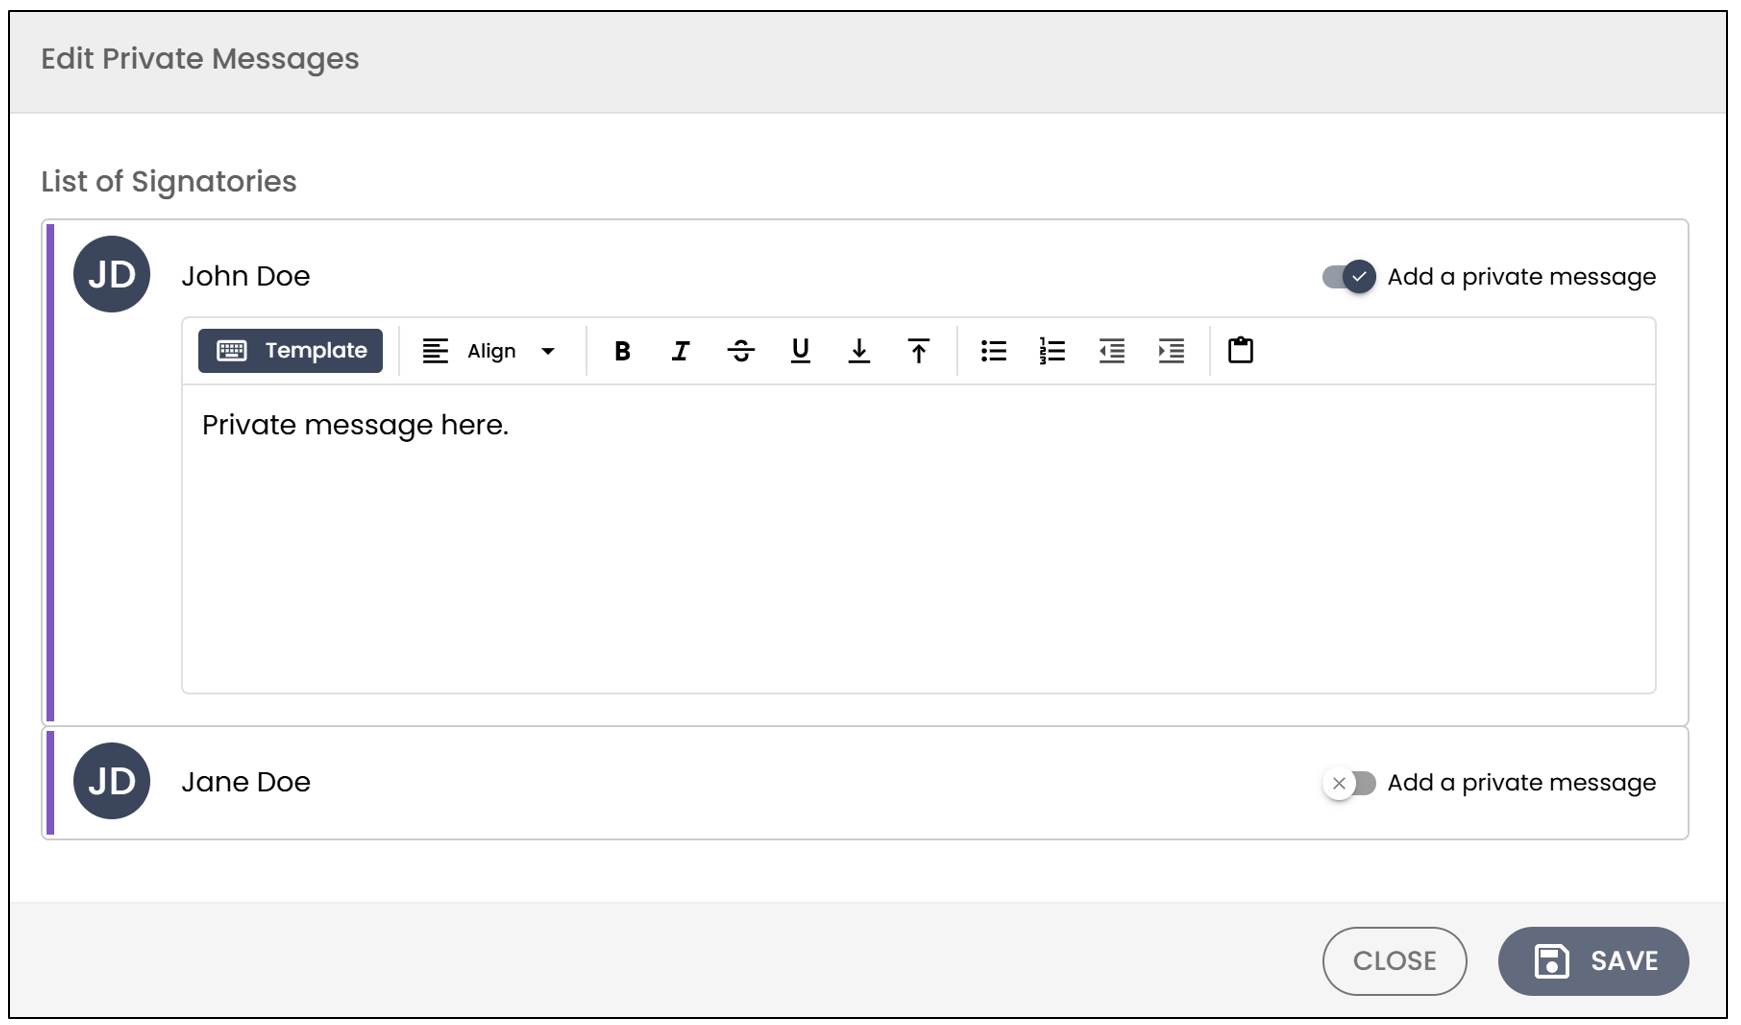
- You will then be able to edit the private messages and click on Save.
Complete Prematurely All Documents
- If one of the signers decides not to sign one or more documents, but you wish to keep the signatures already collected, you can then Complete Prematurely All Documents.
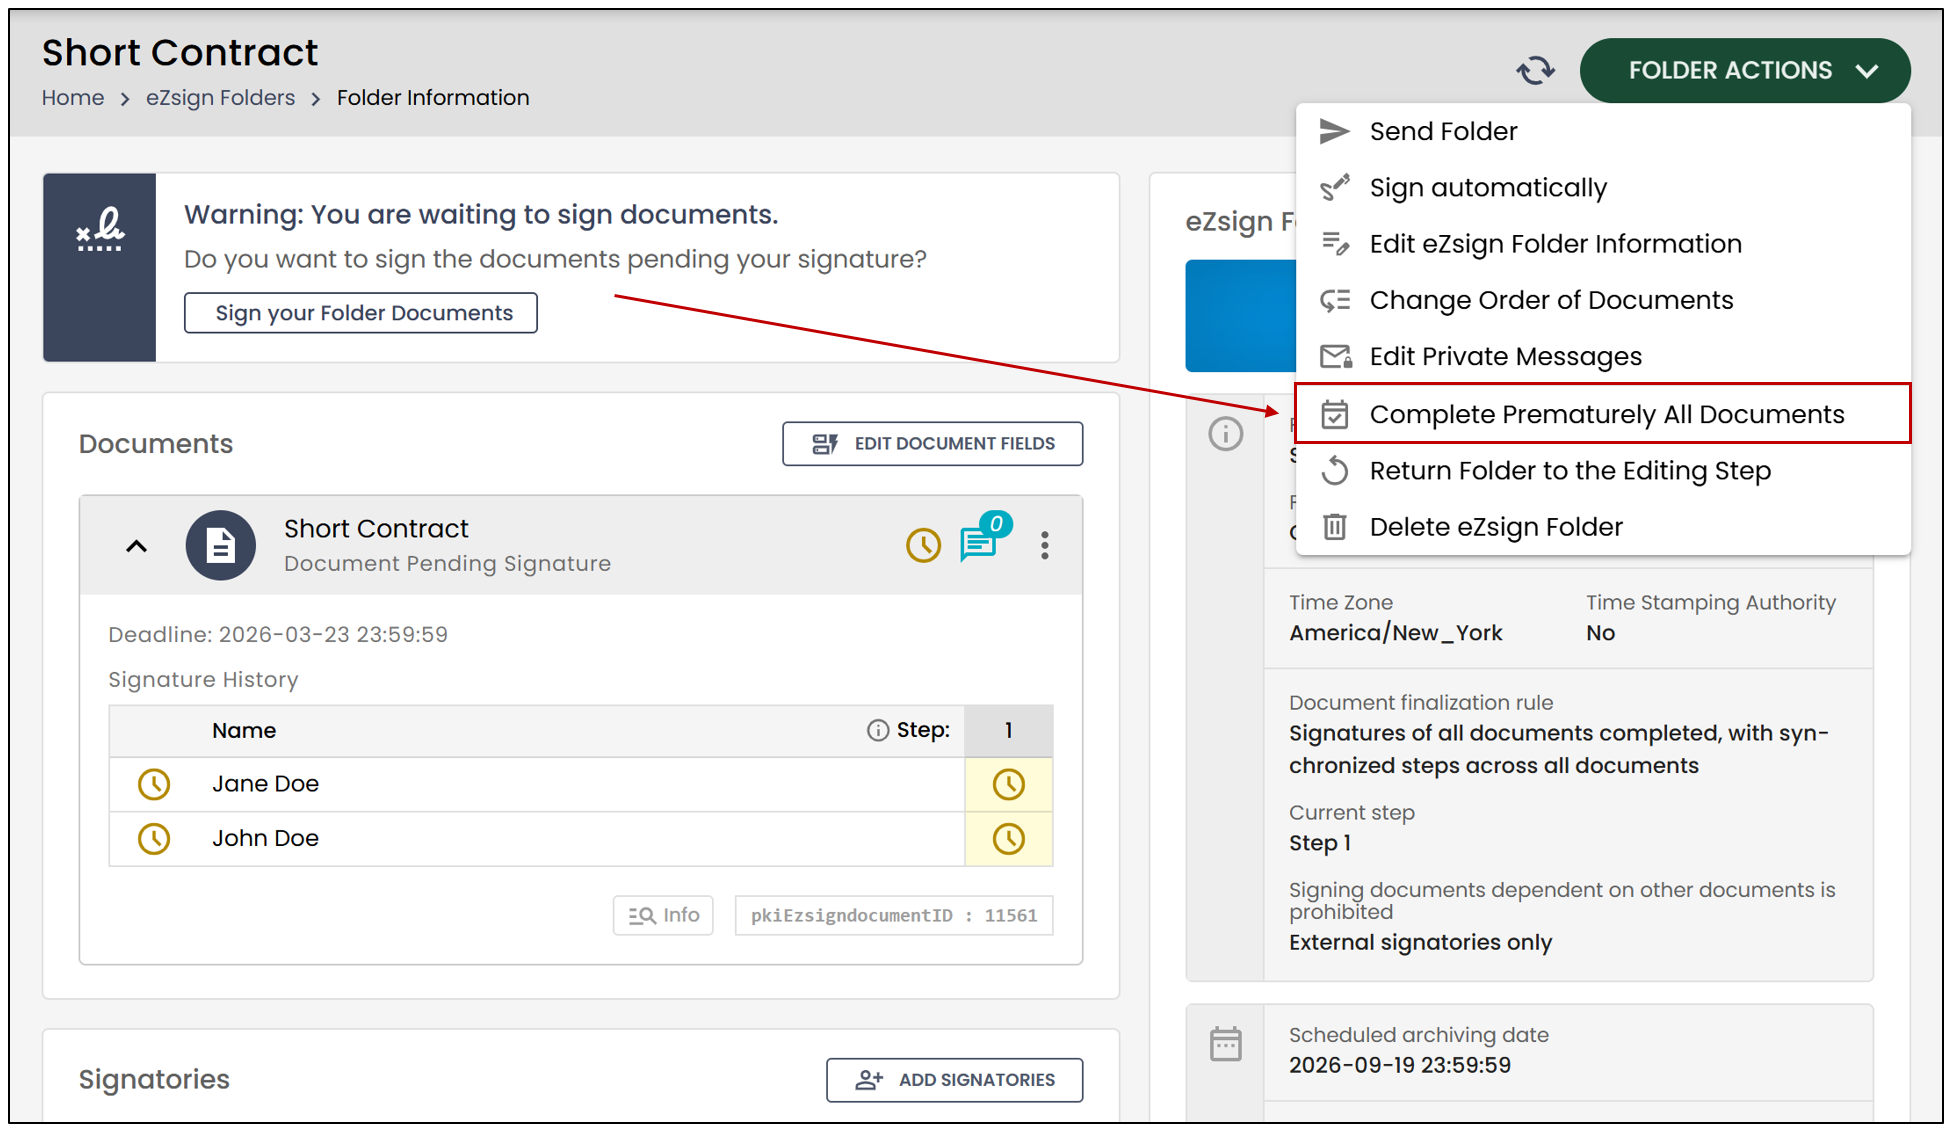
This message will appear:
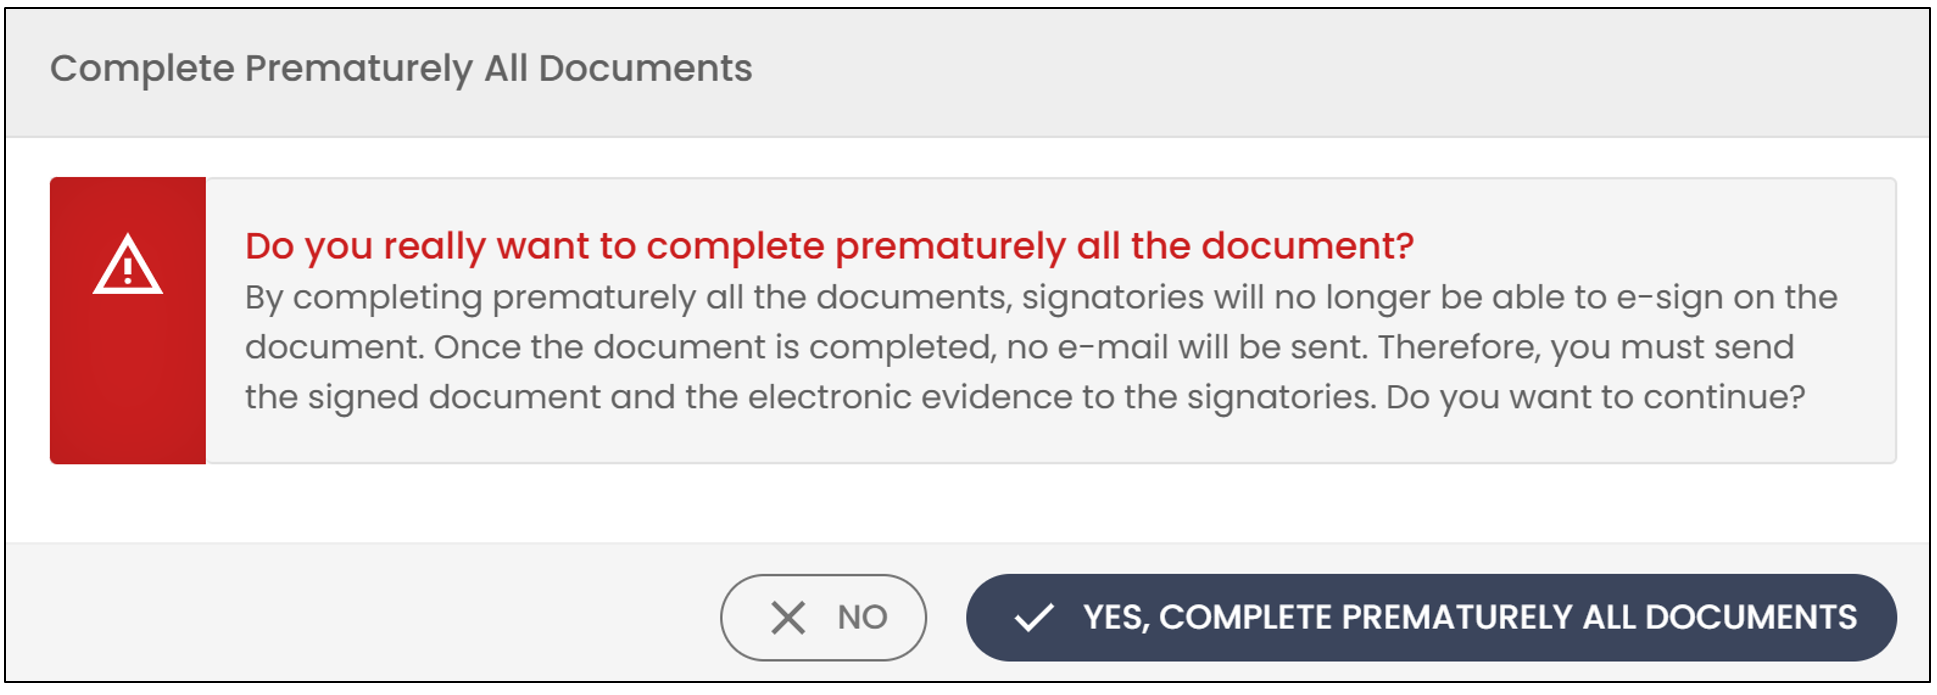
- Click on Yes, complete prematurely all the documents.
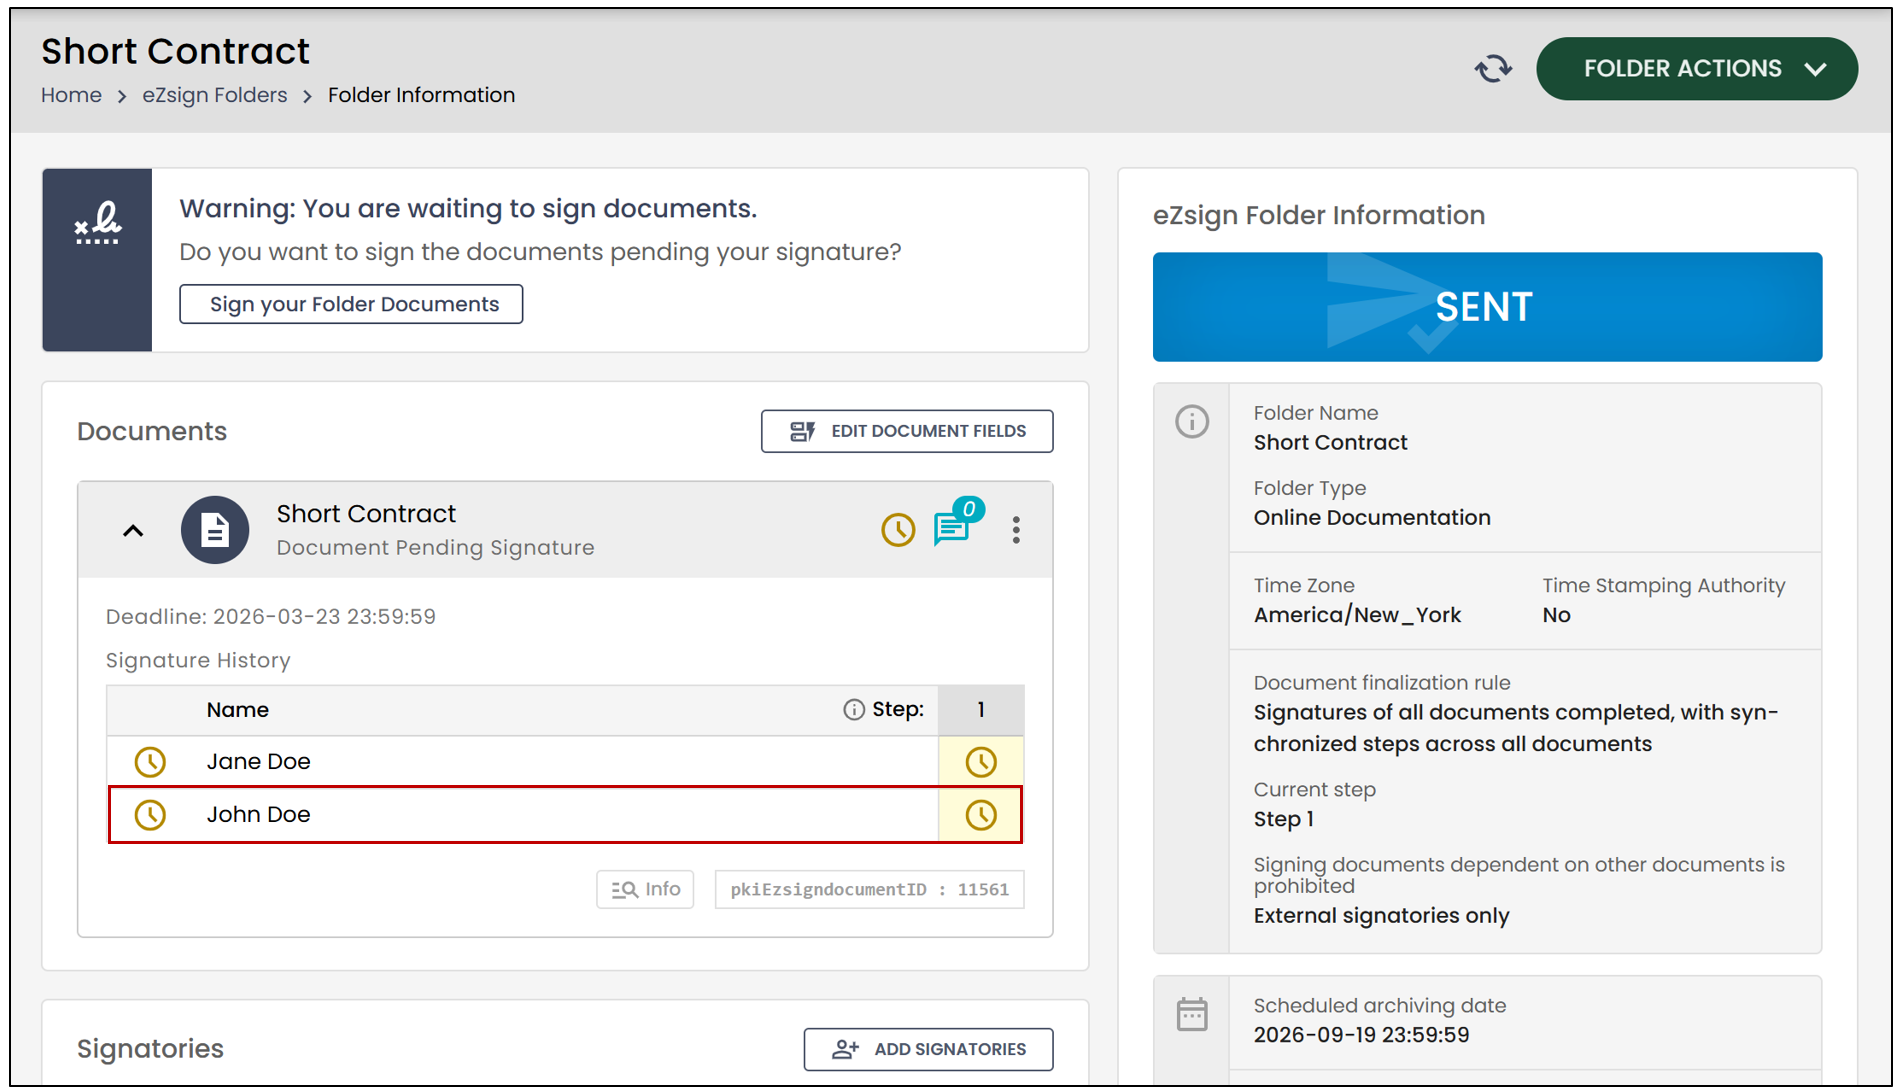
Return Folder to the Editing Step
- If you want to return the folder to the editing step, click on this option.
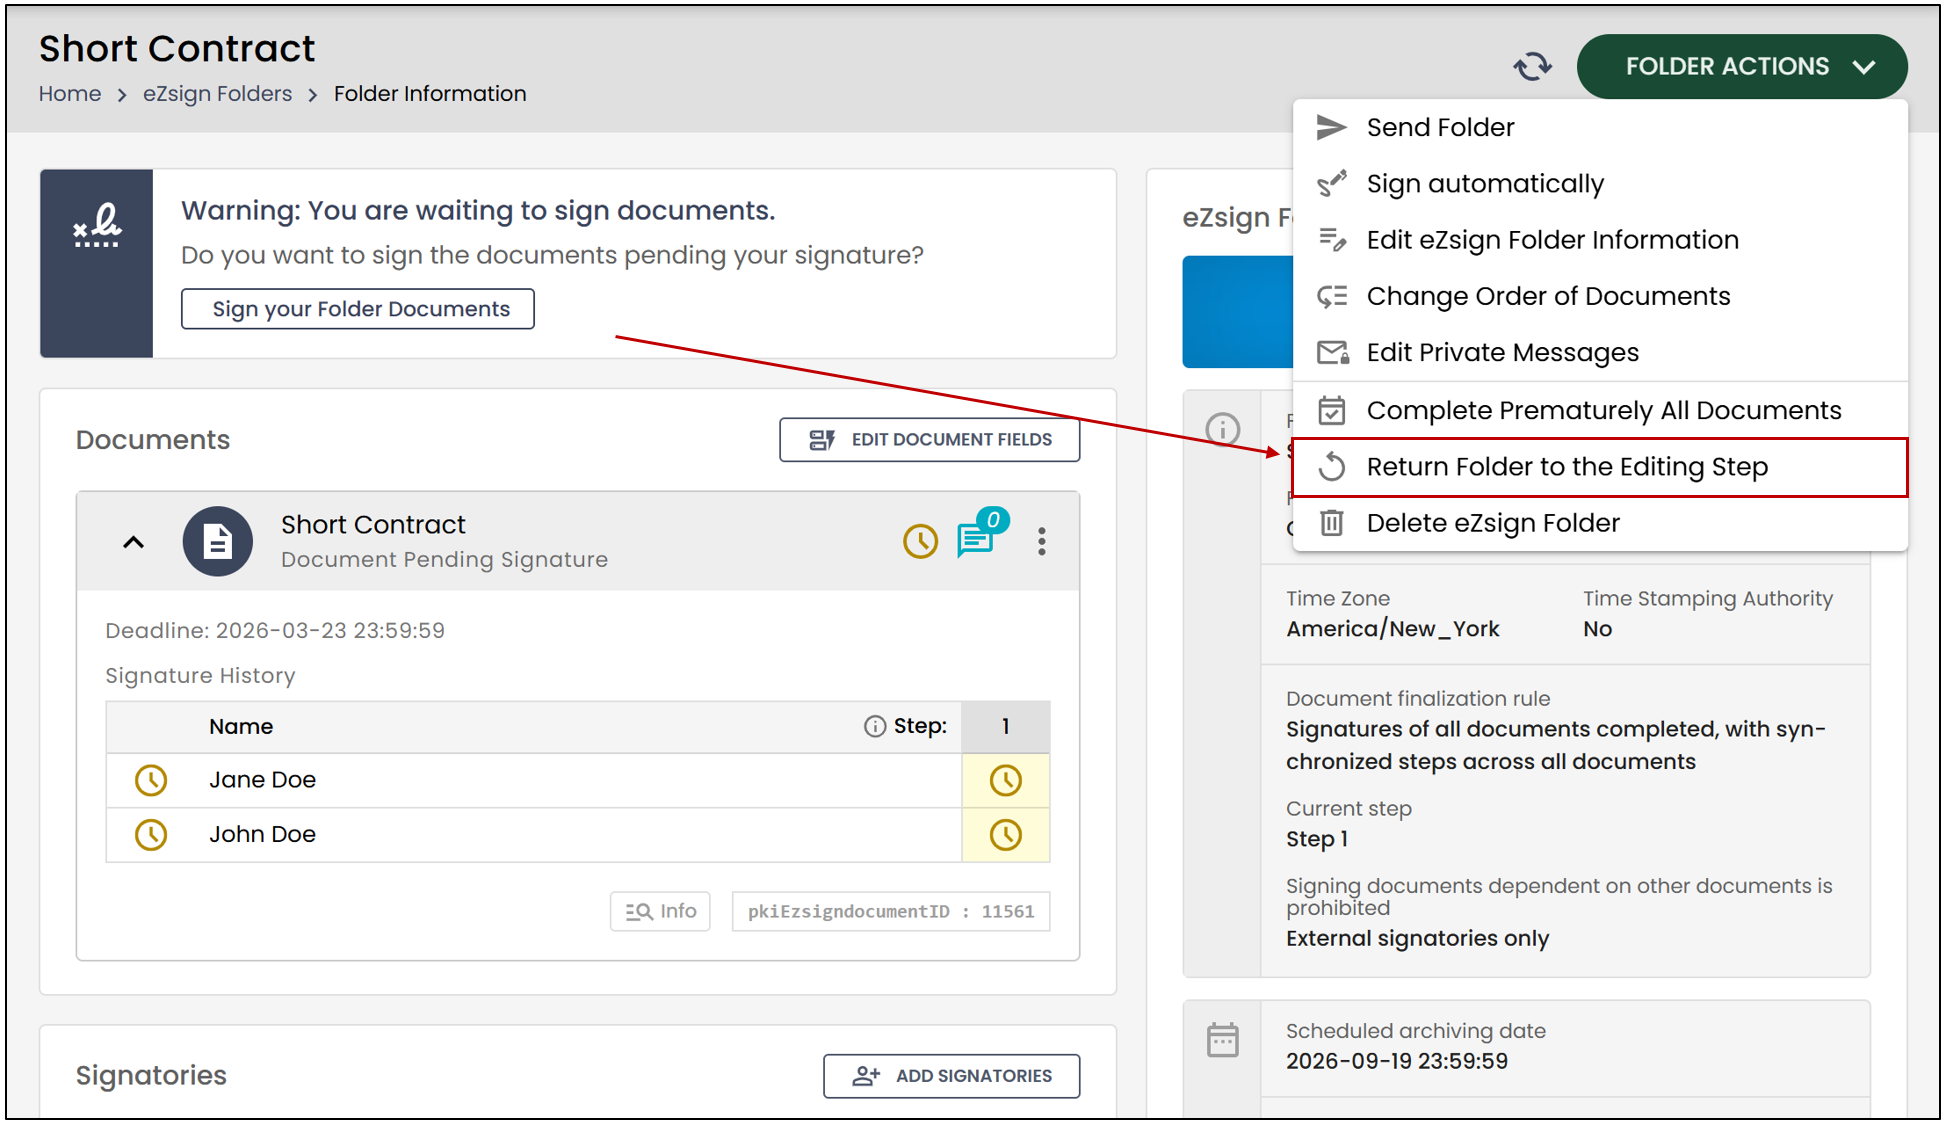
This message will appear:
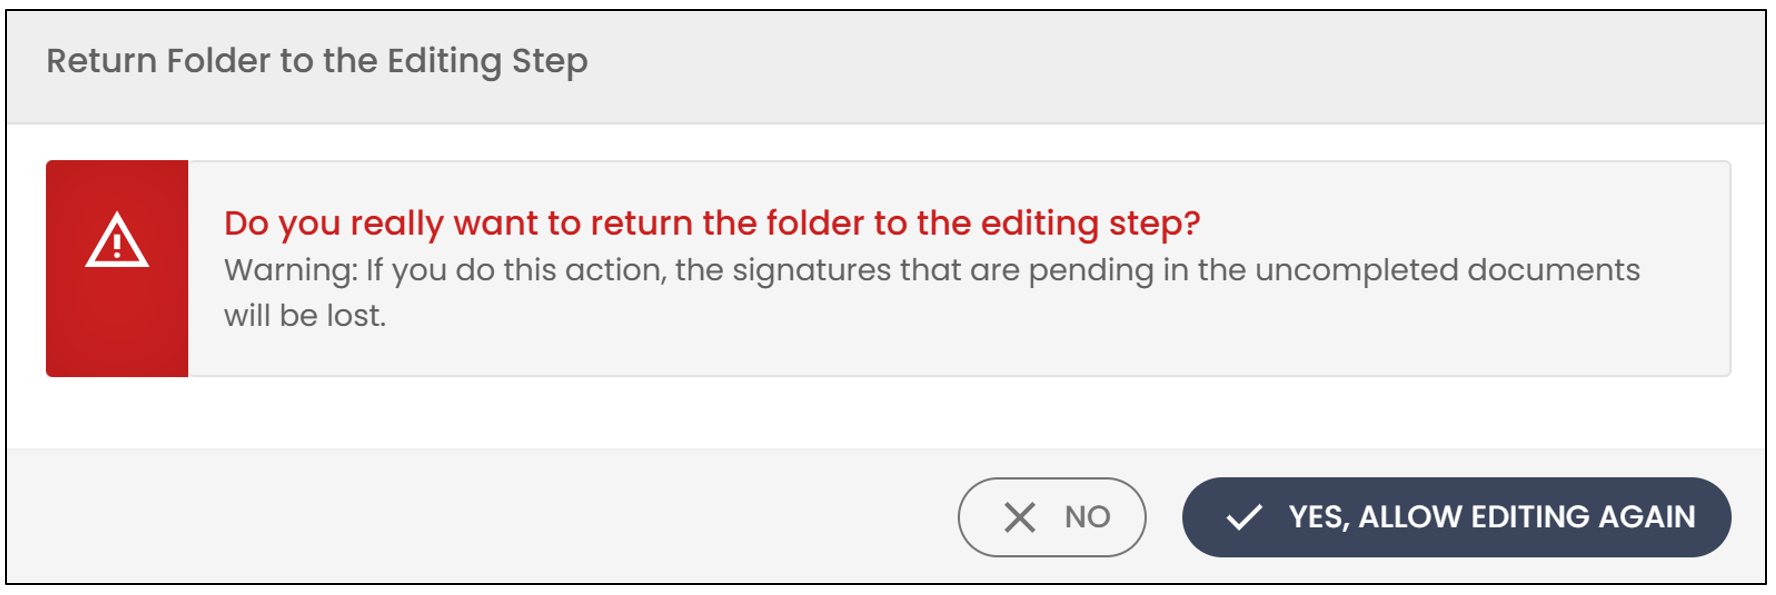
- Click on Yes, allow editing again.
Delete eZsign Folder
- To delete the eZsign folder, click on this option.
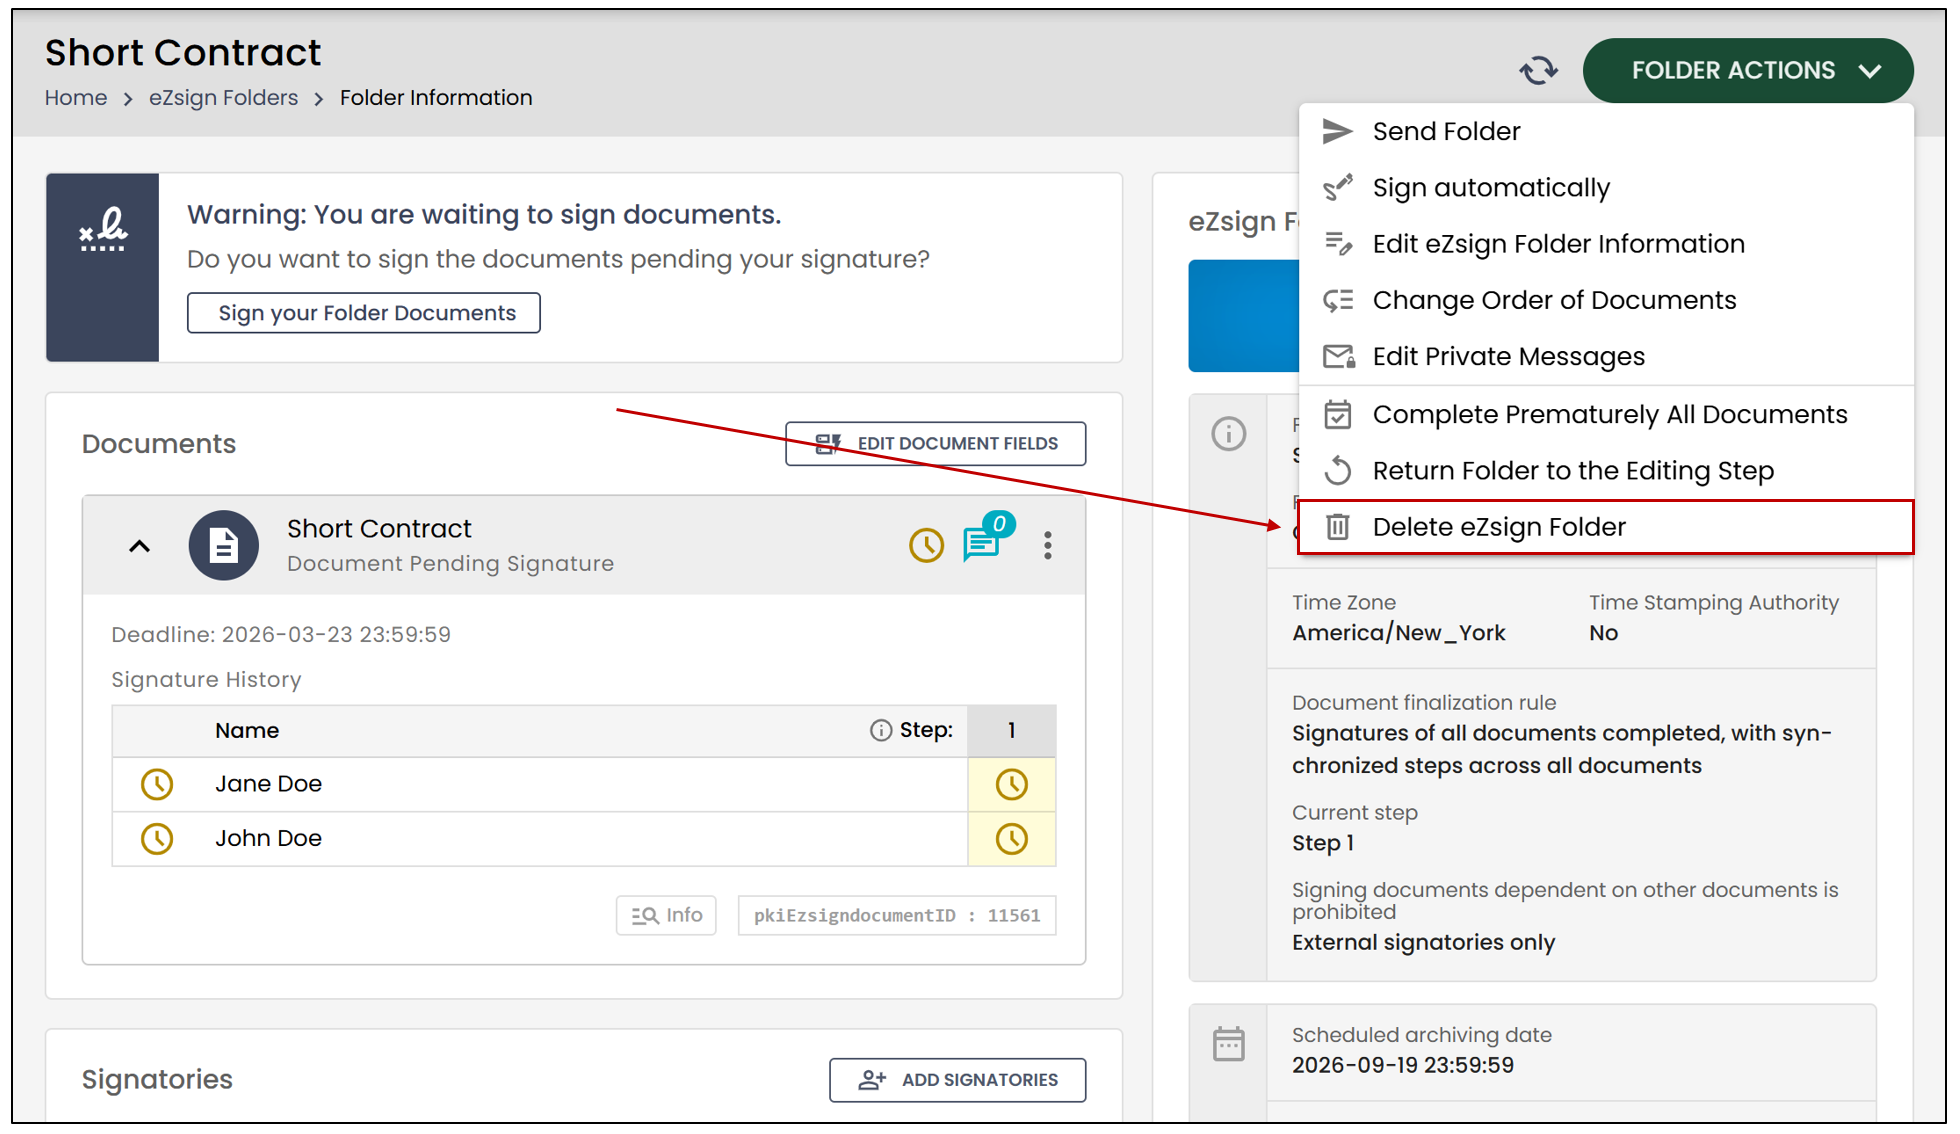
This message will appear:
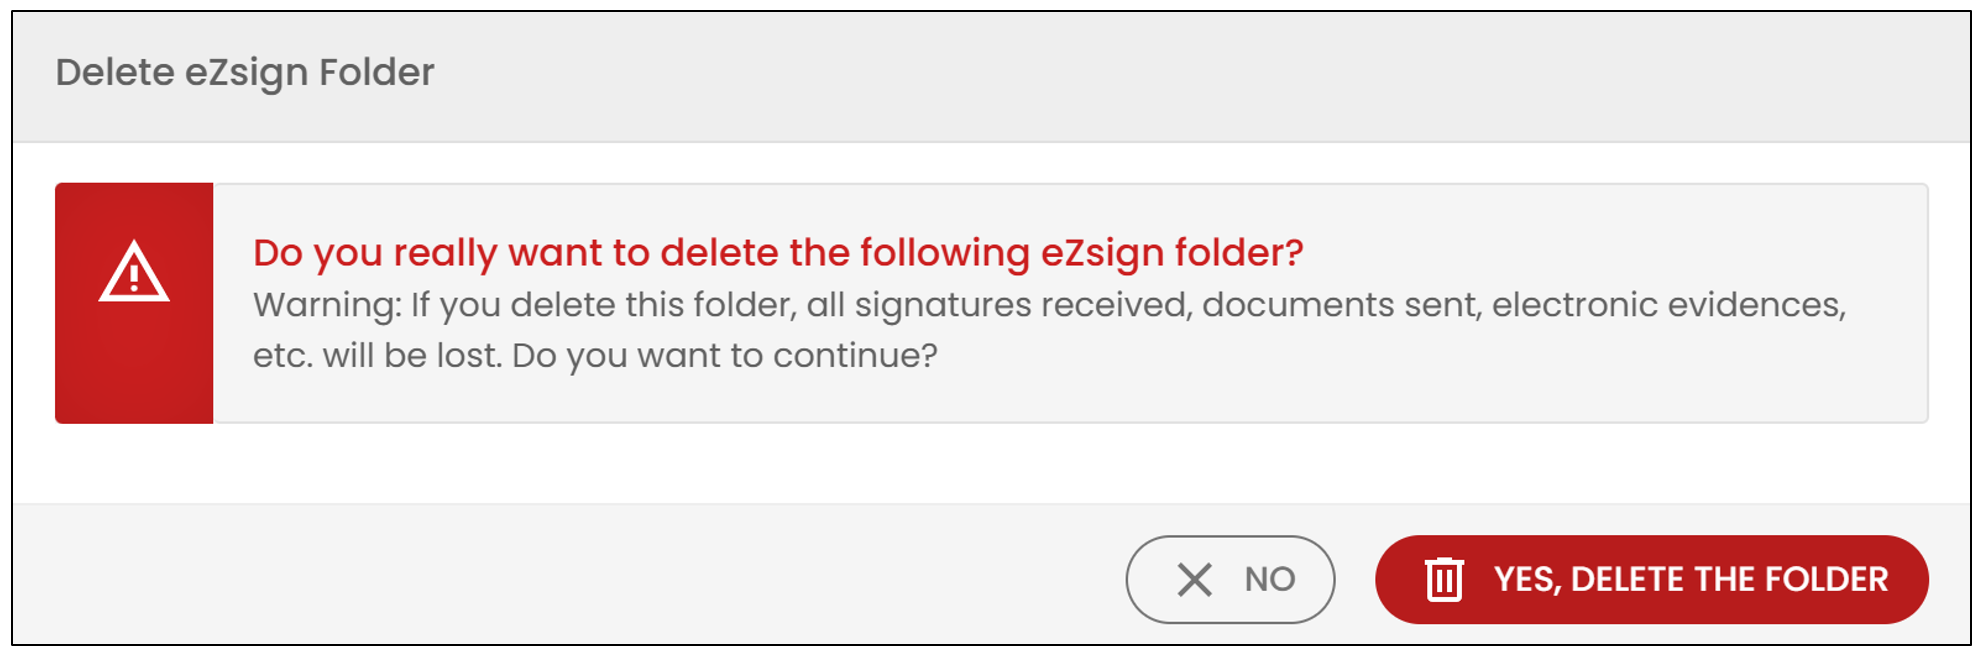
- Click on Yes, delete the folder.
Document Actions
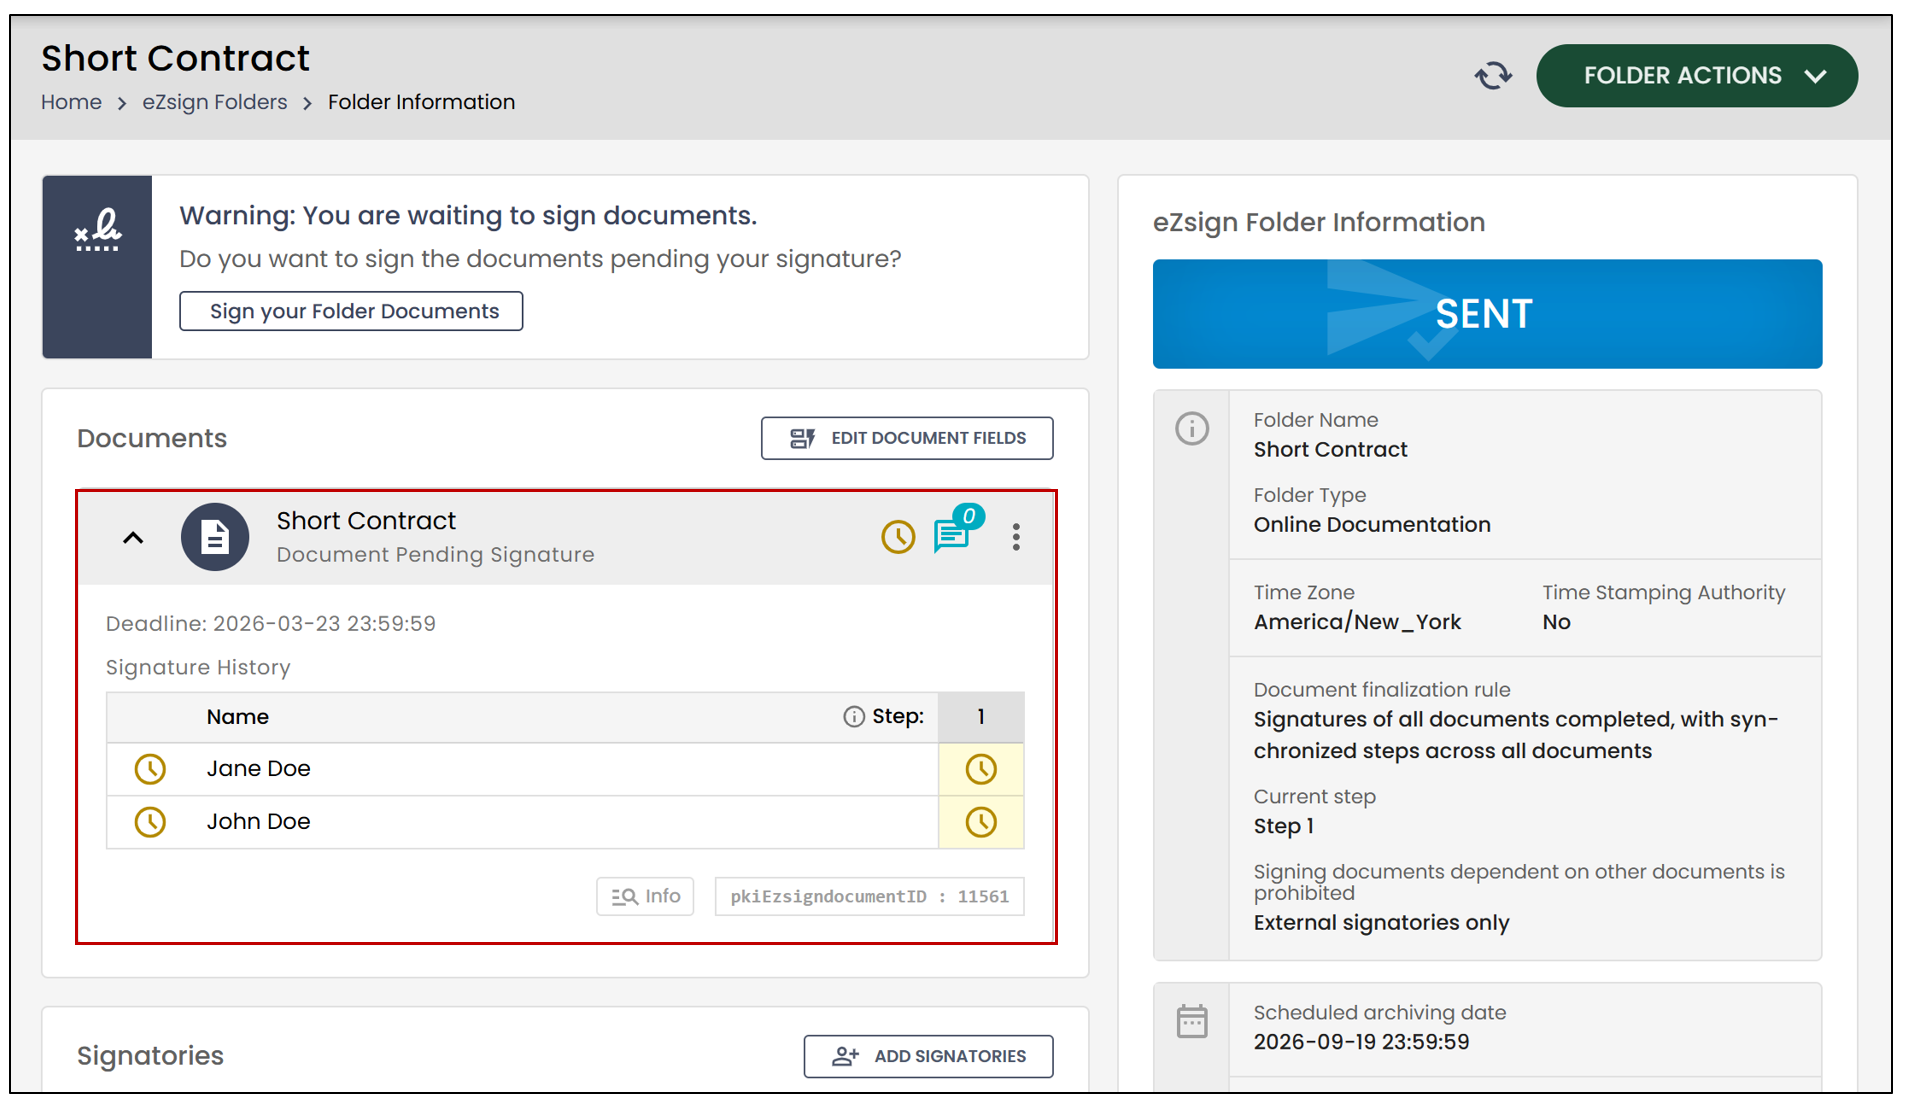
In this example, you will be able to see, thanks to the

icon, that John Doe has not signed yet:
Create Documents
- If you wish to add more documents to a folder, you must take it back to the Editing Step.
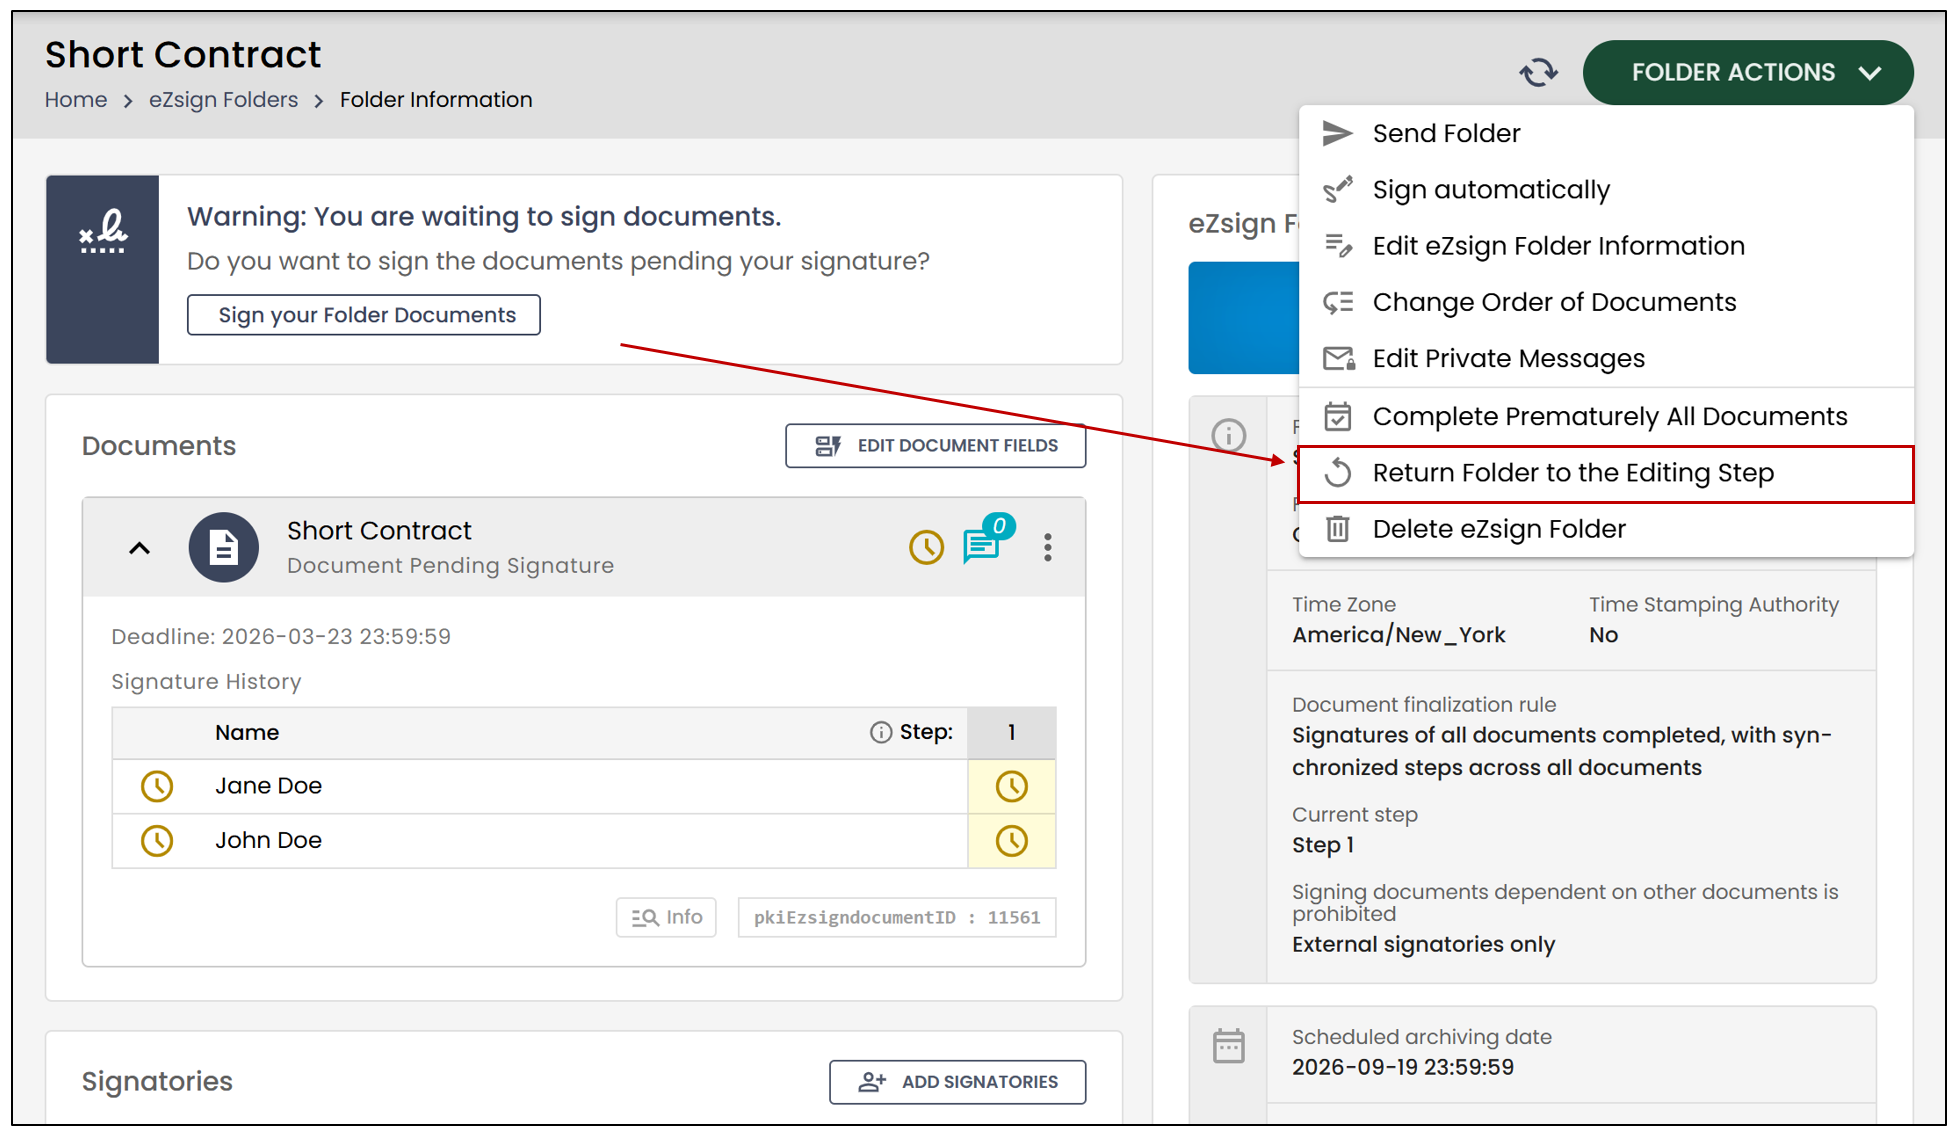
- You can click on Create Documents to add new documents to the folder.
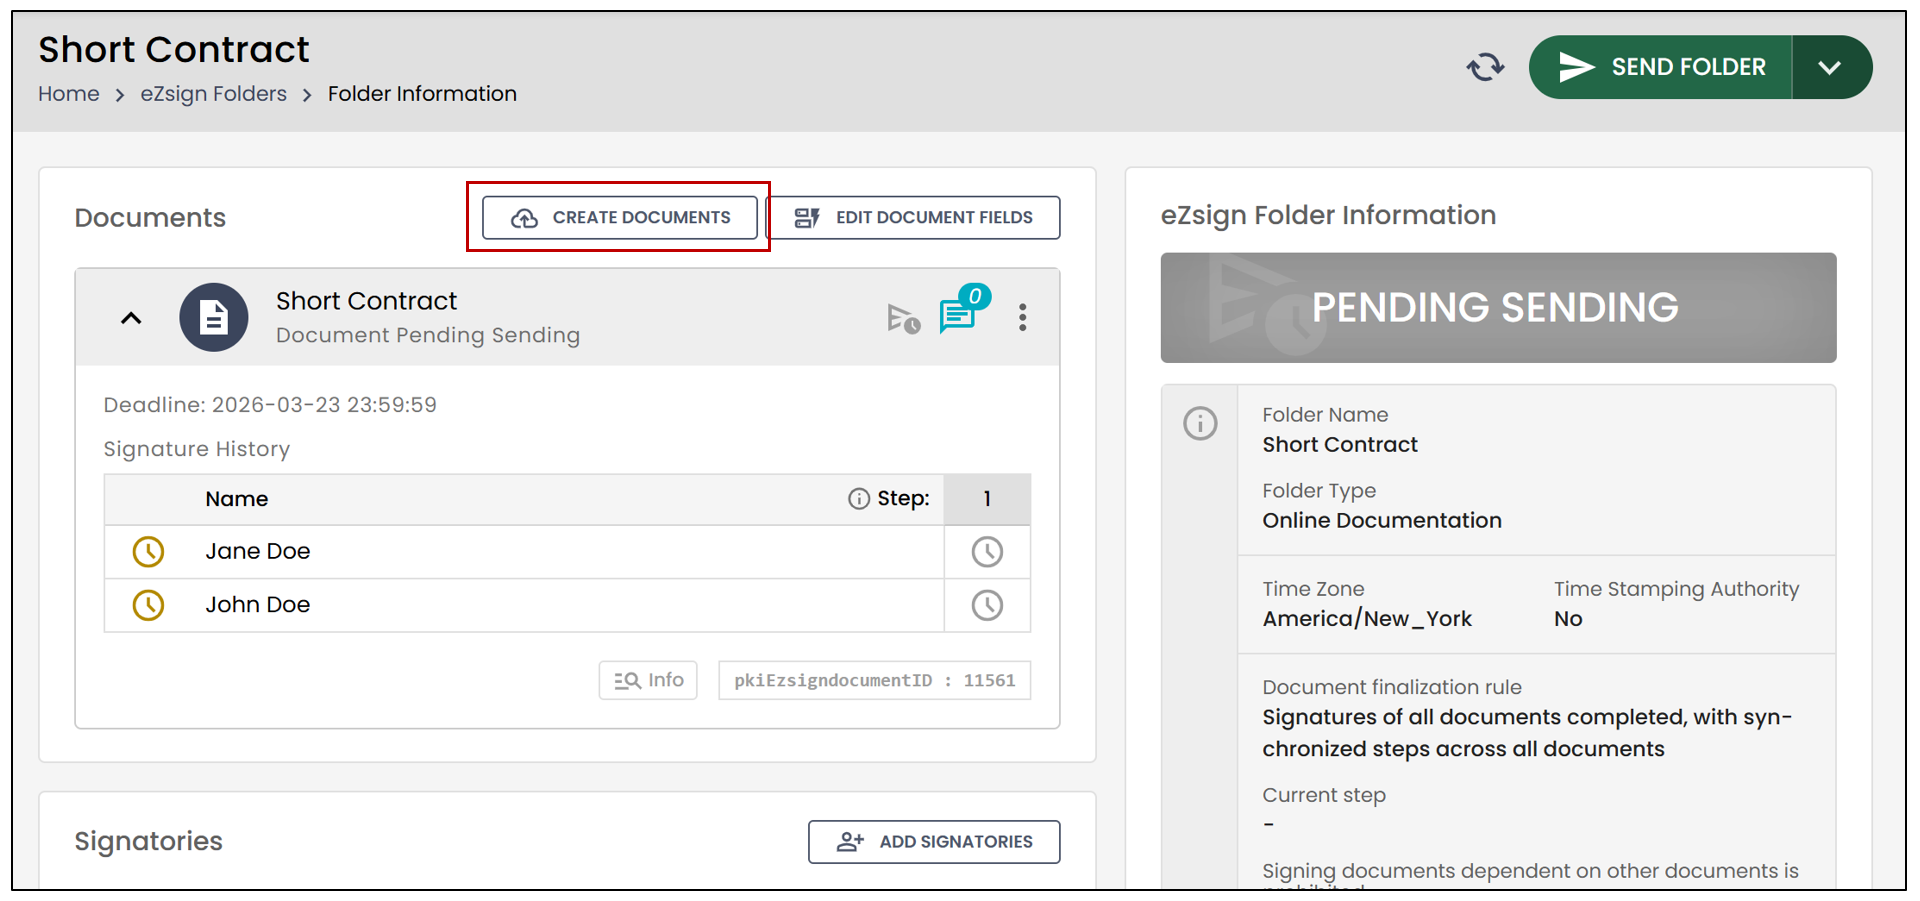
- You will then be able to add documents to be signed for this same folder.
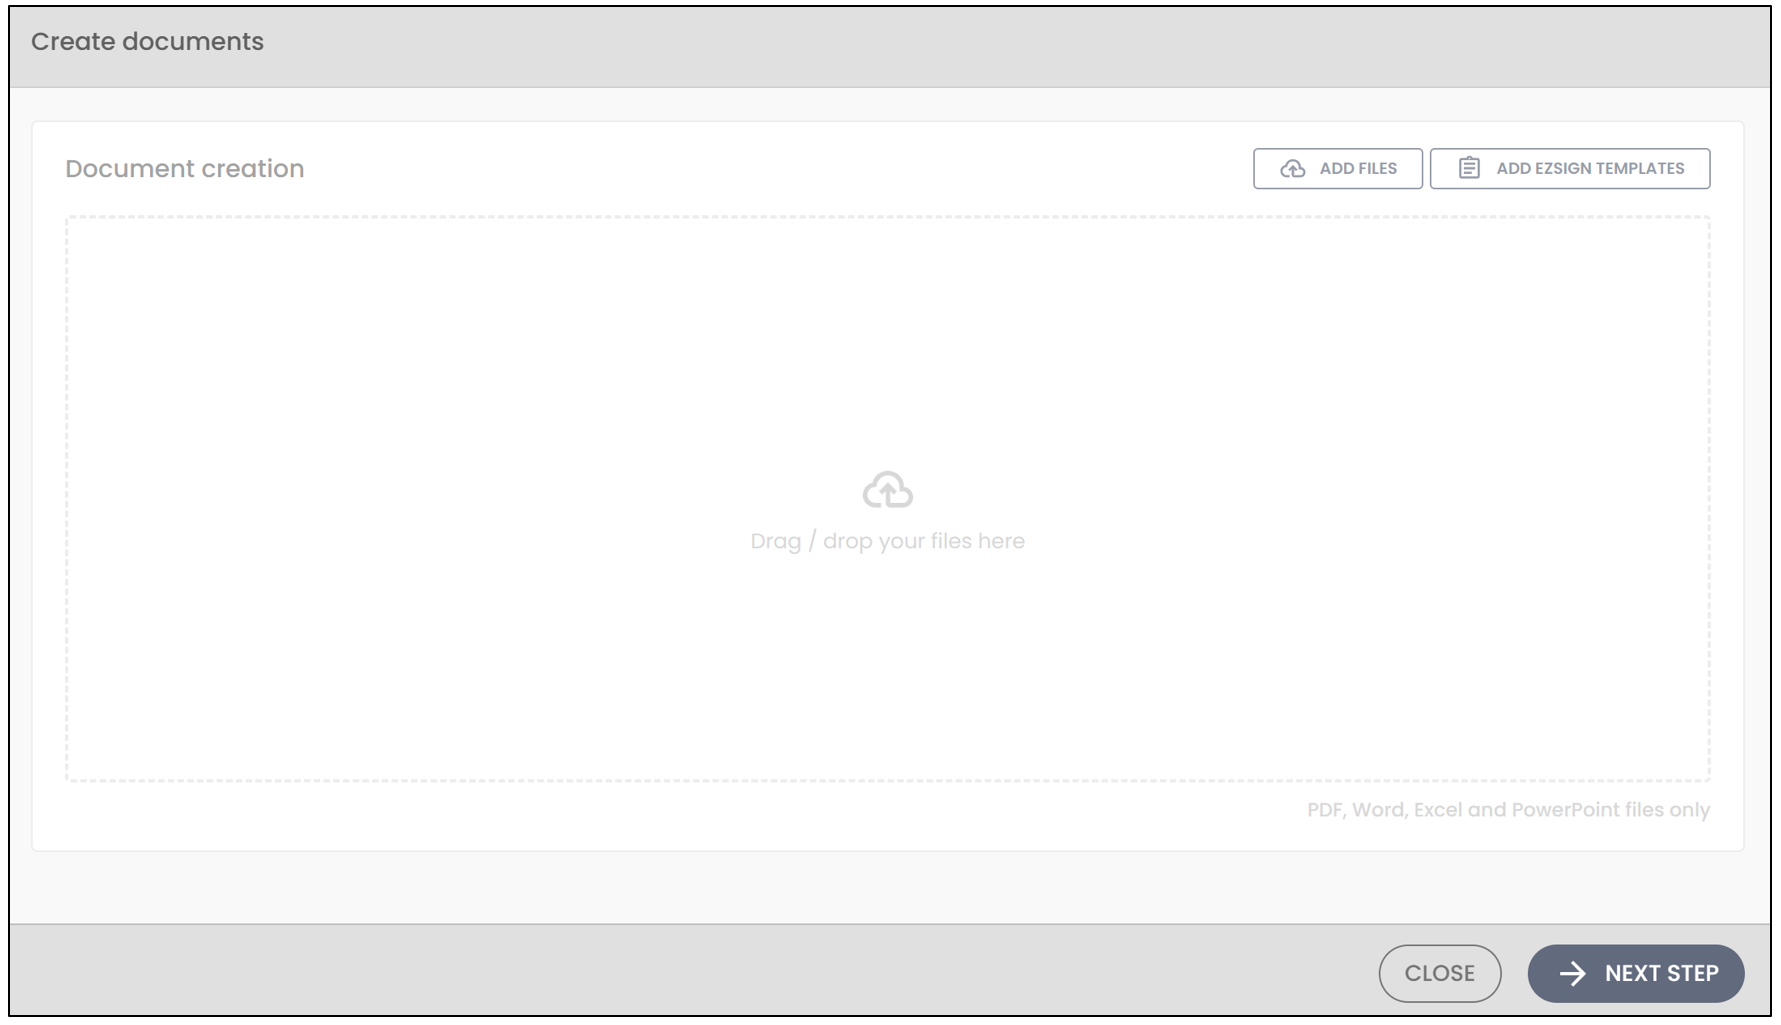
For more information on creating documents and editing document fields, please refer to the article Creating an eZsign Folder: Start Here.
View the document from the signatory’s perspective
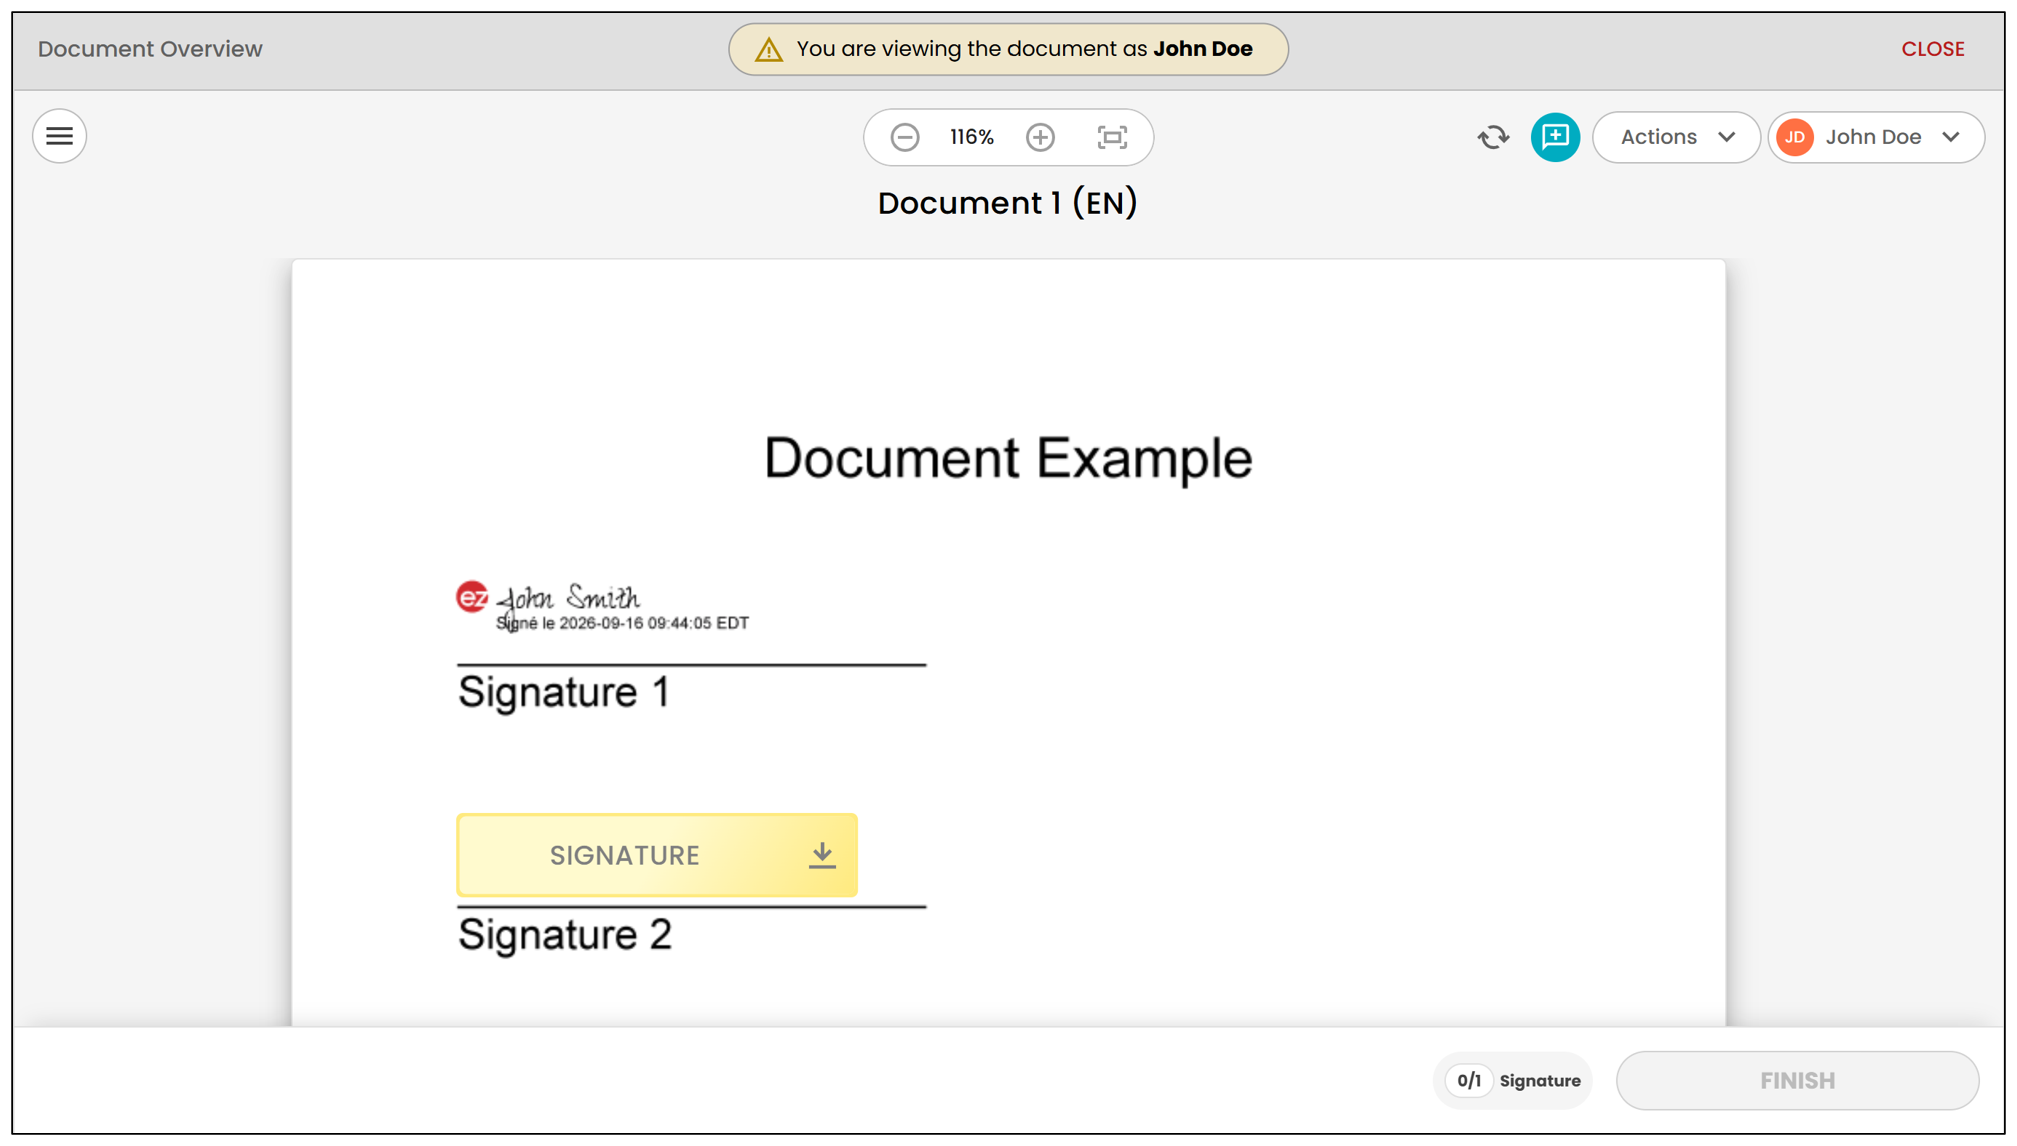
You can now view the document exactly as a signatory sees it when signing.
- To view a document, click the

icon to the right of the document.
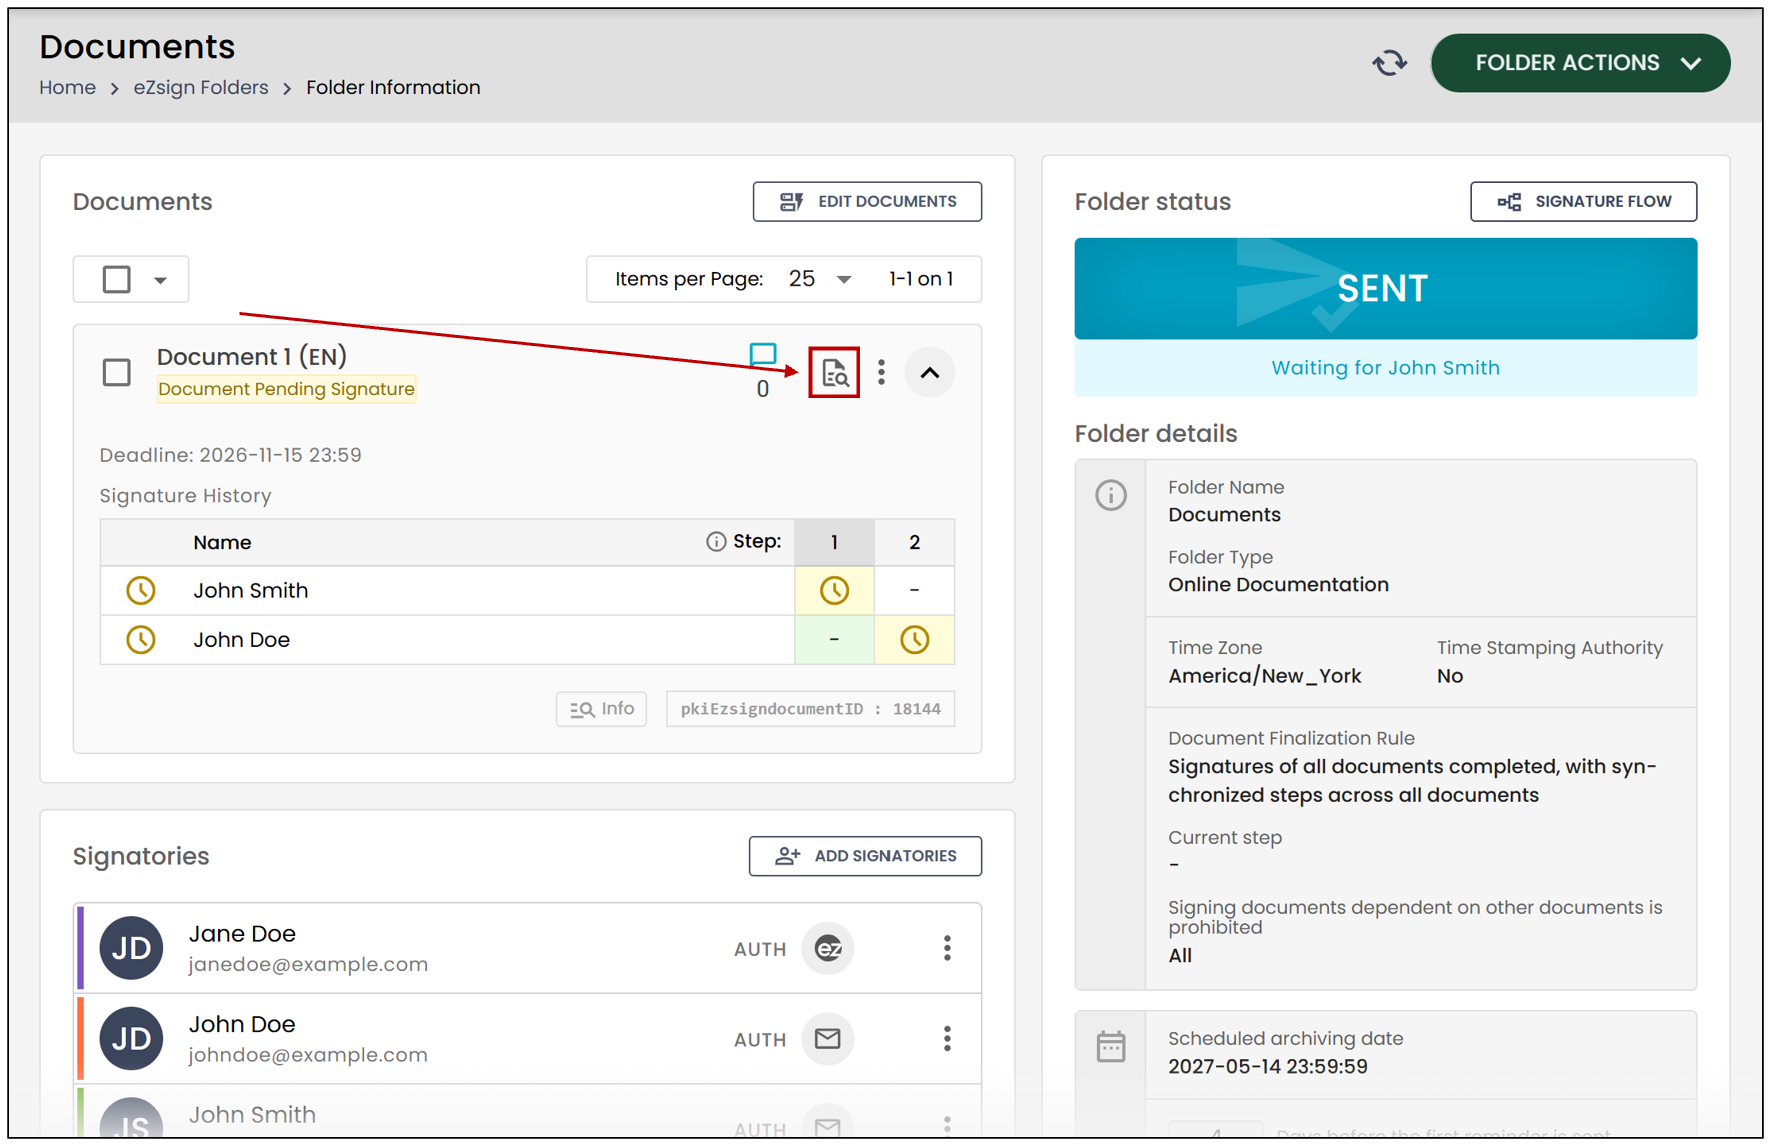
- In the top-right corner, click your name to display the drop-down menu containing all signatories in the folder. Then, select the desired signatory.
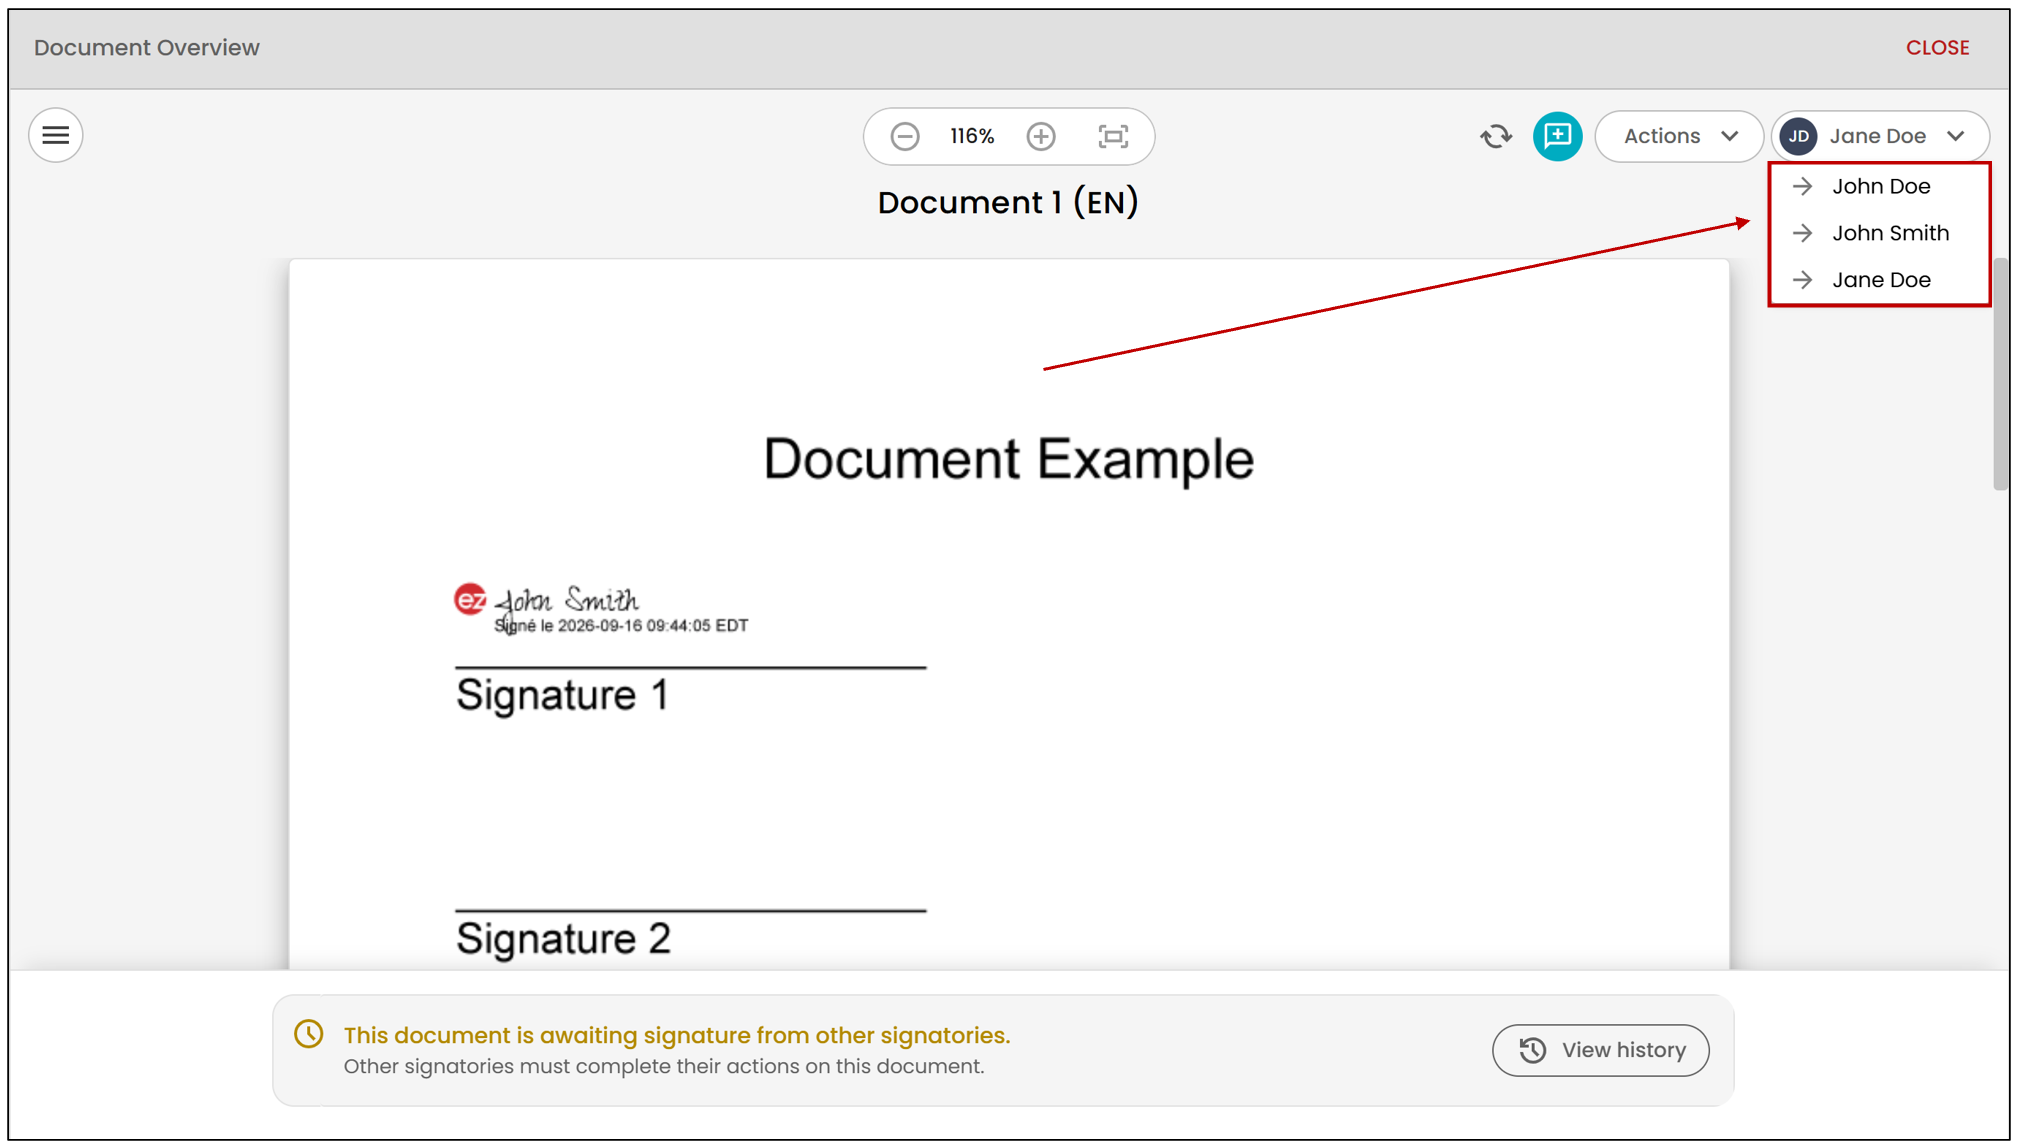
You will then view the document from the selected signatory’s perspective and see the signature fields exactly as they appear to them.
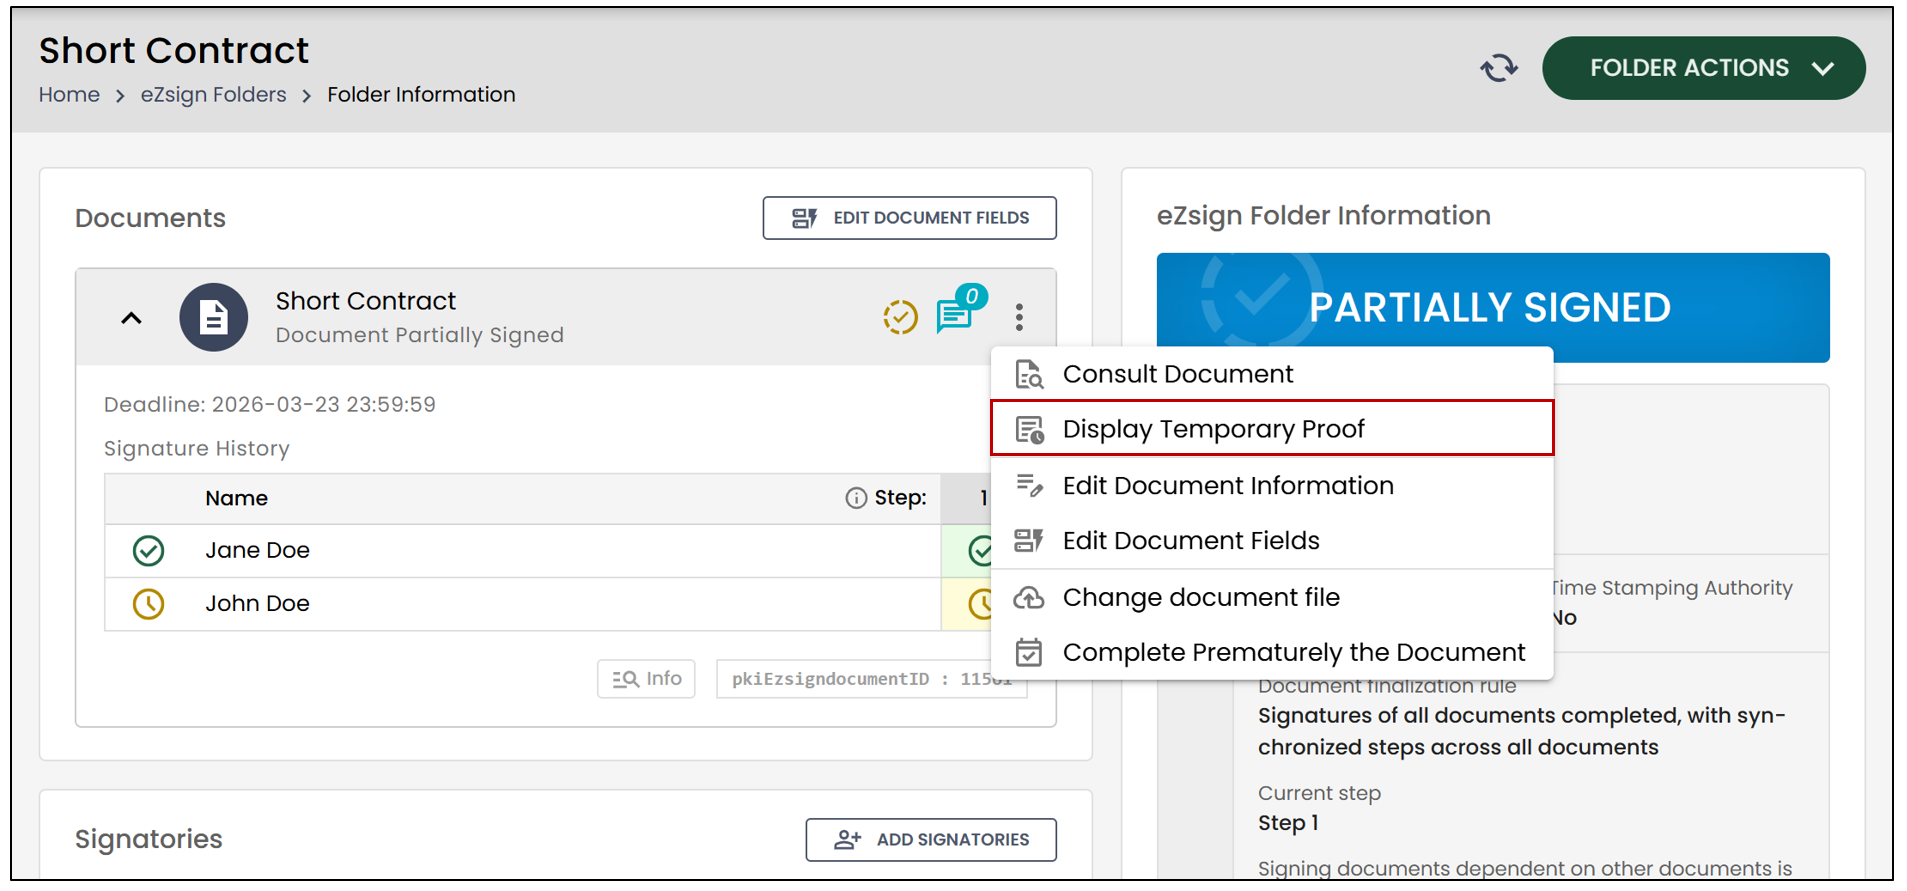
Display Temporary Proof
- To view the temporary proof of a document, click on the three vertical dots to the right of it, then select Display Temporary Proof.
Edit Document Information
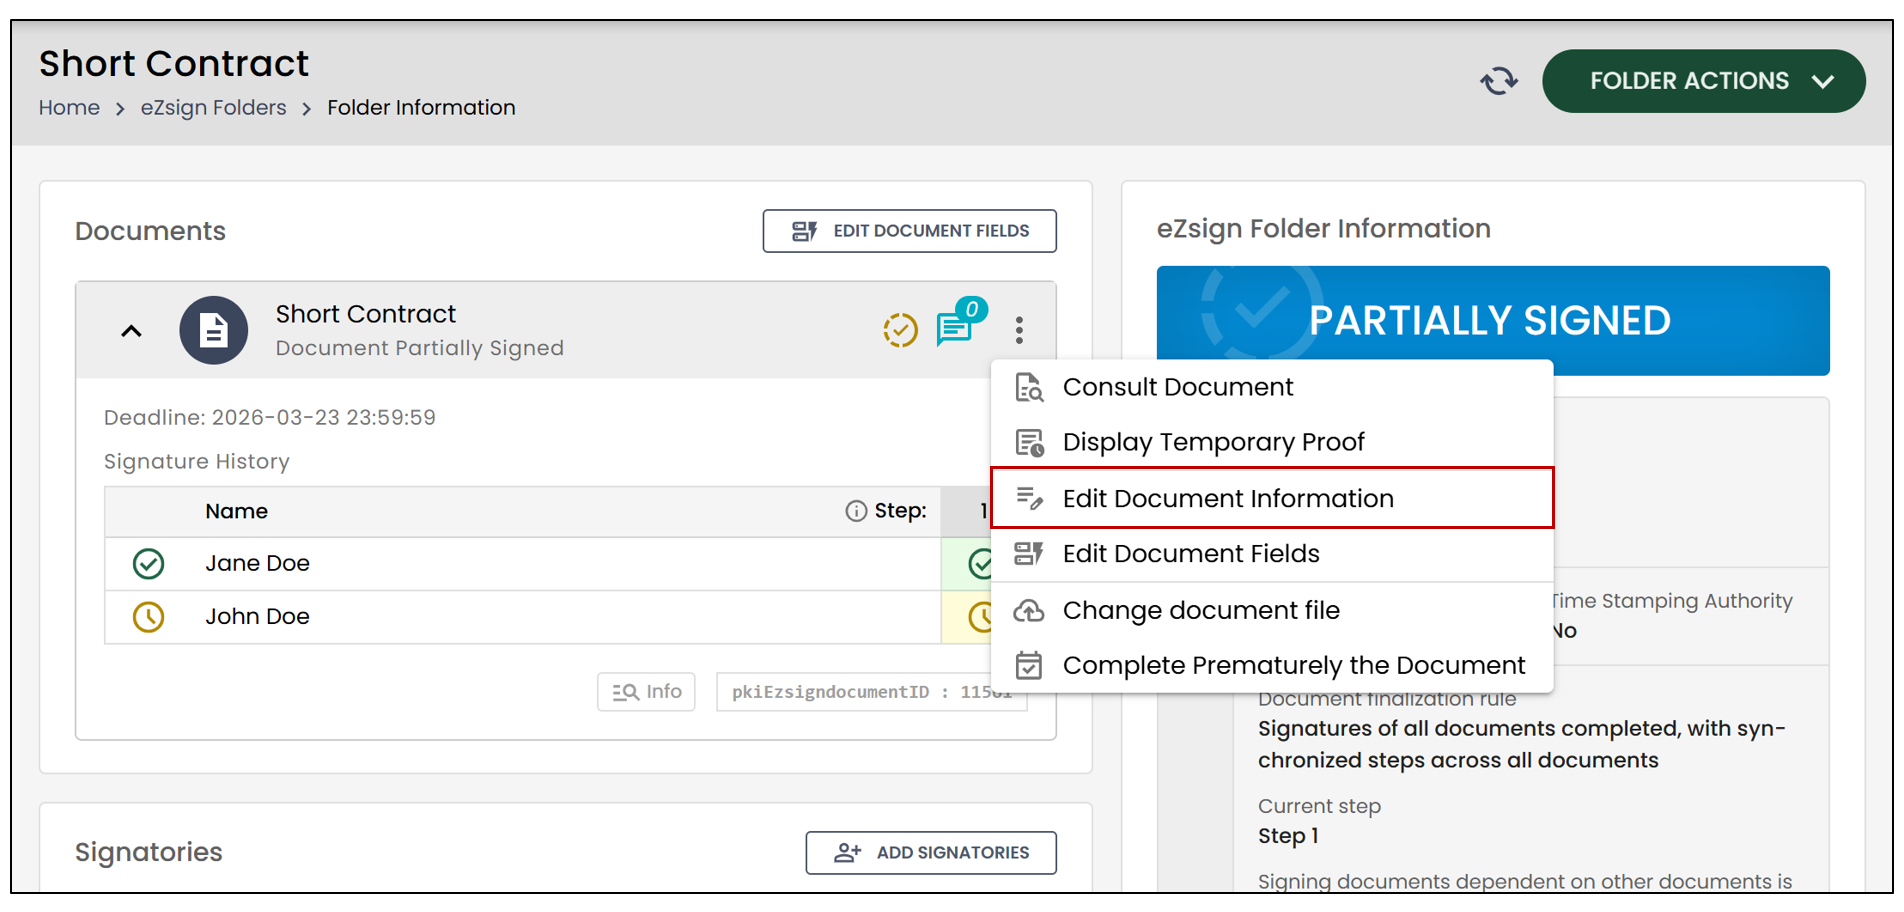
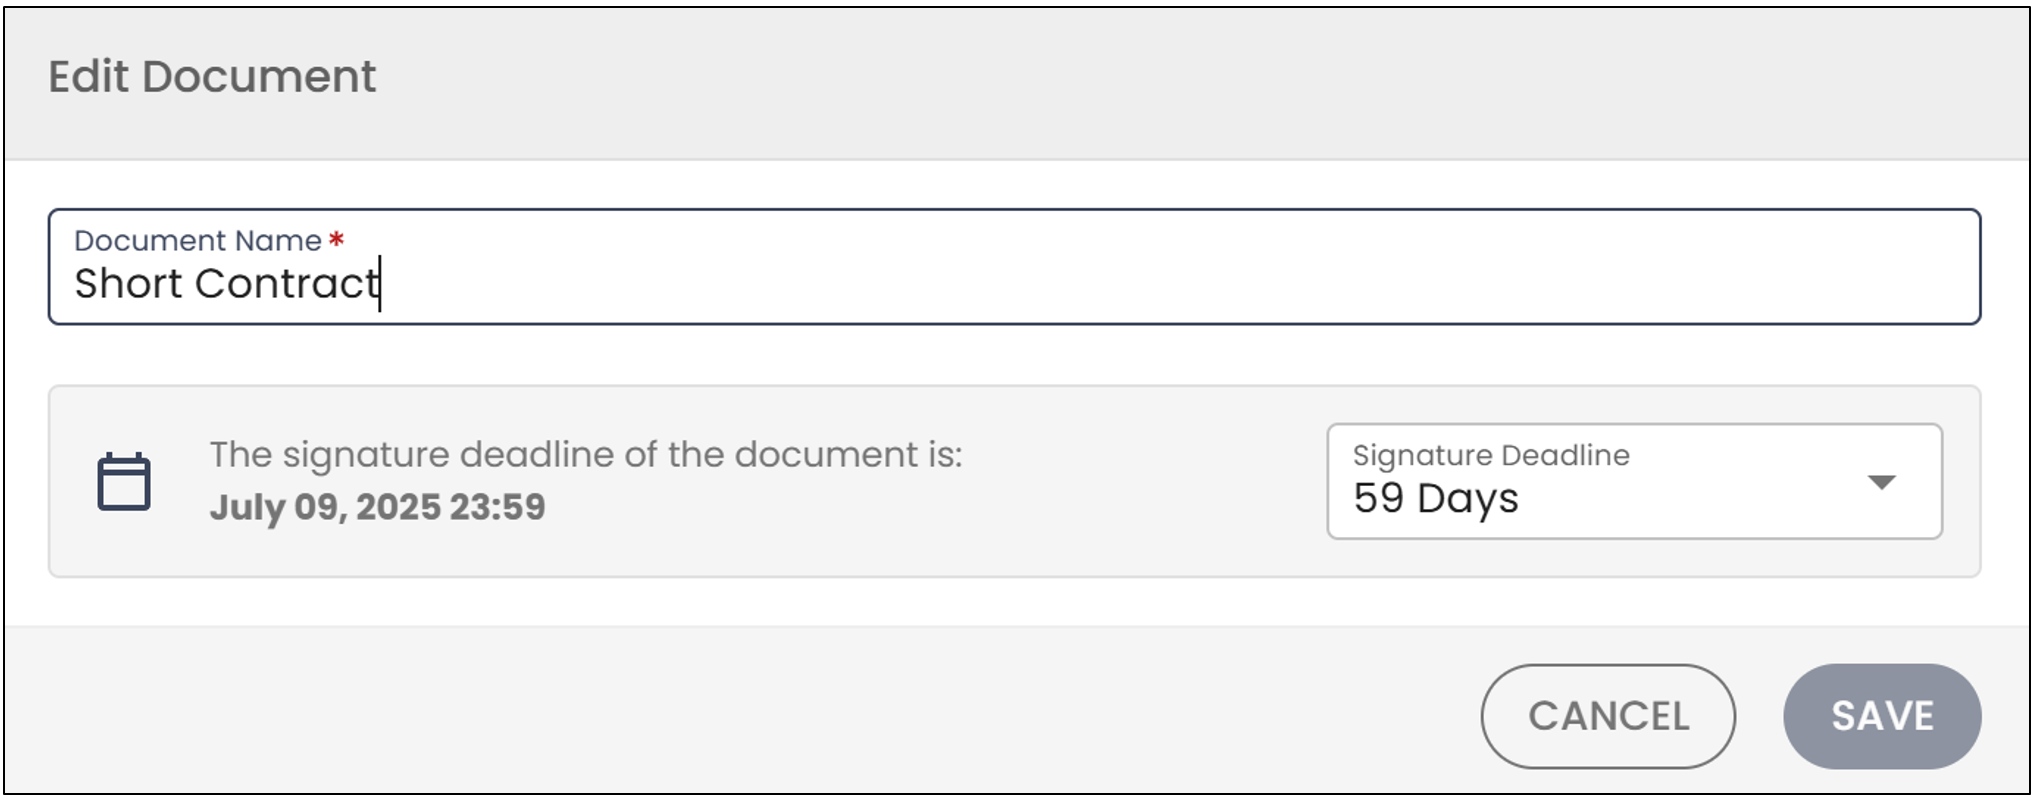
You will be able to modify the Document Name as well as the Signature Deadline.
Click on Save to record your changes.
Edit Document Fields
- If you want to modify the fields of a document, click on the three vertical dots of the document, then click on Edit Document Fields.
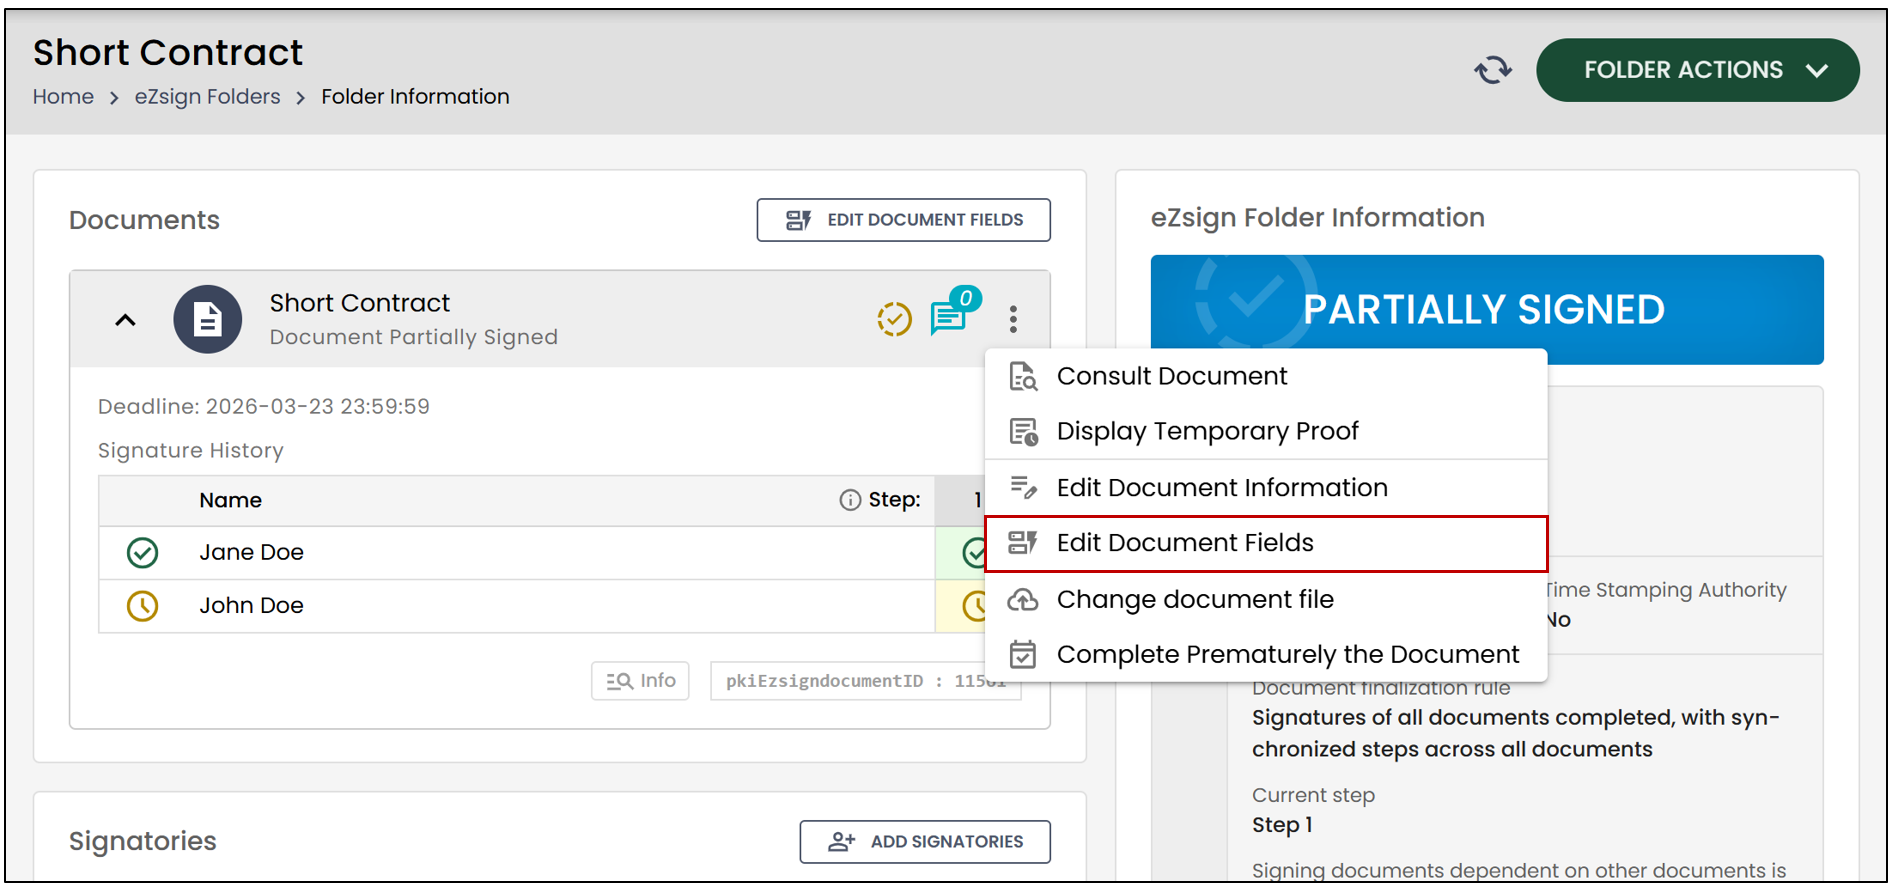
This message will appear:
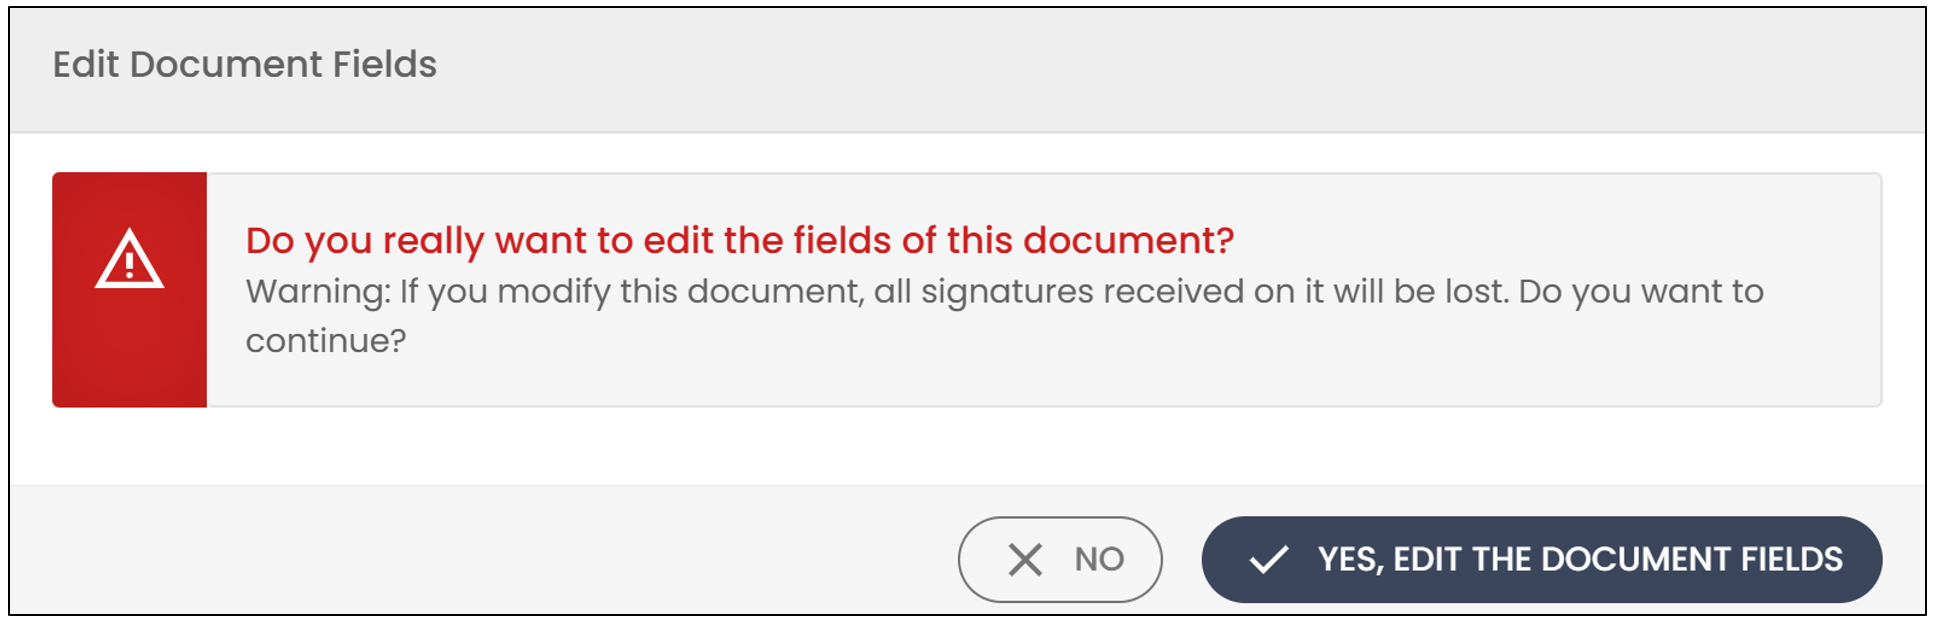
- Click on Yes, edit the document fields.
For more information on form and signature fields, please refer to the articles Types of Form Fields (eZsign Web) and Types of Signature Fields.
Complete Prematurely the Document
If a document is partially signed, but you want to complete it without the missing signatures, click on the three vertical dots to the right of the document, then select Complete Prematurely the Document.
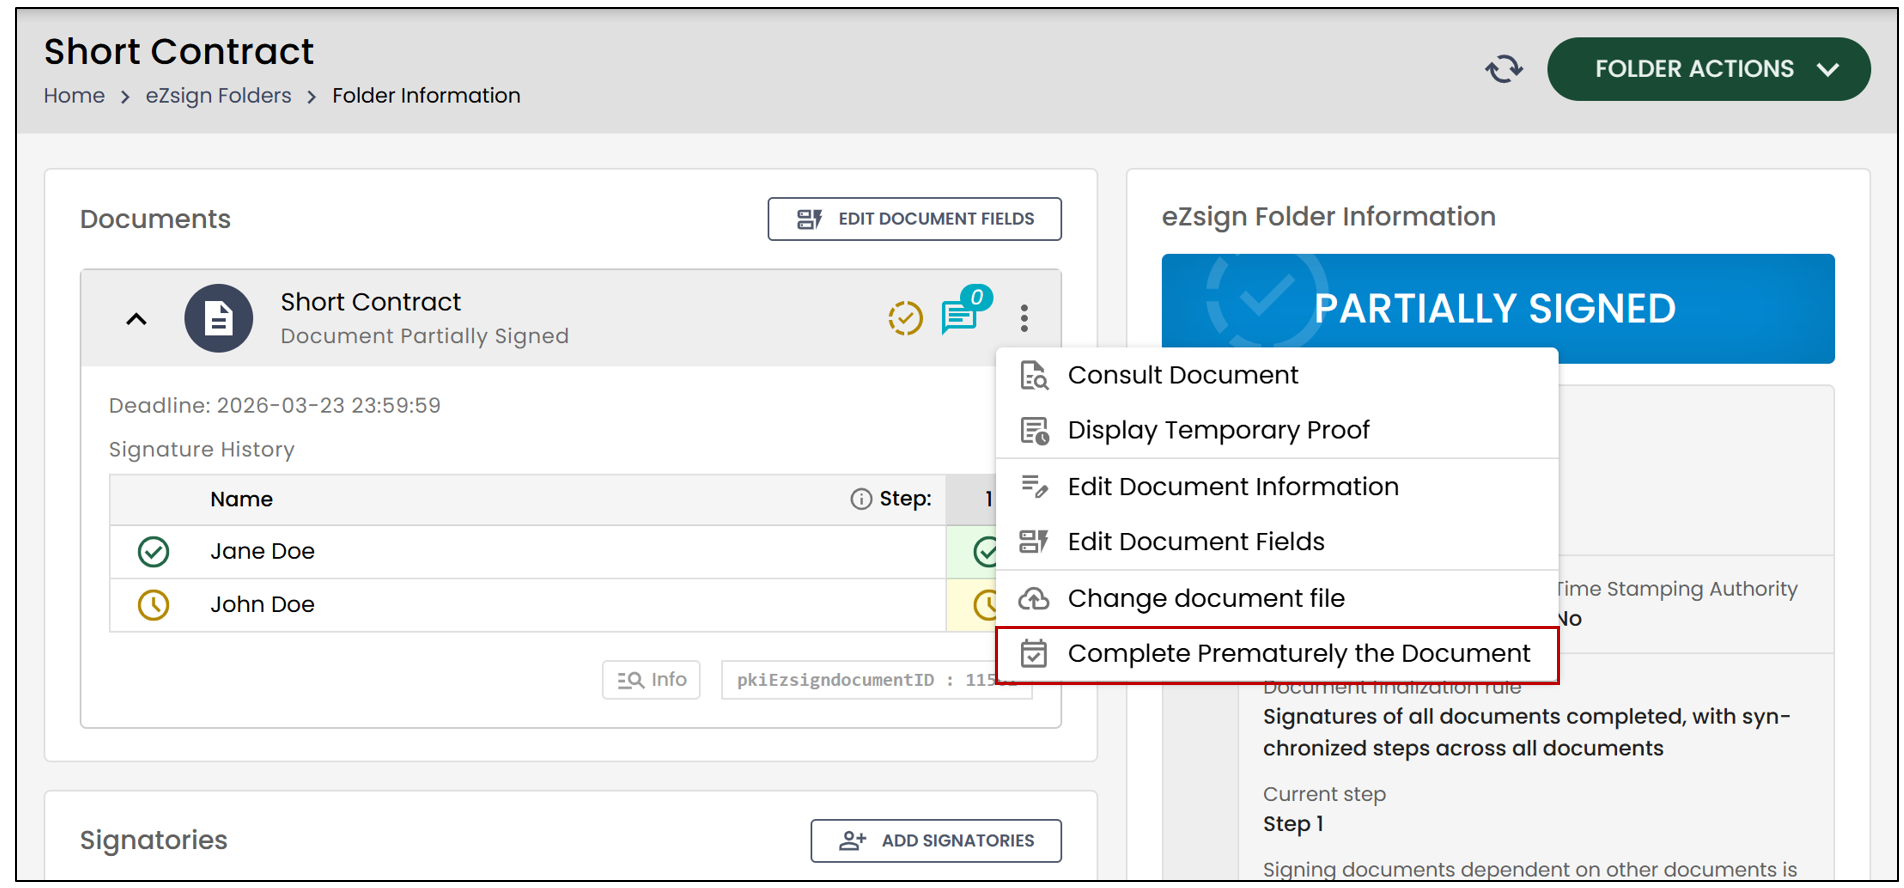
This message will appear:
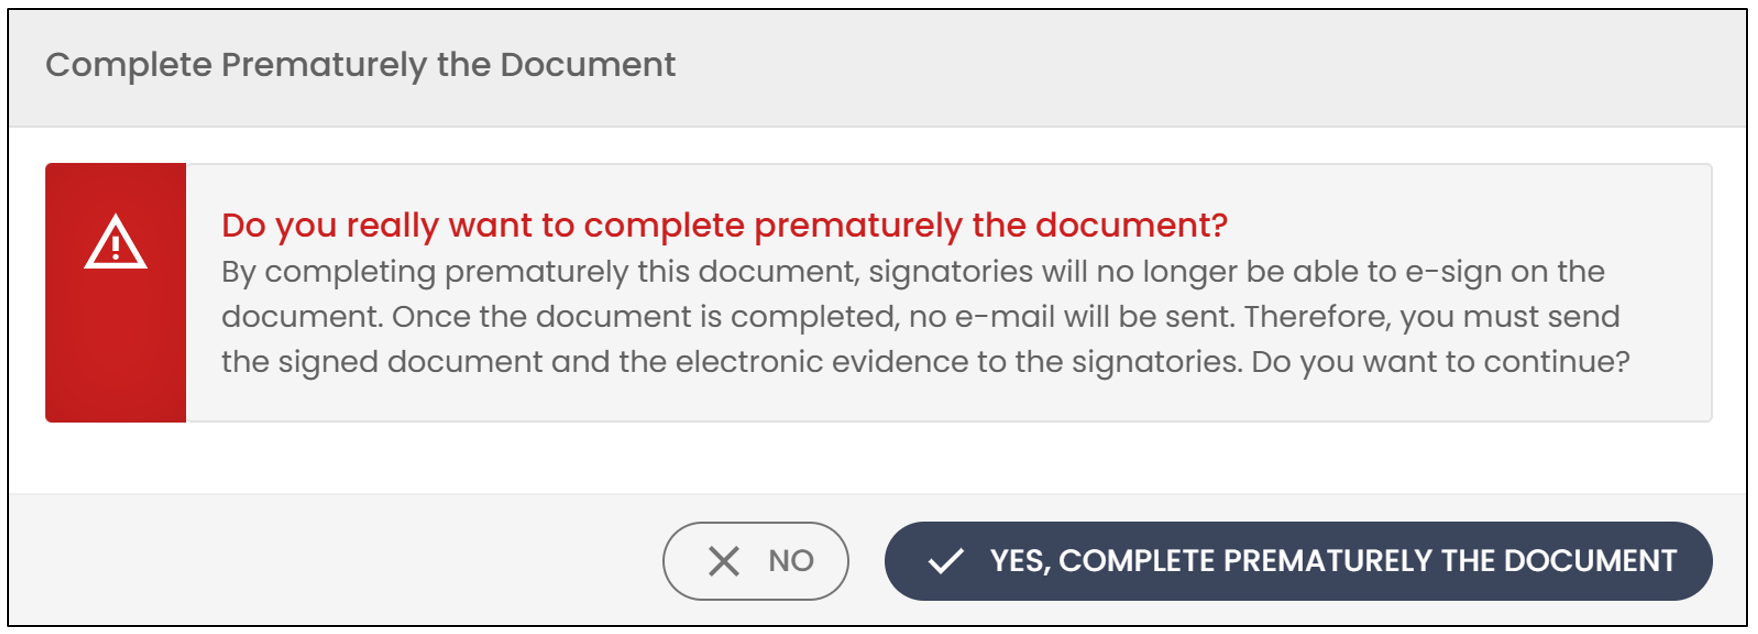
- Click on Yes, complete prematurely the document.
Signatories Actions
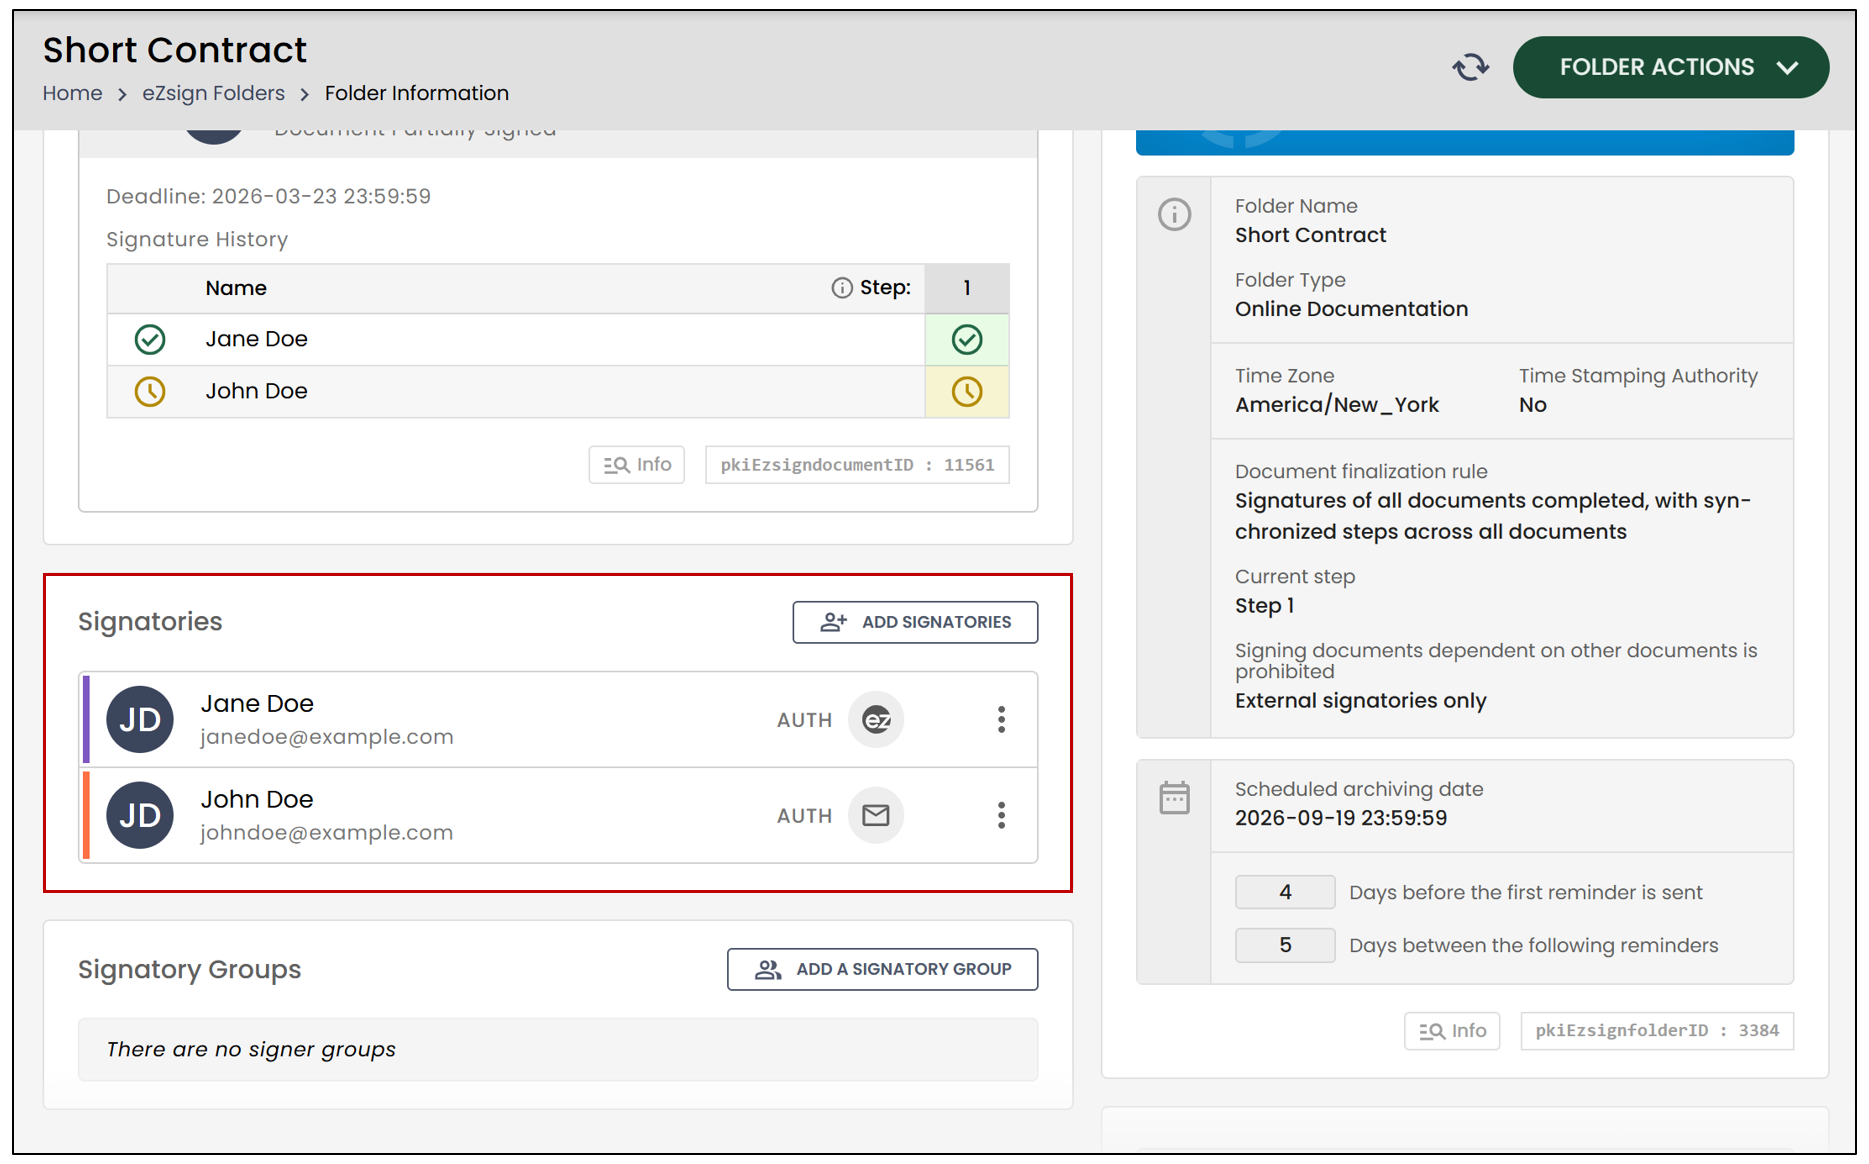
Add a Signatory
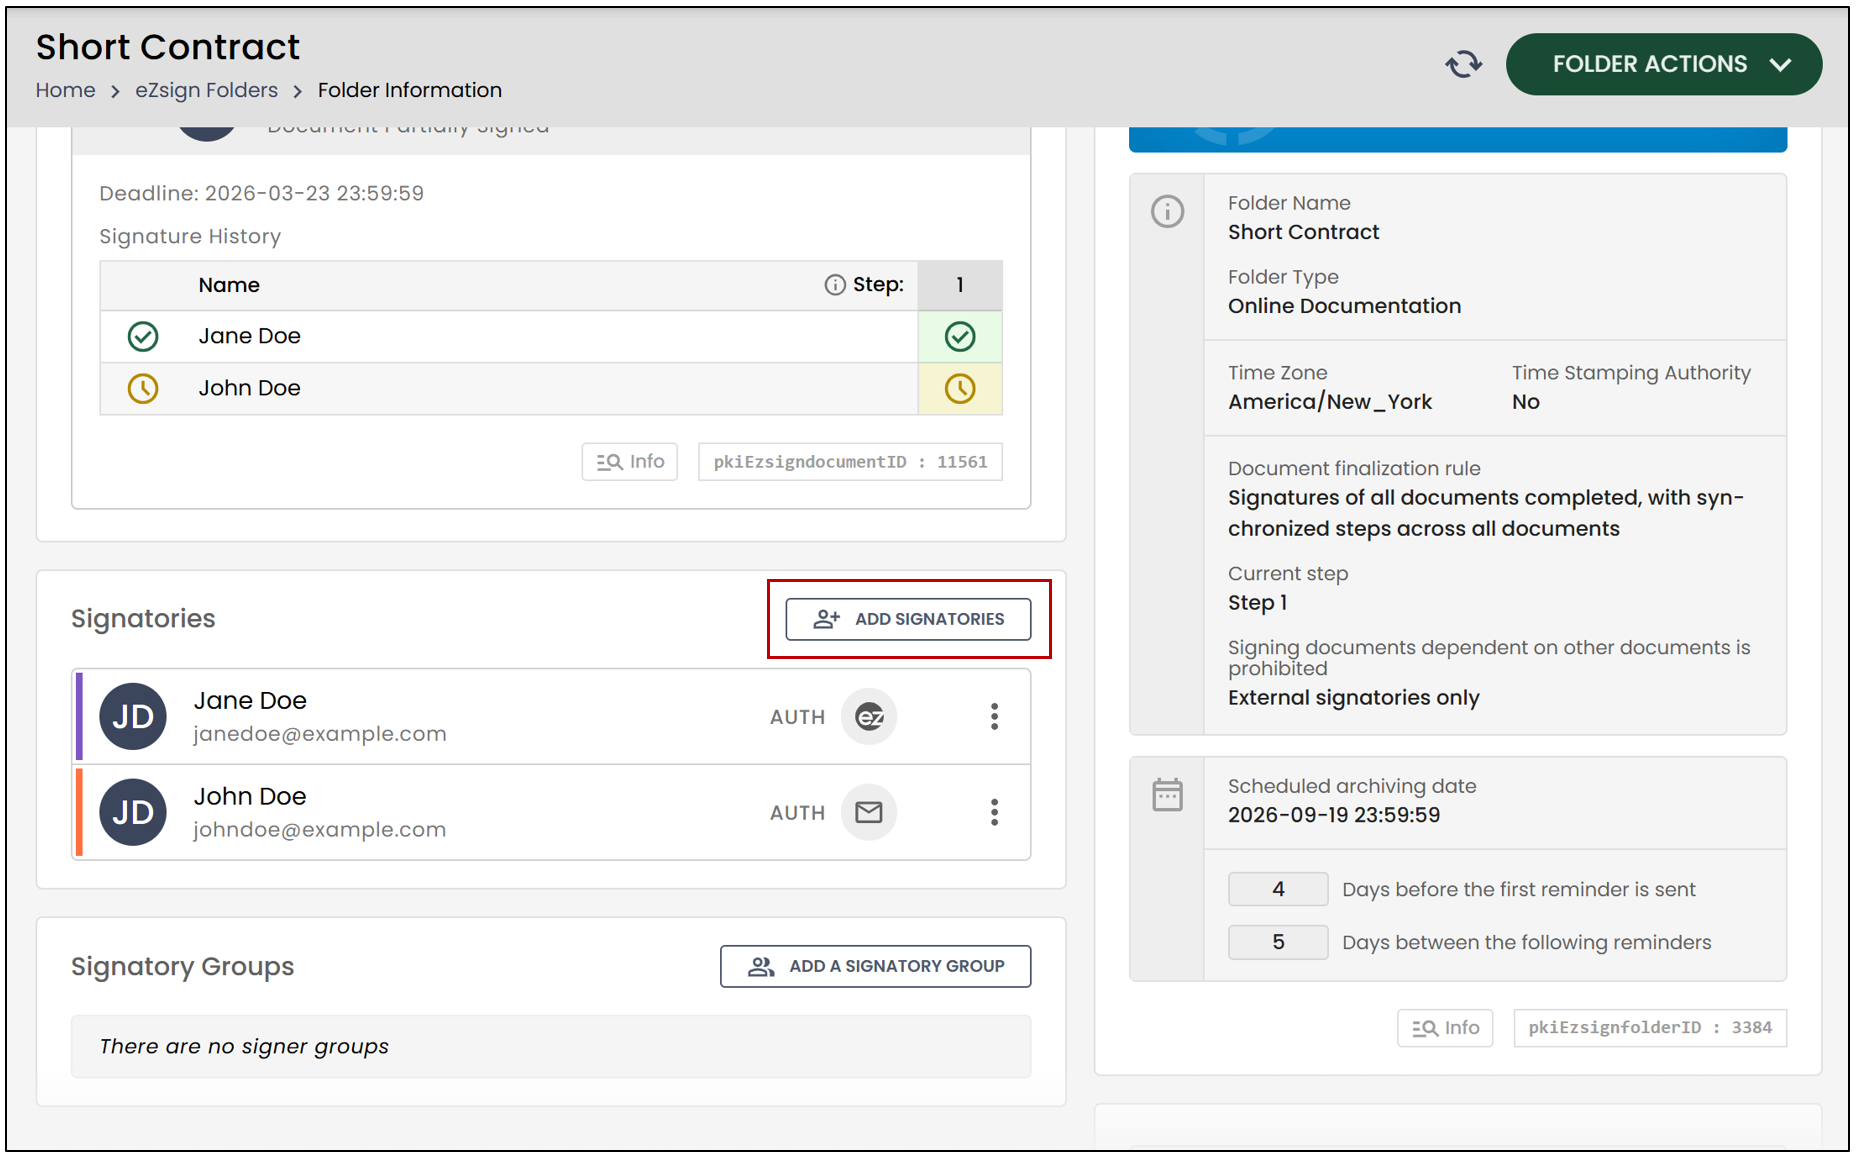
- If you want to add a signer to the folder, click on Add Signatories.
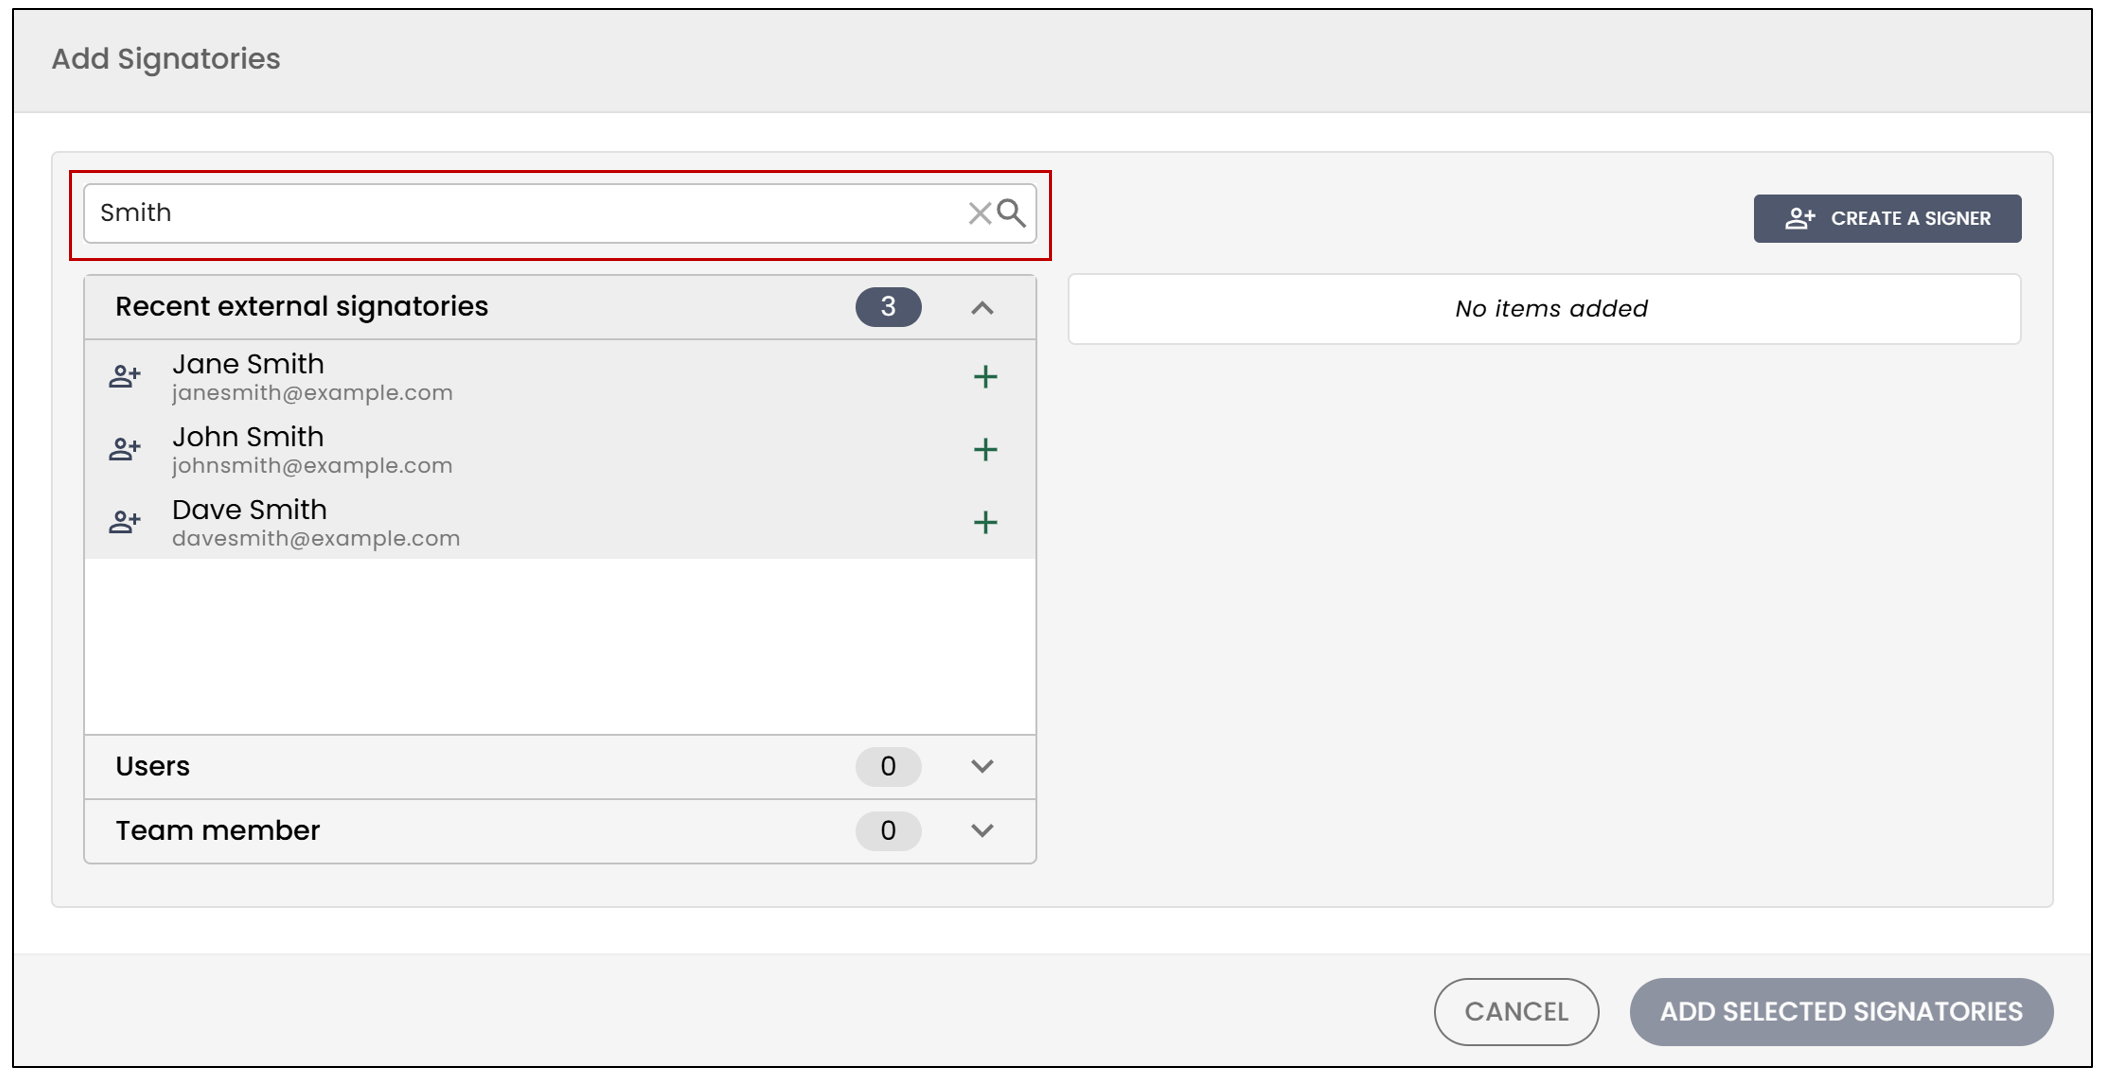
You will have the option to select a recent signer. If they are already in your database, they will automatically appear in the list. You can also enter, for example, your client’s last name to easily find the corresponding signers.
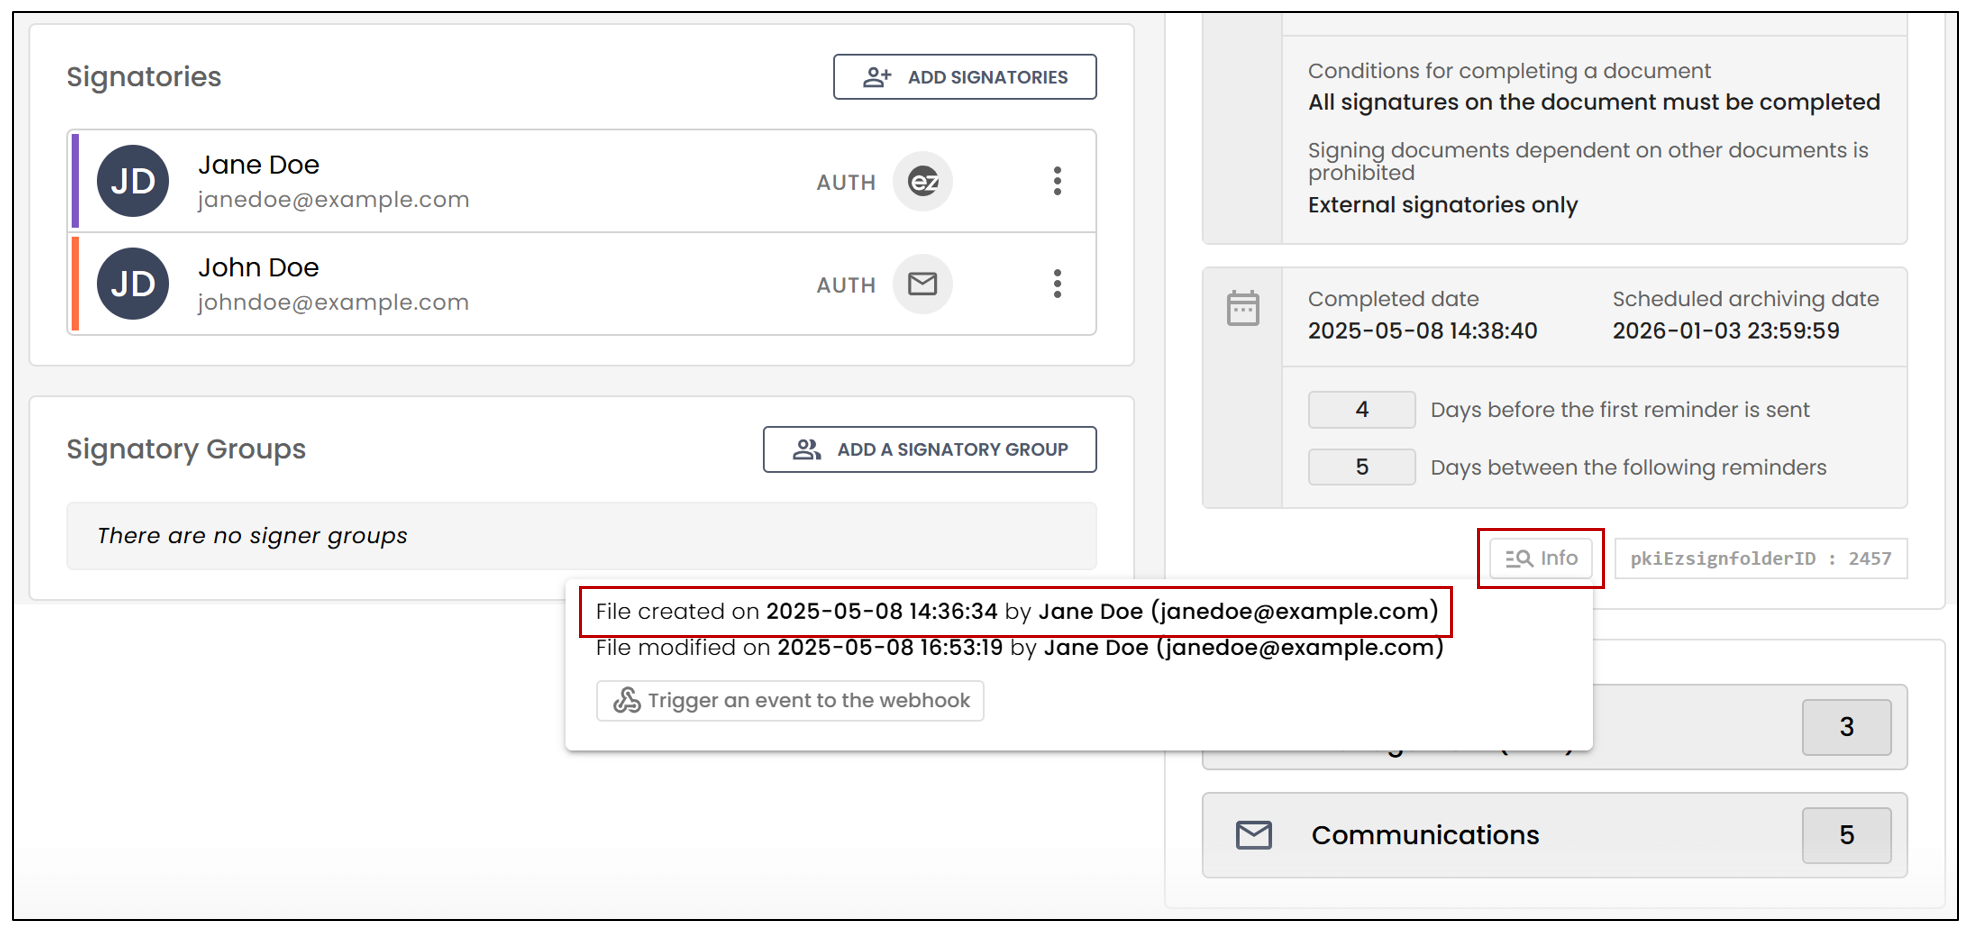
NOTE: Recent signers are displayed for a period of up to 13 months. The reference date used for this display is the creation date of the folder associated with the signer. It should also be noted that, for a signer to appear in this list, they must have the required permissions to manage the folder and must have an authorized login type for the new folder. To view the creation date, click on Info.
- To create a new signer, click on Create a Signer.
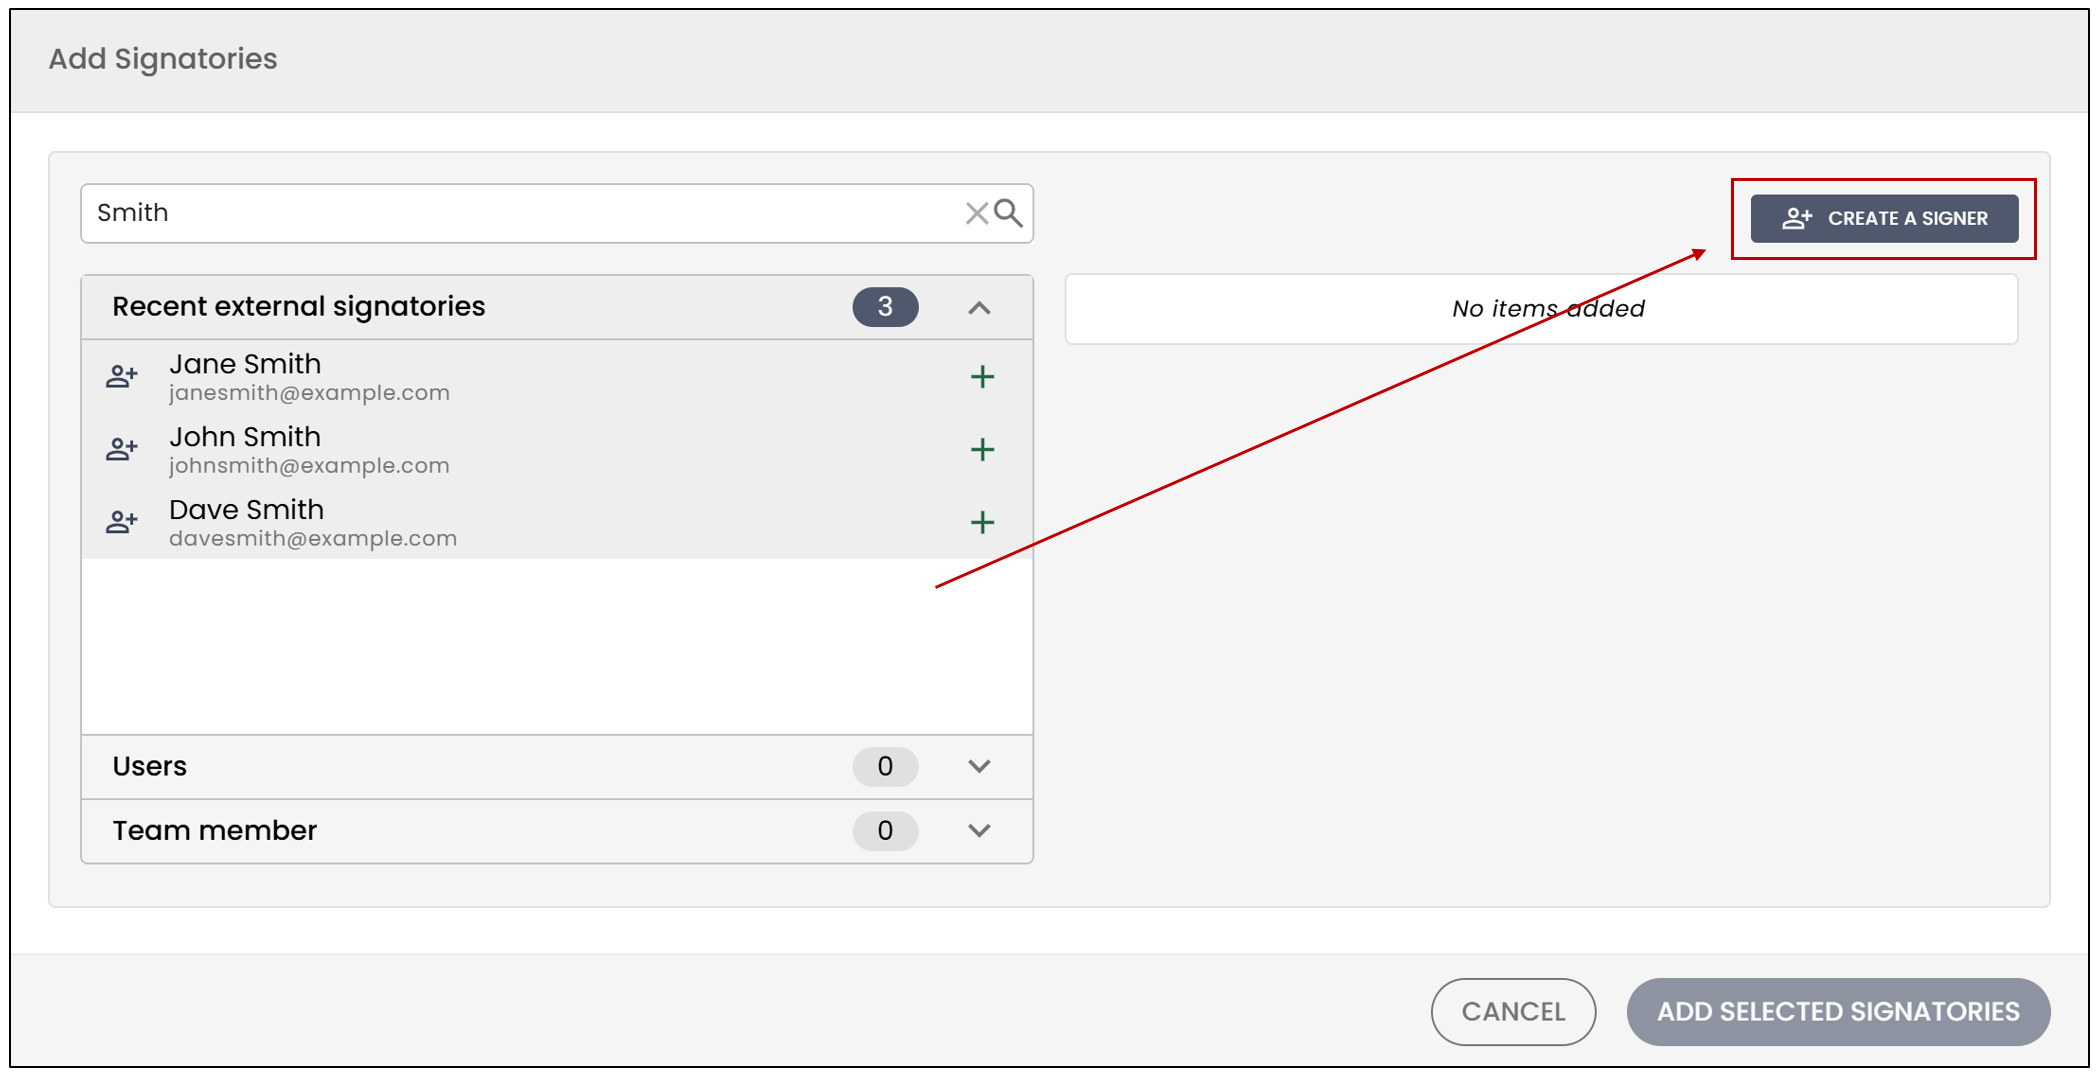
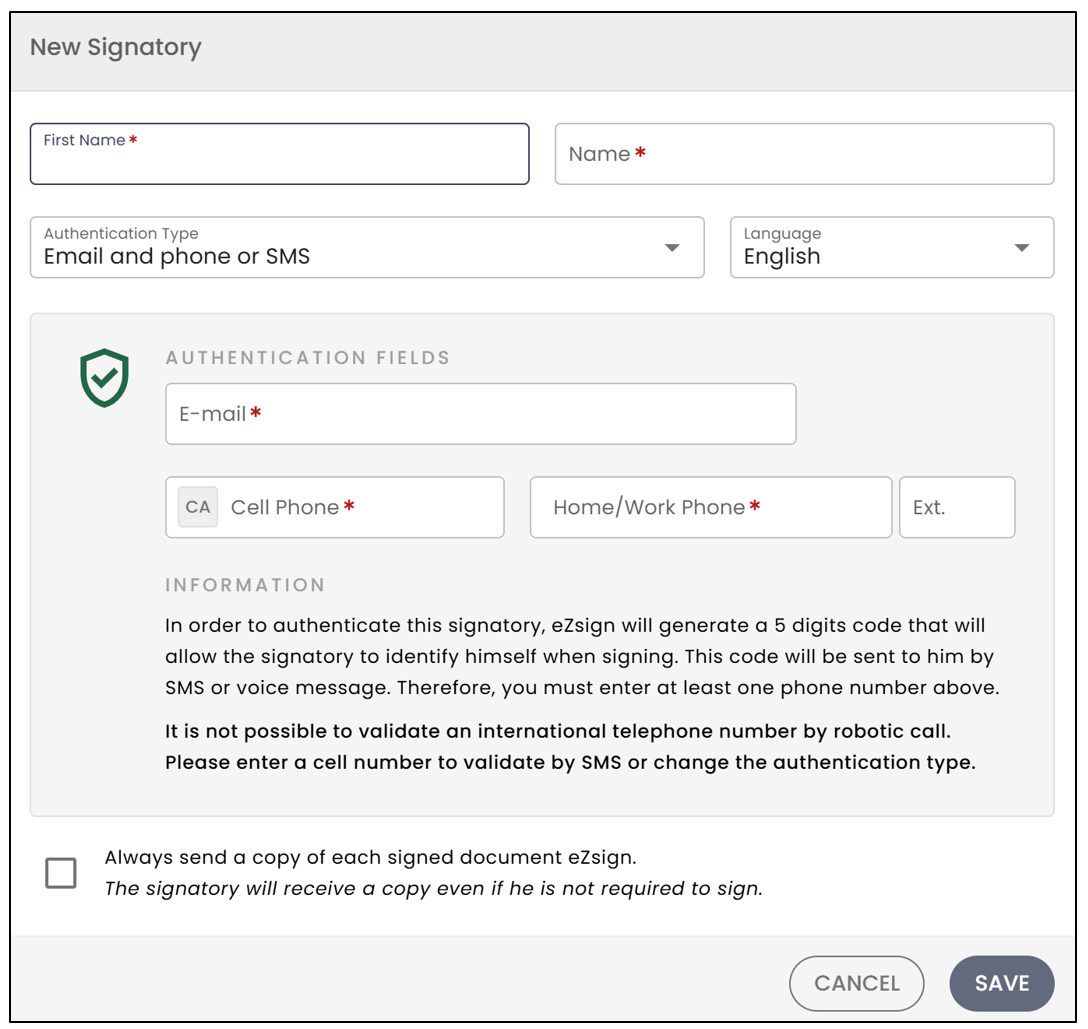
You will be able to enter the signer’s First Name and Last Name. Then, select the Language.
From the drop-down list, select the Authentication Type. For more information, please refer to the article Types of Signatory Authentication.
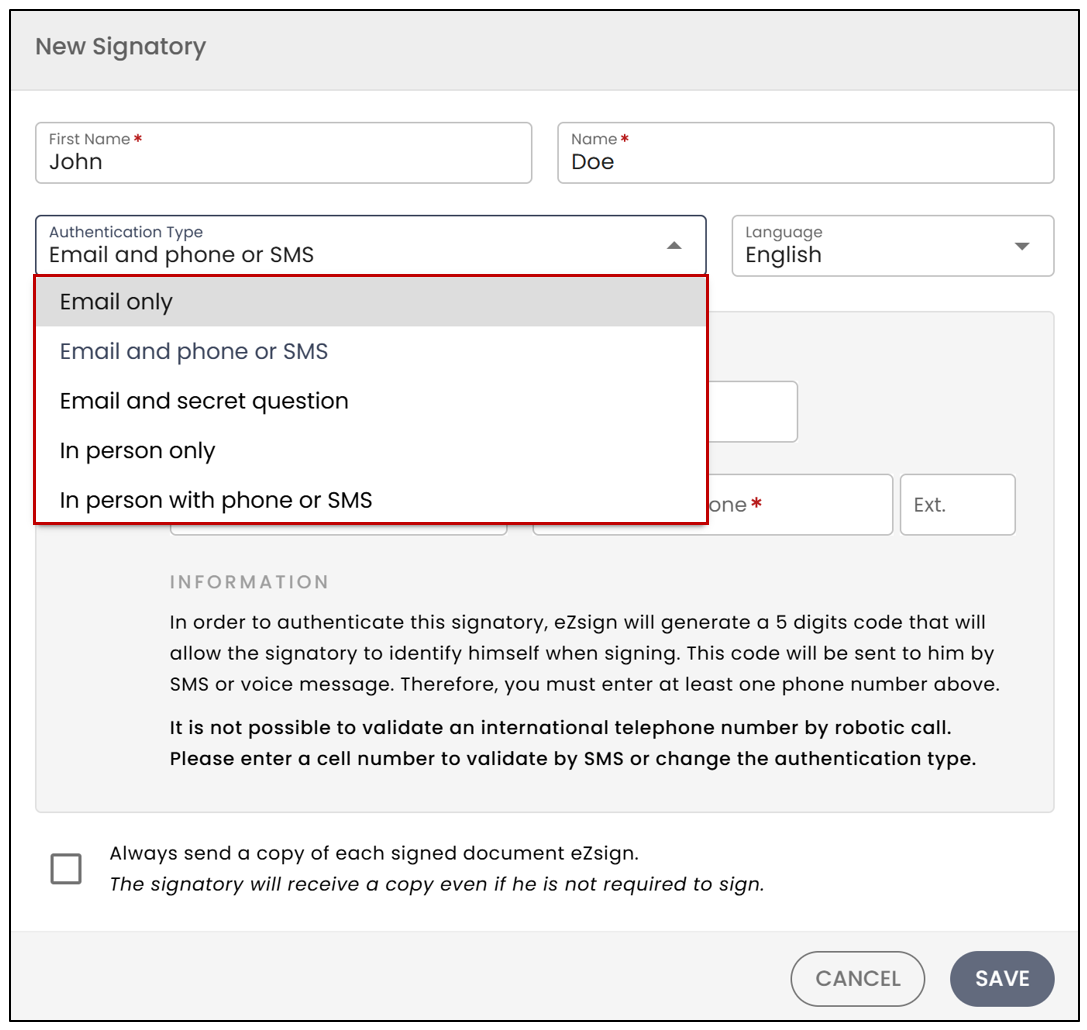
- Click on Save to create the new signer. When you are done, click on Add Selected Signatories.
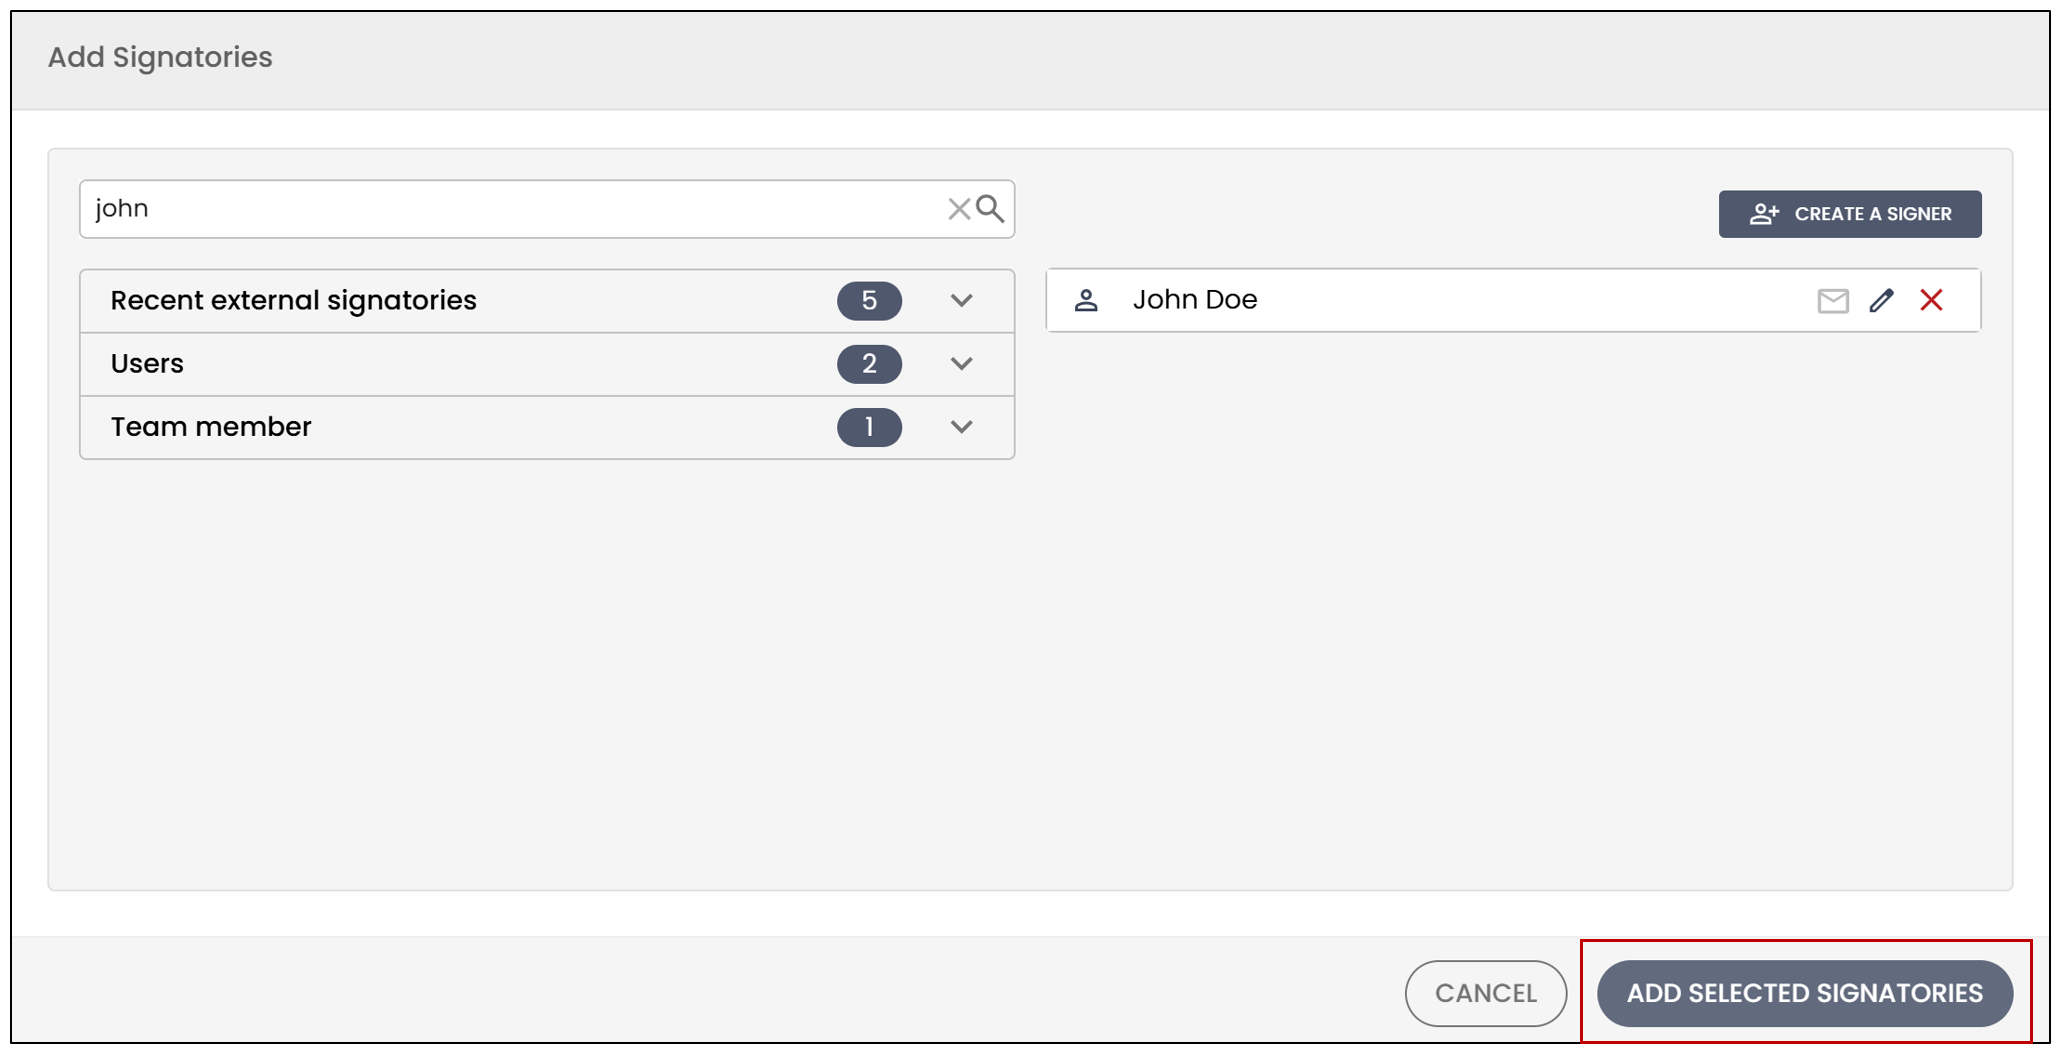
- The signer will appear in the list, and you will be able to view the authentication type to the right of their name.
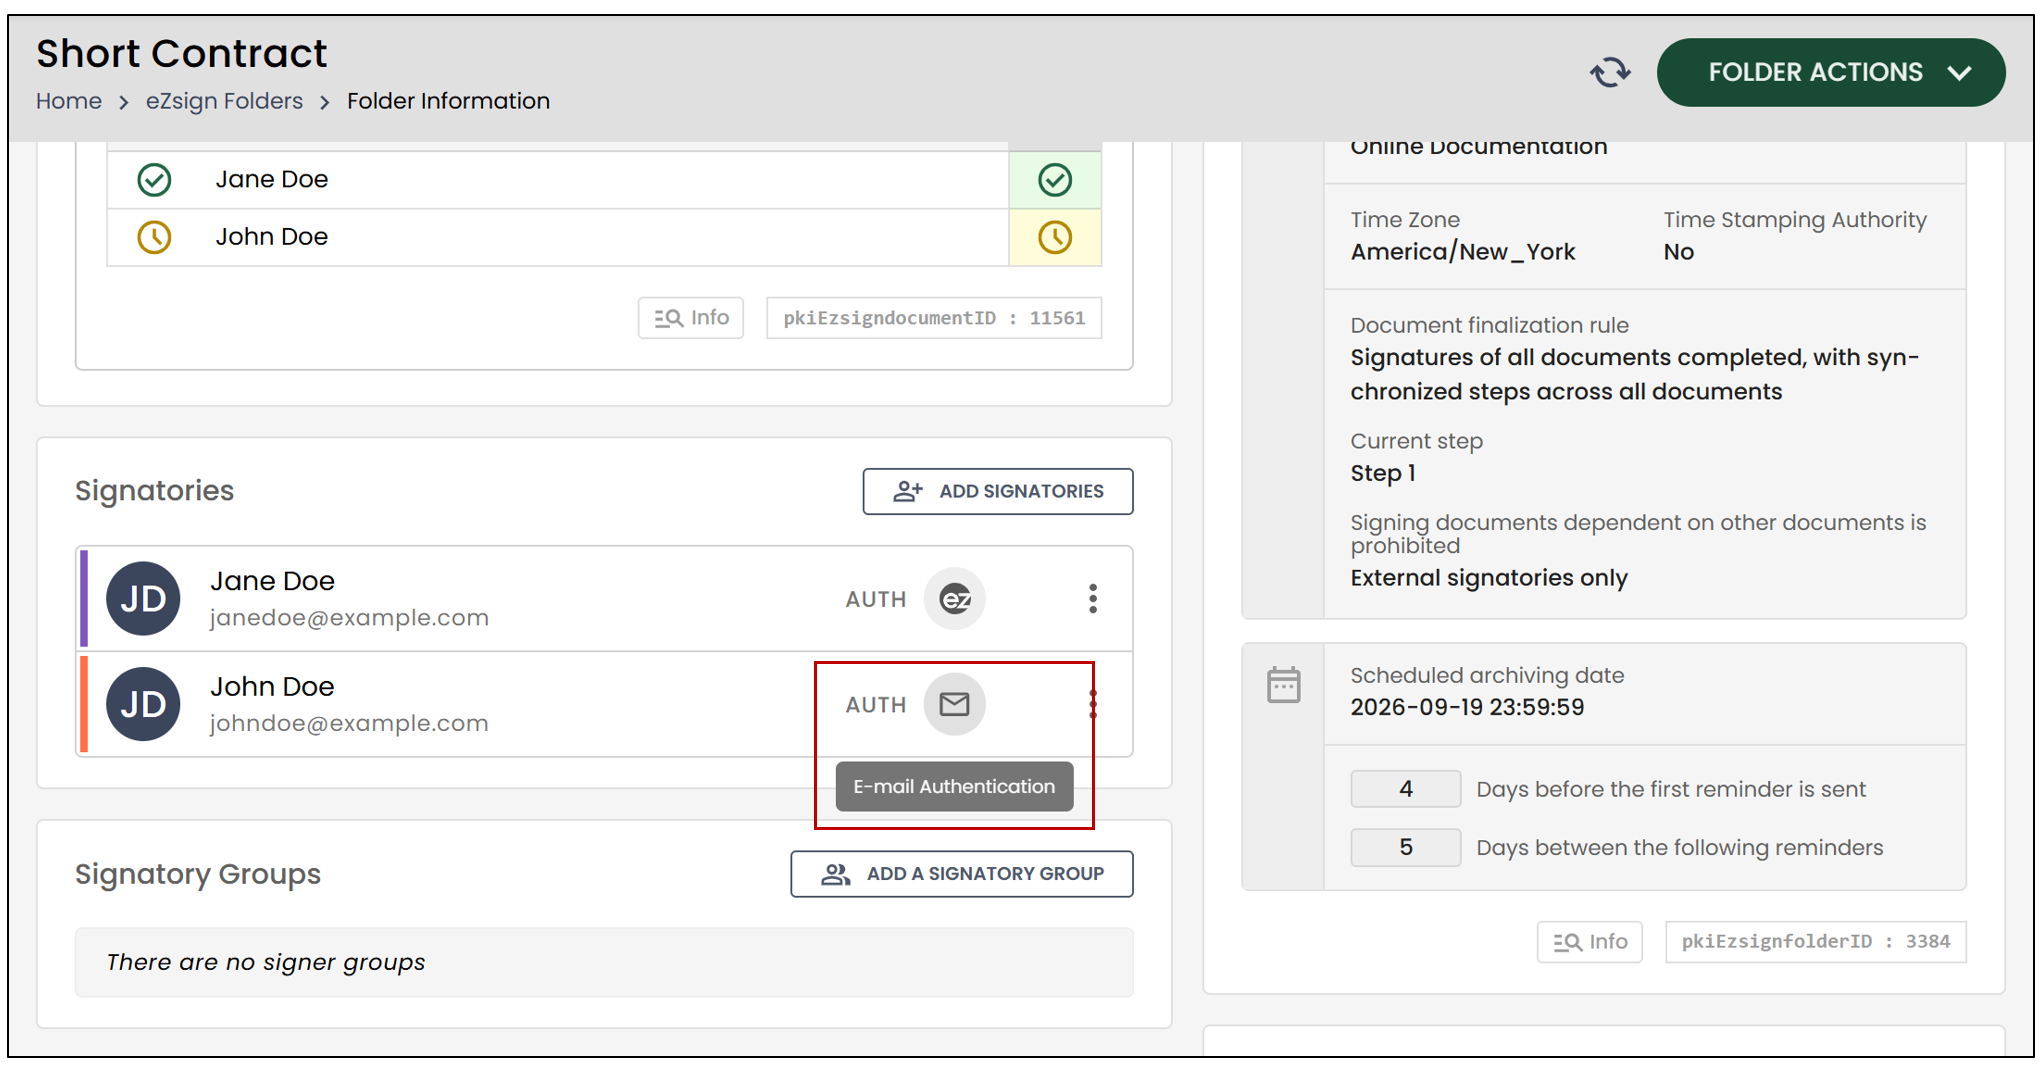
Edit a Signer
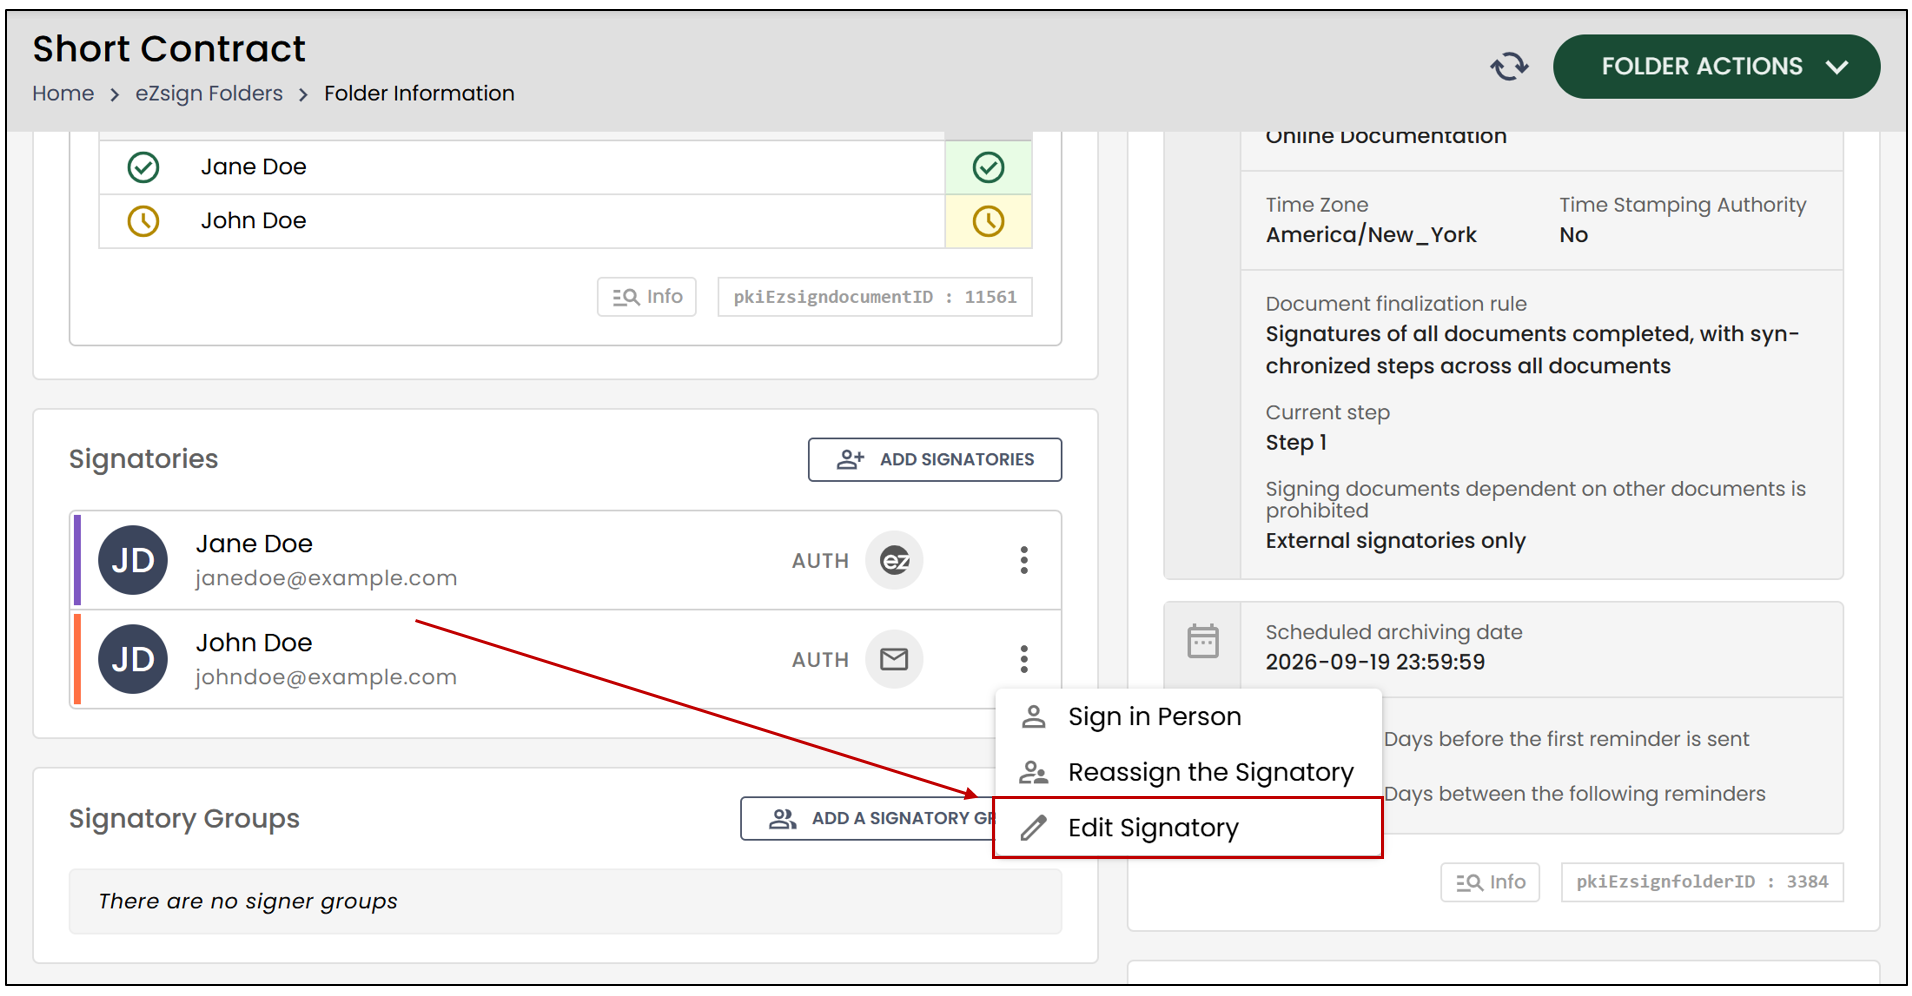
It is always possible to modify the details of a signer in a sent folder from the Signatories section.
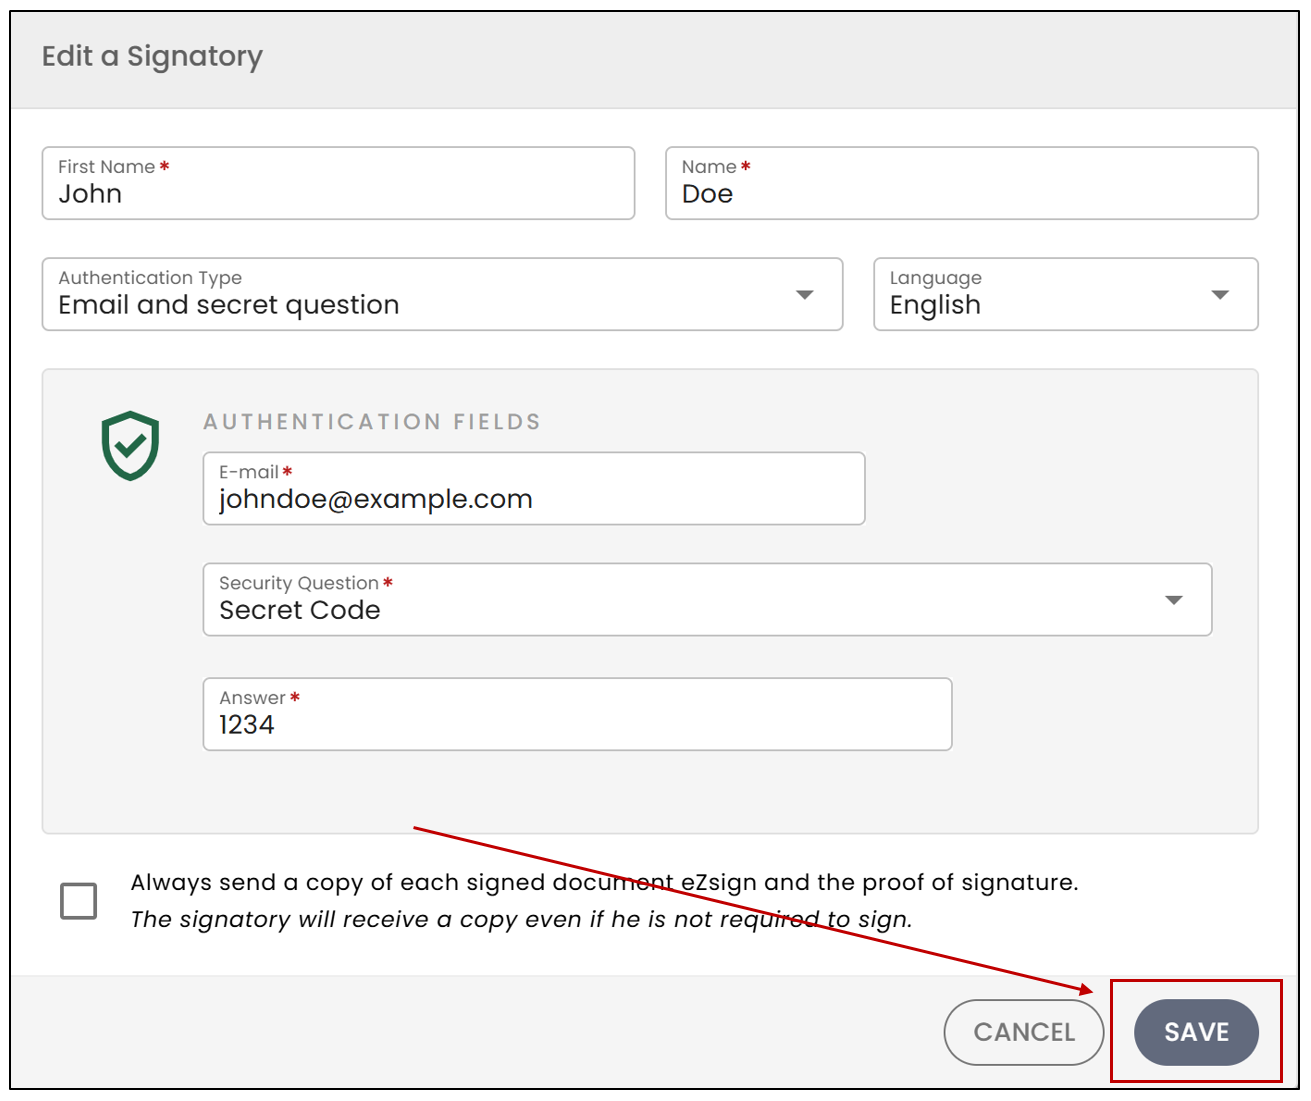
- Click on the

icon, then click on Edit Signatory.
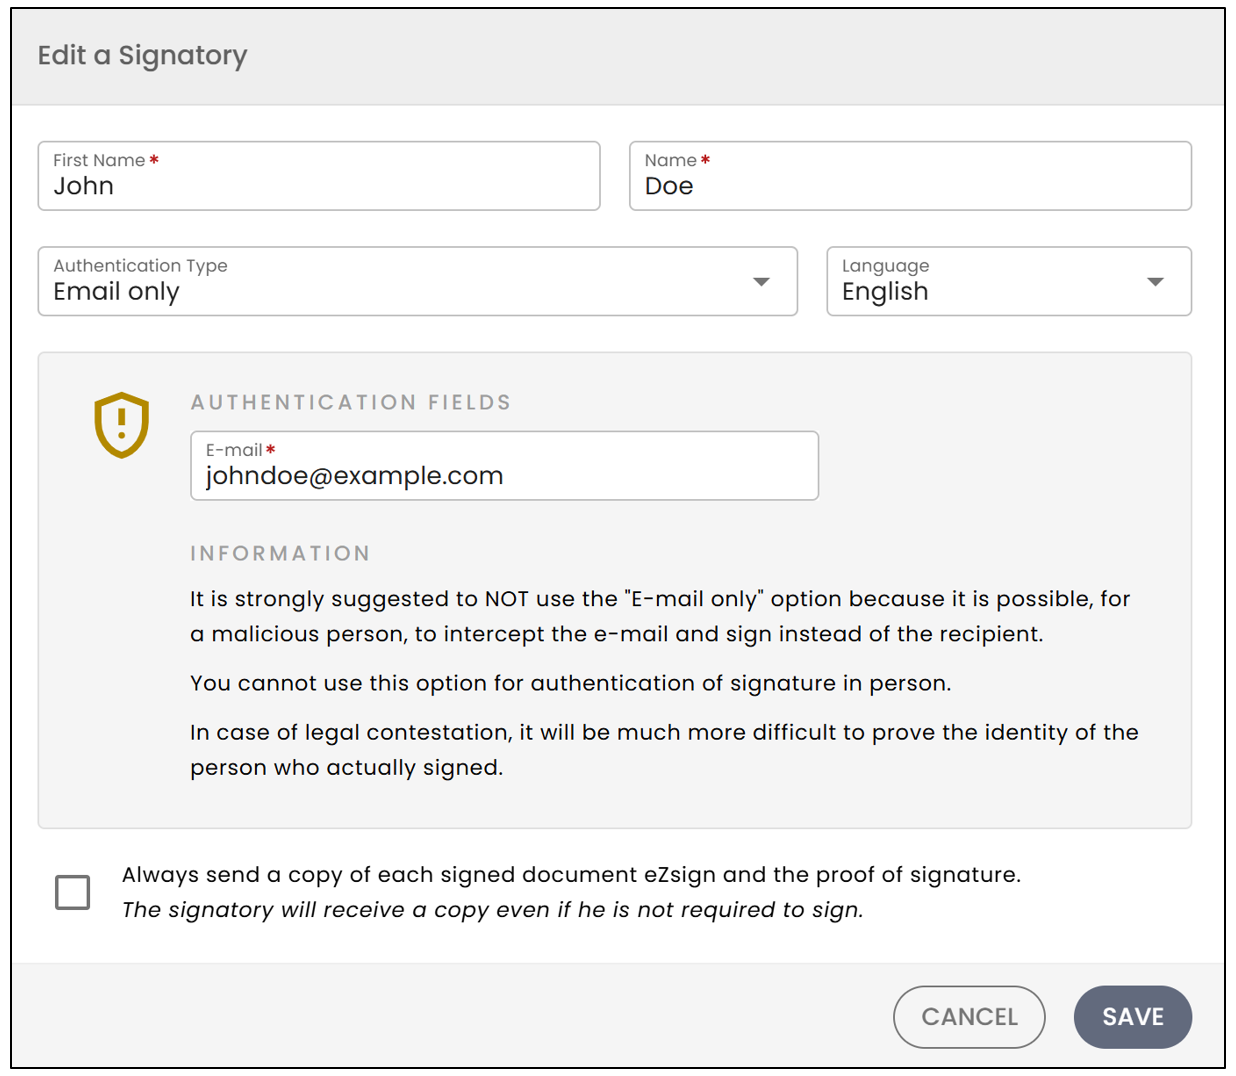
You will be able to edit the First Name , Last Name , and Language.
You can also change the signer’s Authentication Type using the drop-down list.
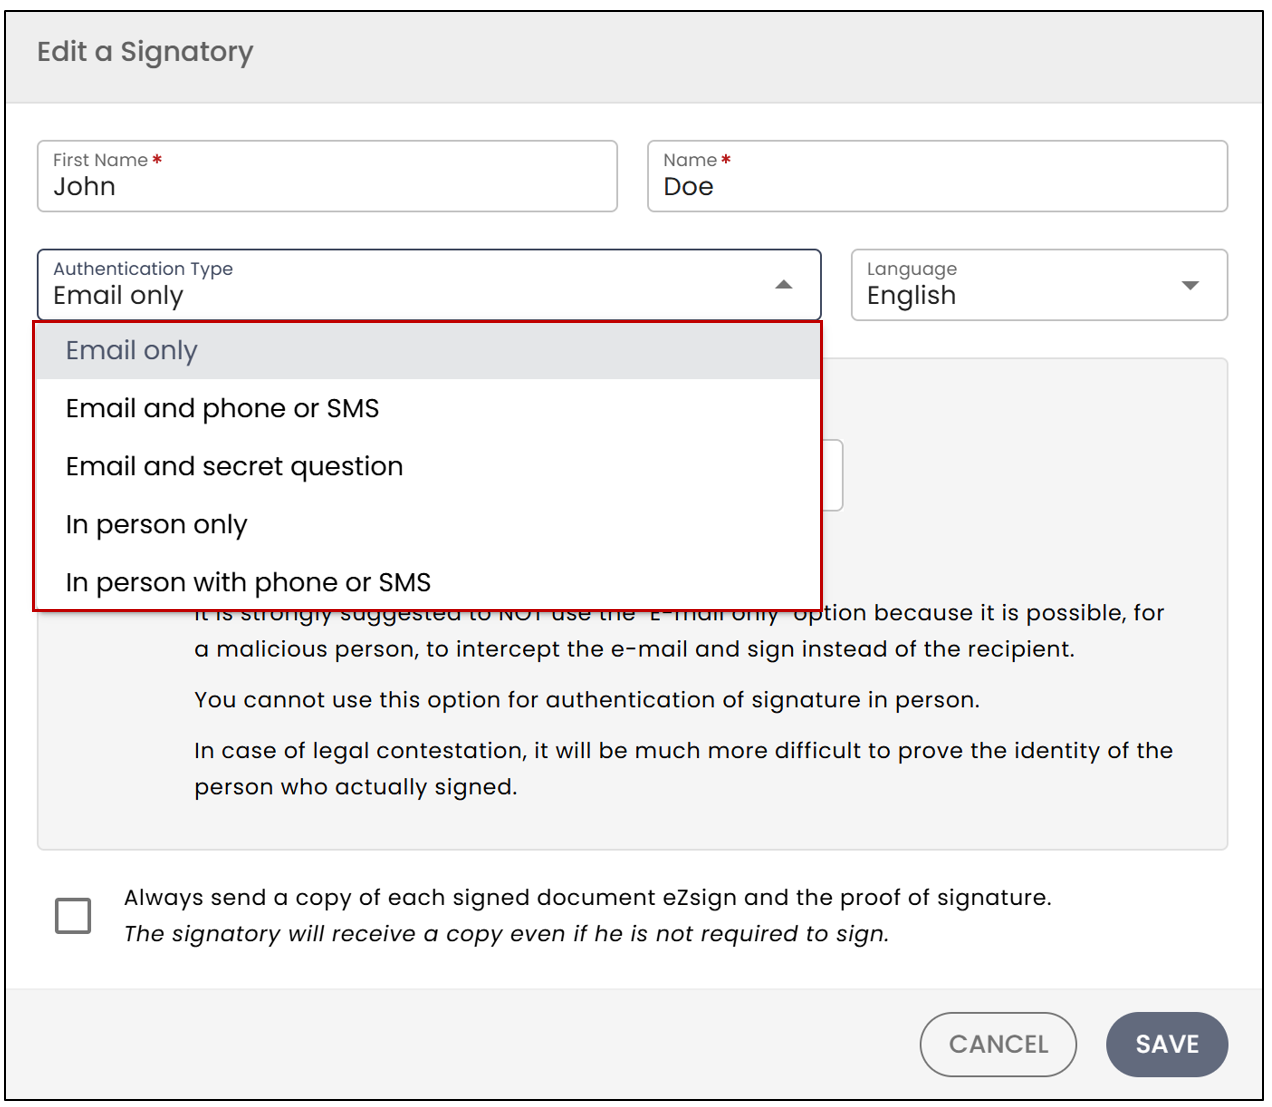
For more information, please refer to the article Types of Signatory Authentication.
- When you are finished, click Save.
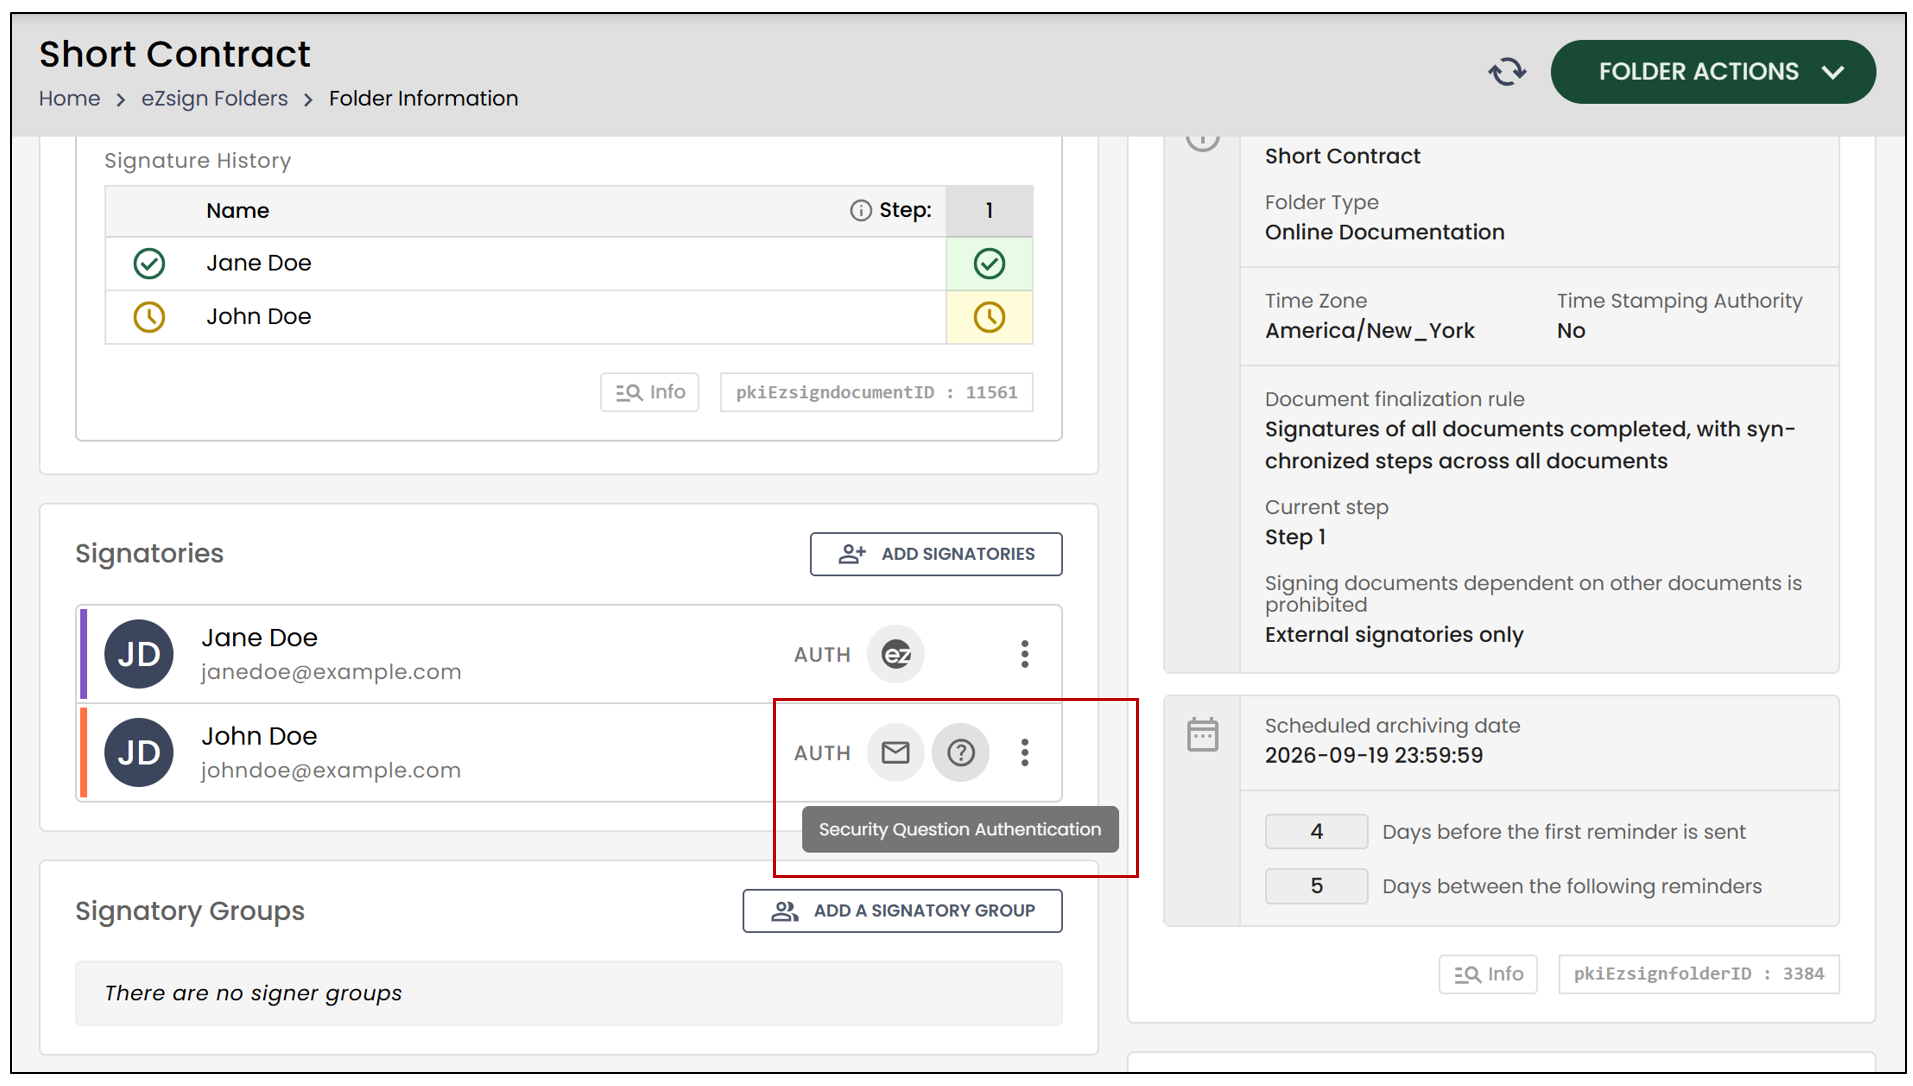
- You will find the authentication type to the right of the signer.
NOTE: If you have modified a signer’s email address, for example, because there was an error, make sure to resend the folder.
Sign In Person
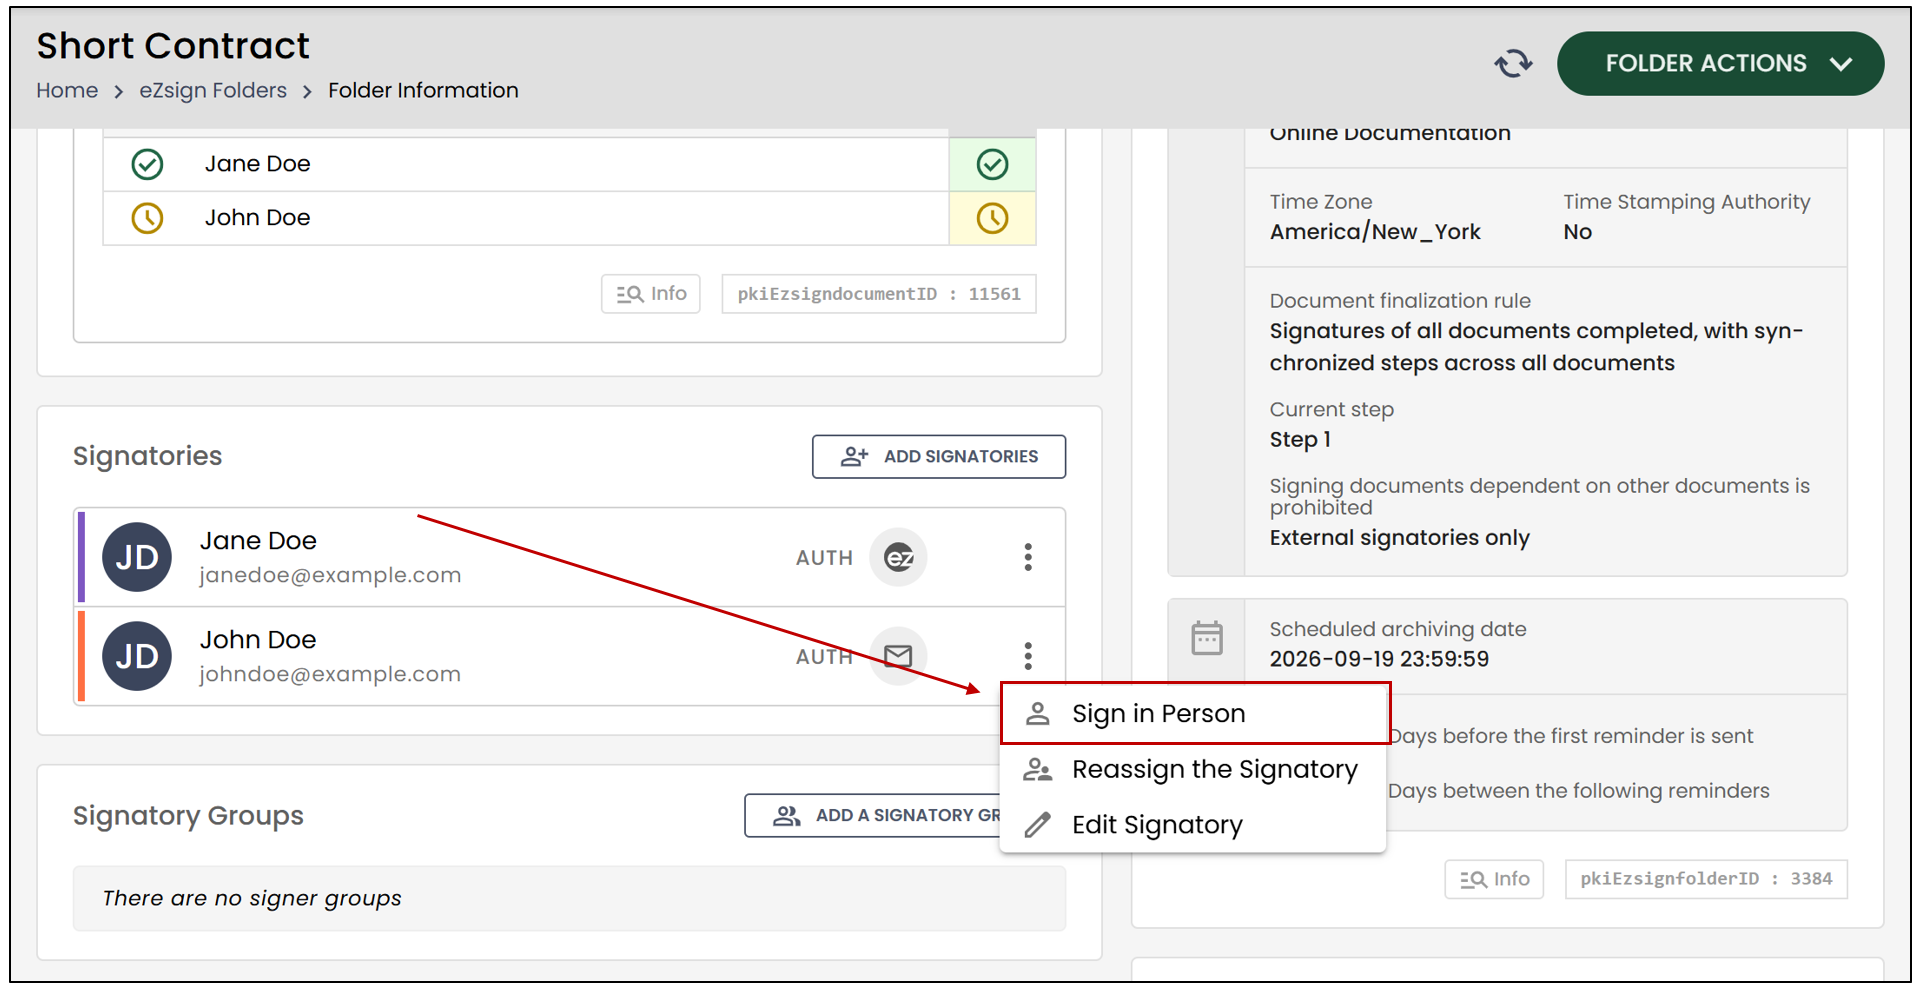
- If you want a signer in the folder who has not yet signed to sign in person, click on the three vertical dots to the left of the signer, then select Sign In Person.
Communications
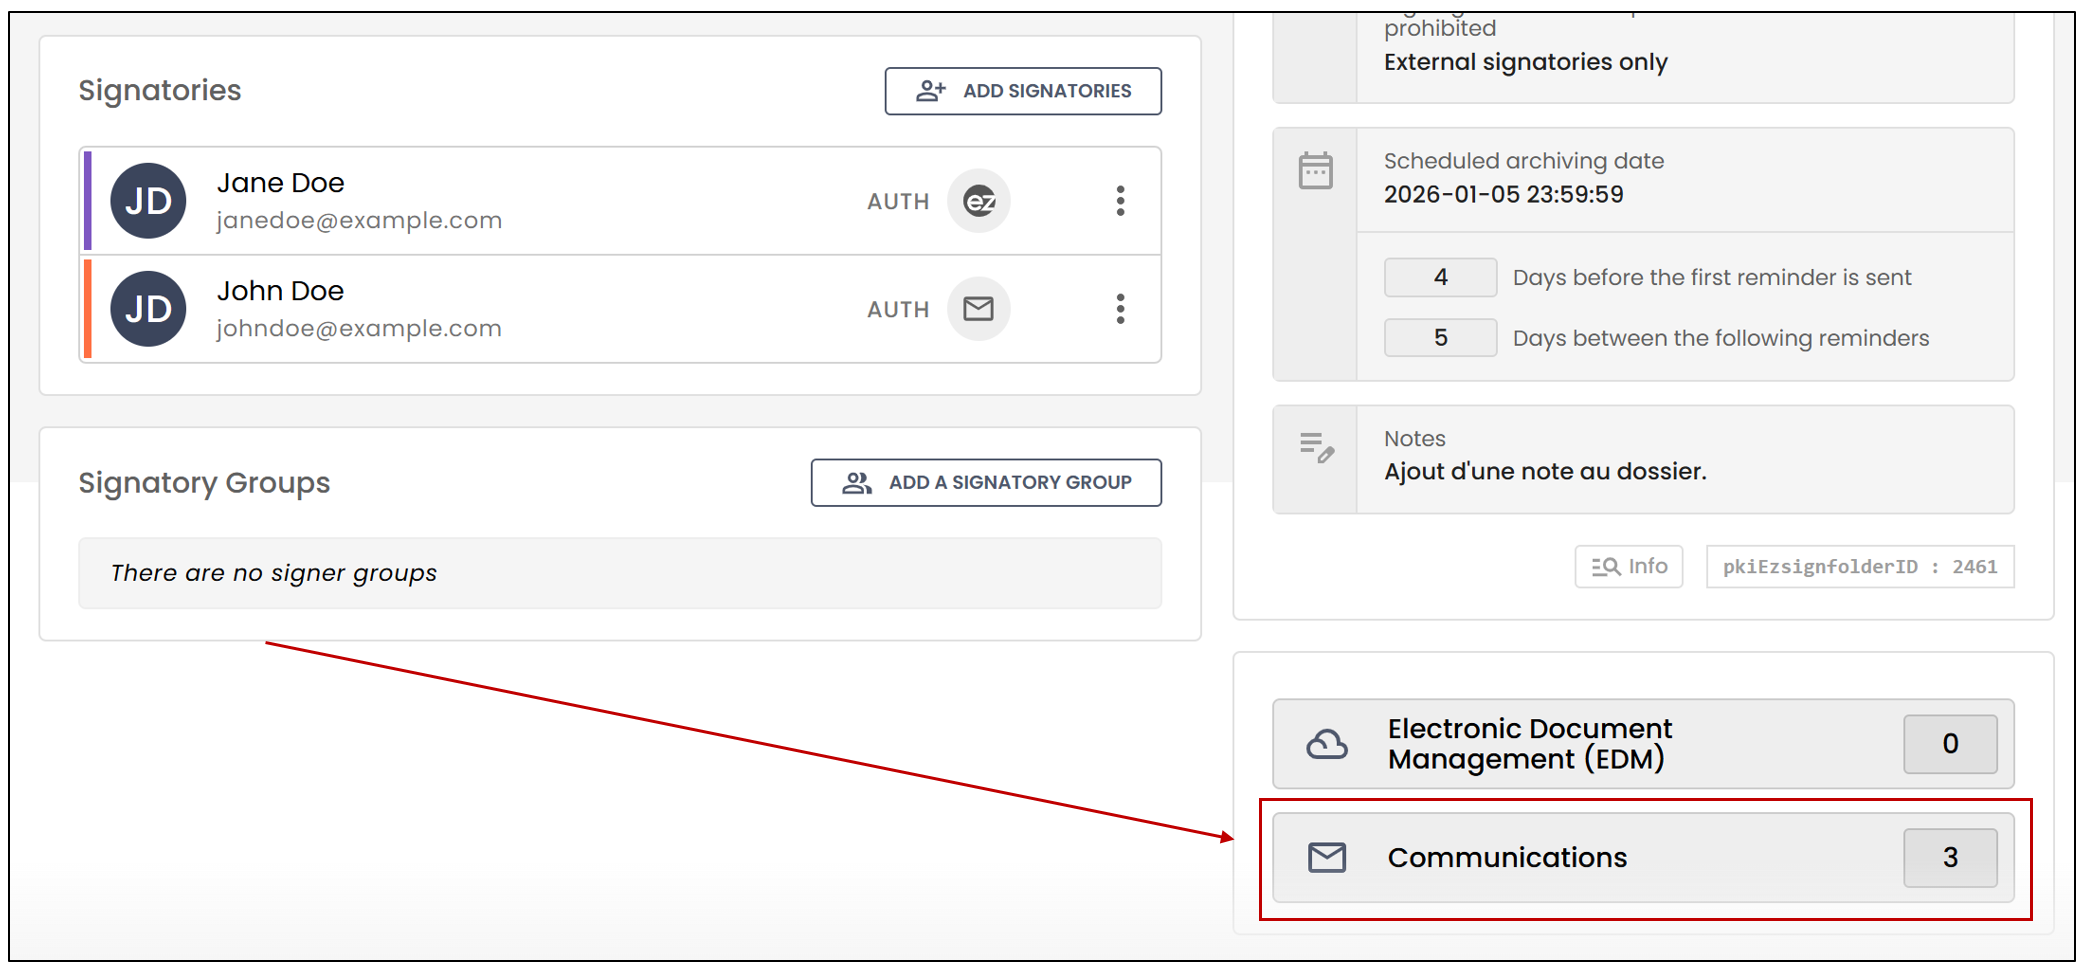
To view all document sends related to an eZsign folder, click on Communications.
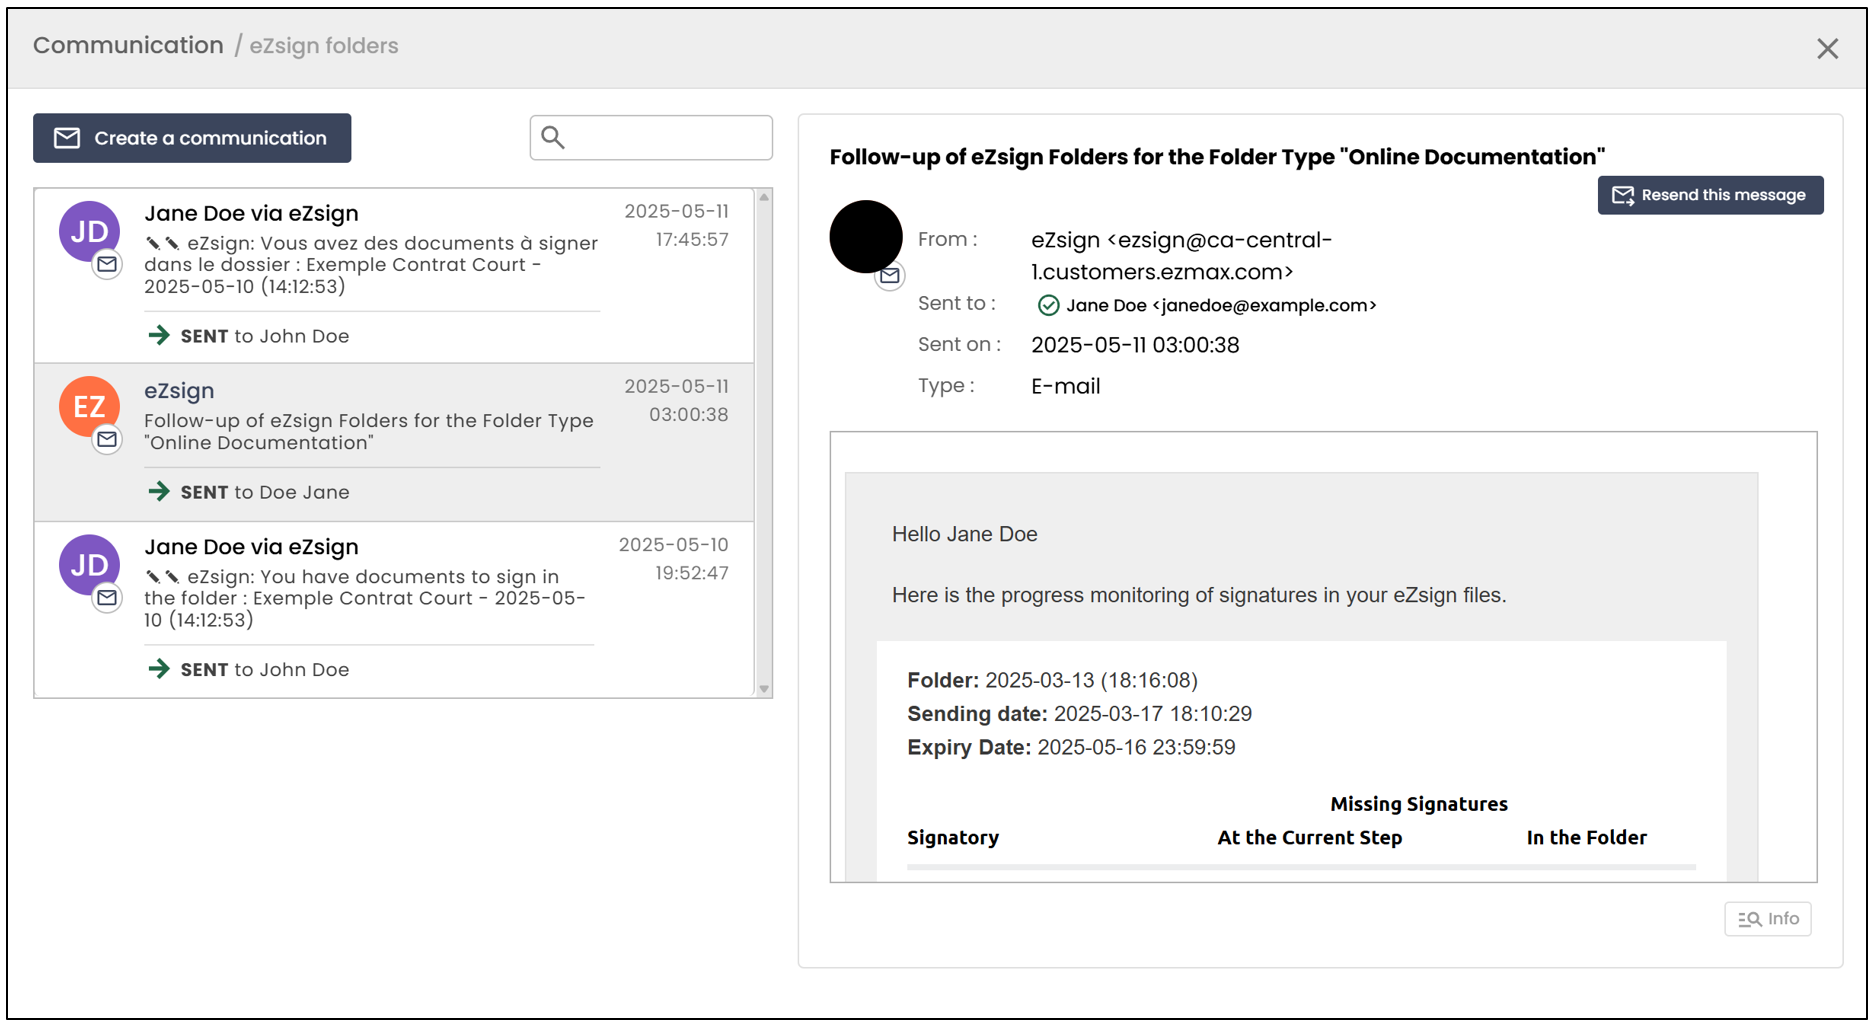
For more information on the status of a communication sent to a signer, please refer to the article Communication status (eZsign Web).
Send the Folder
- If you have made changes to the eZsign folder, you will need to resend the document to the signers. To do so, simply click on Folder Actions , then on Send Folder.